Start your business journey online
Aiprobuild : How to set up Firebase database for enabling chat in Chat Room?
Follow below mentioned steps to easily setup Firebase database and enable chat in Chat Room :
Step 1 : Go to Firebase
Step 2 : If you have a Firebase account, Signin, else Signup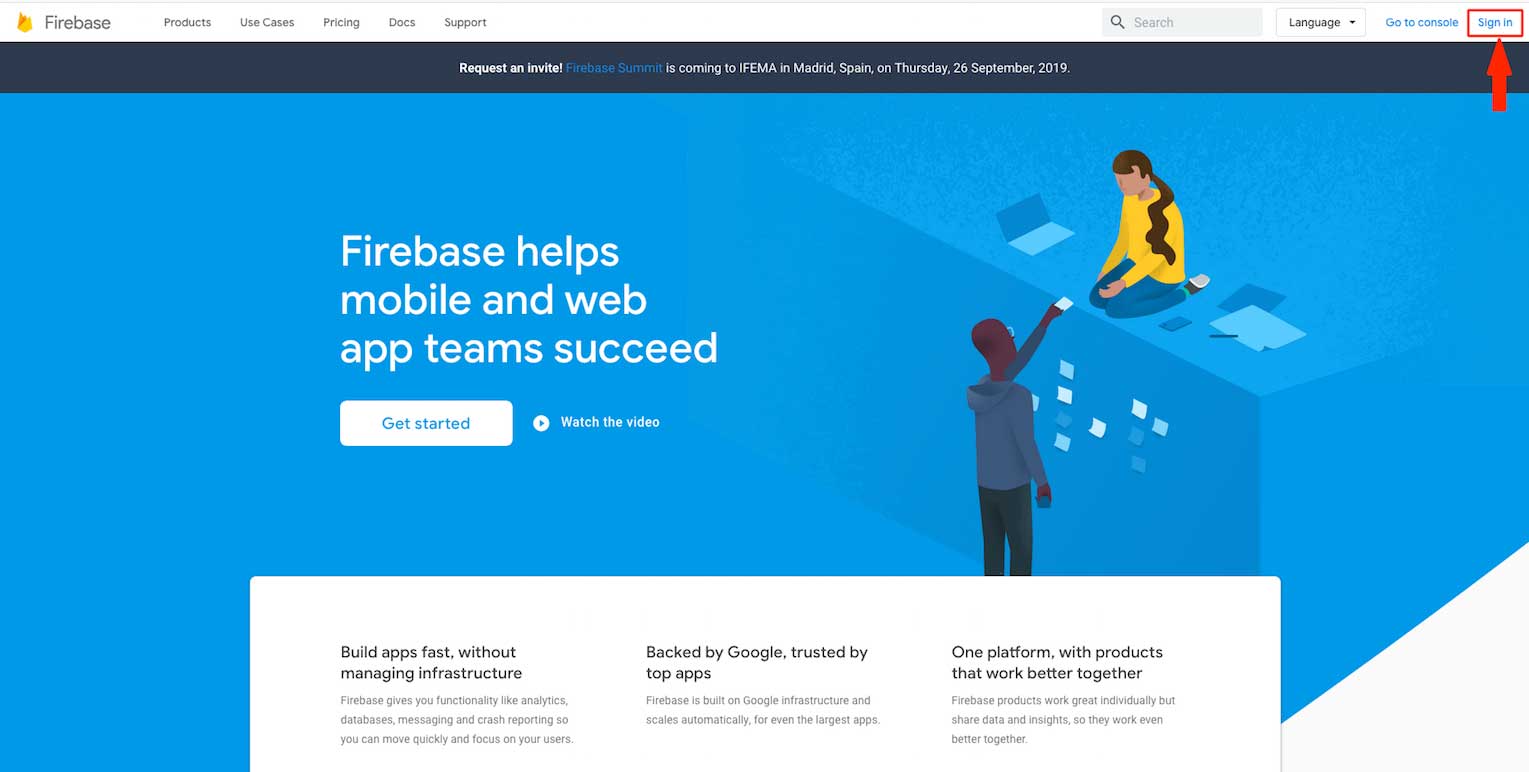 Step 3 : Click on Get Started
 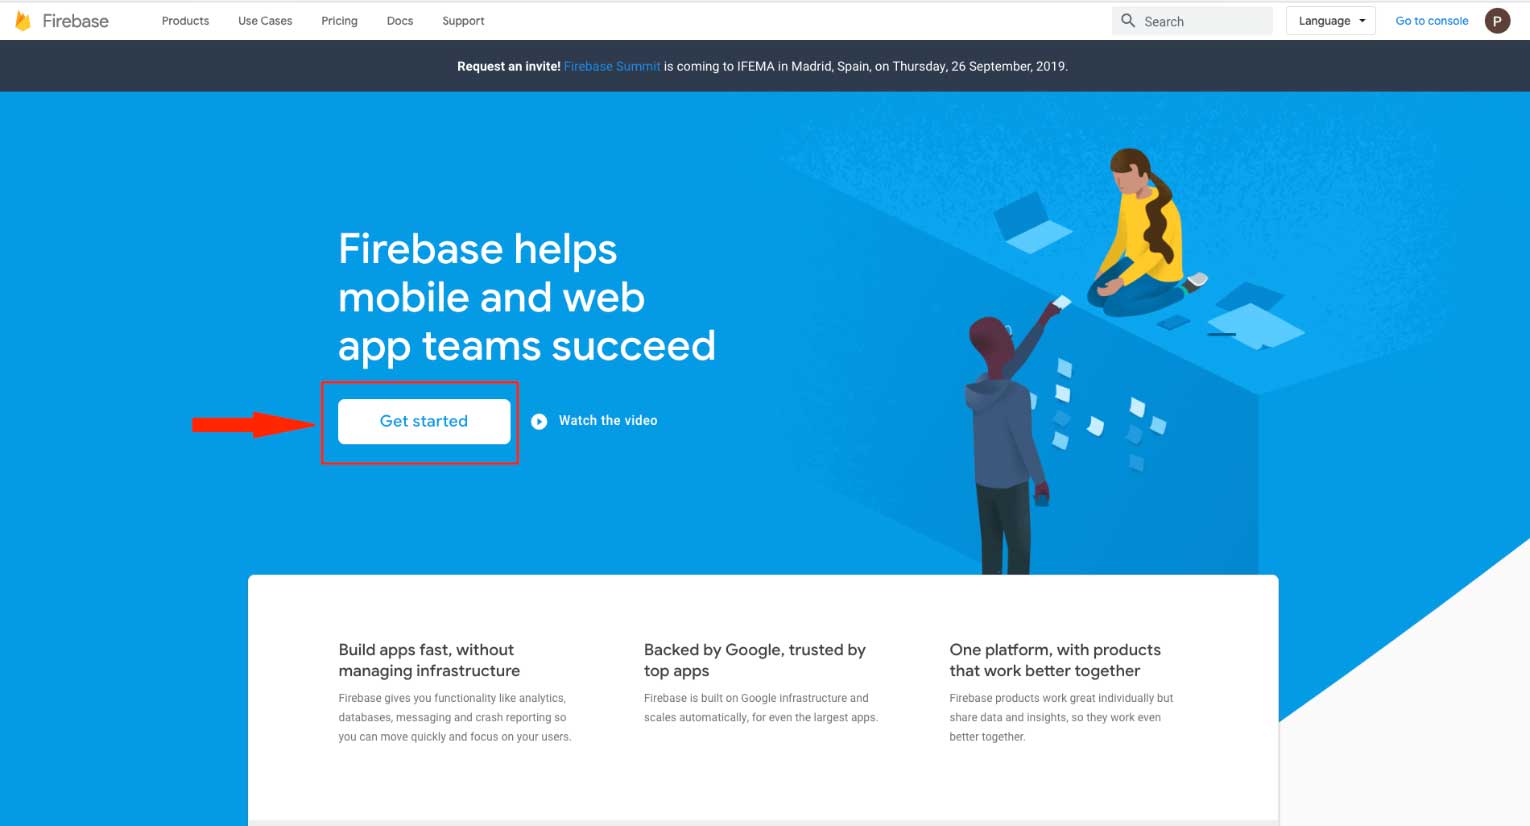 Step 4 : Click on Create a Project
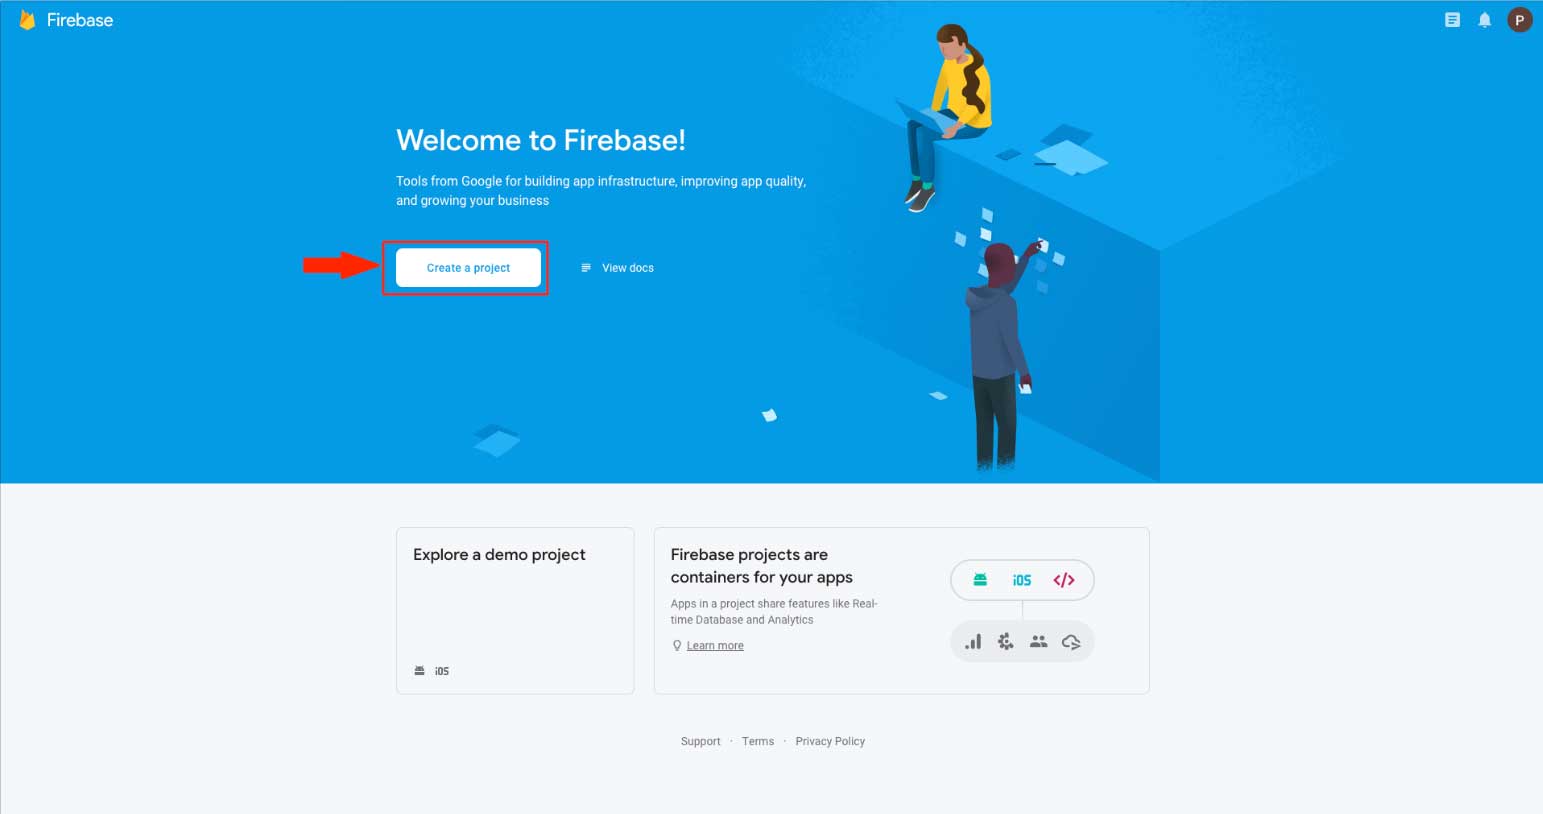 Step 5 : Enter your project name
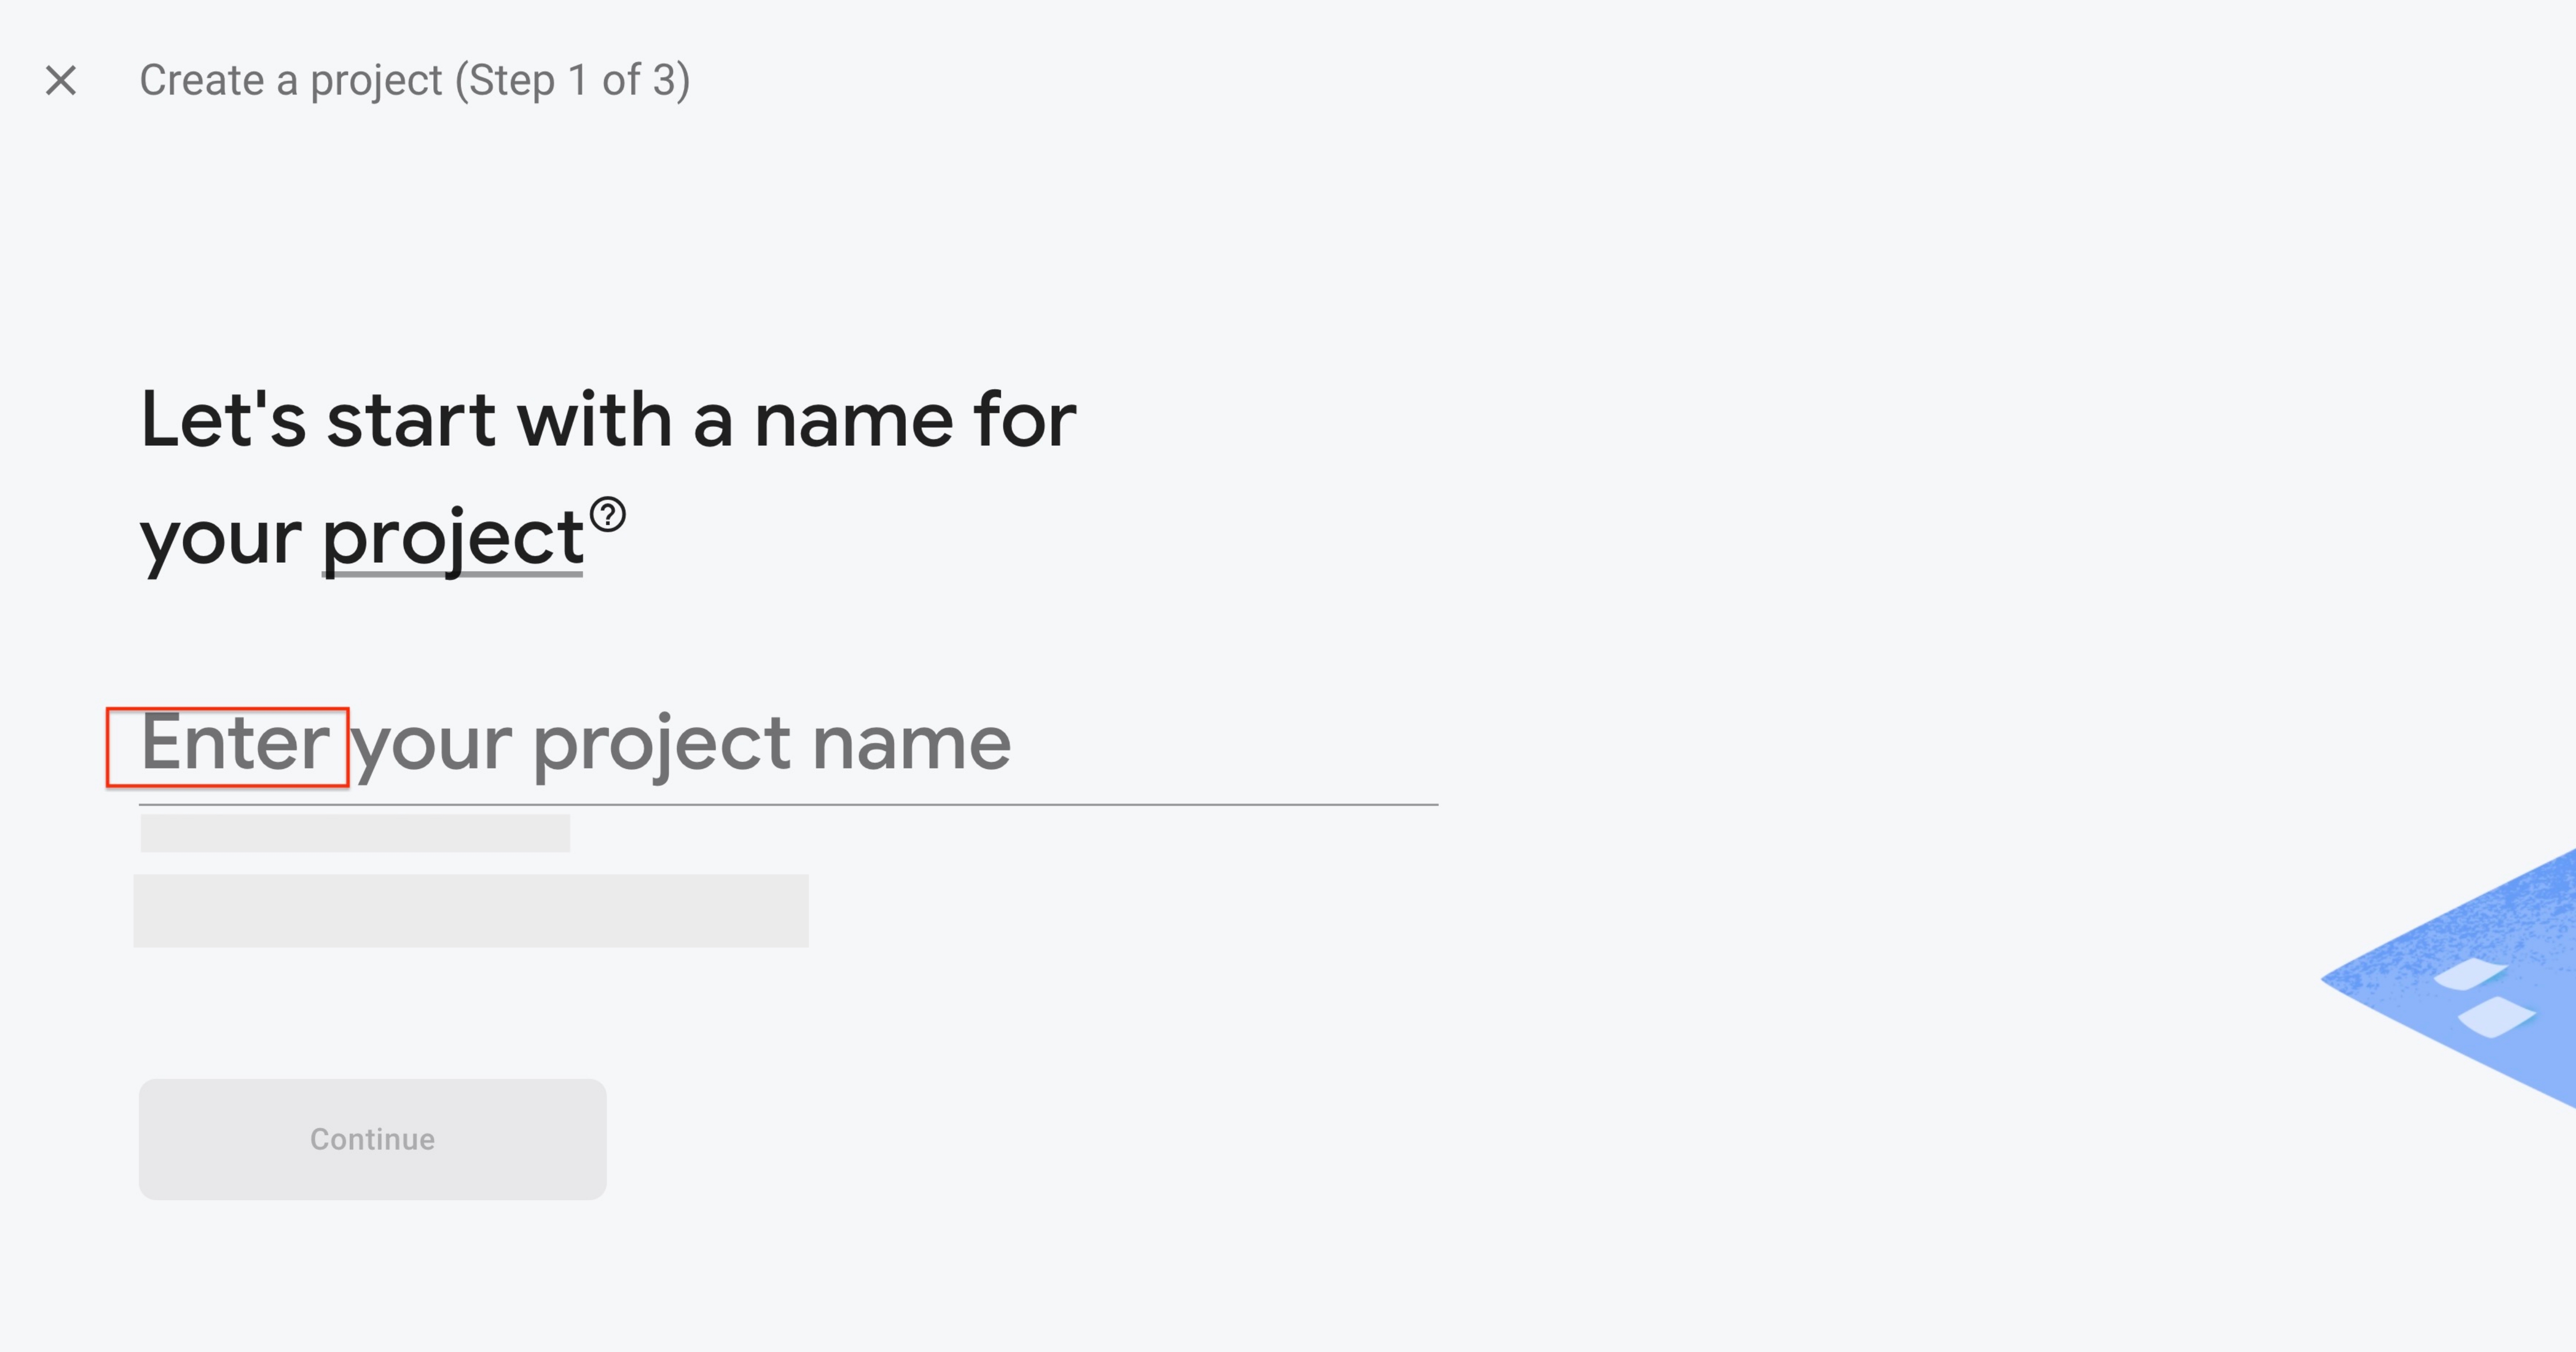
Step 6 : Click on Continue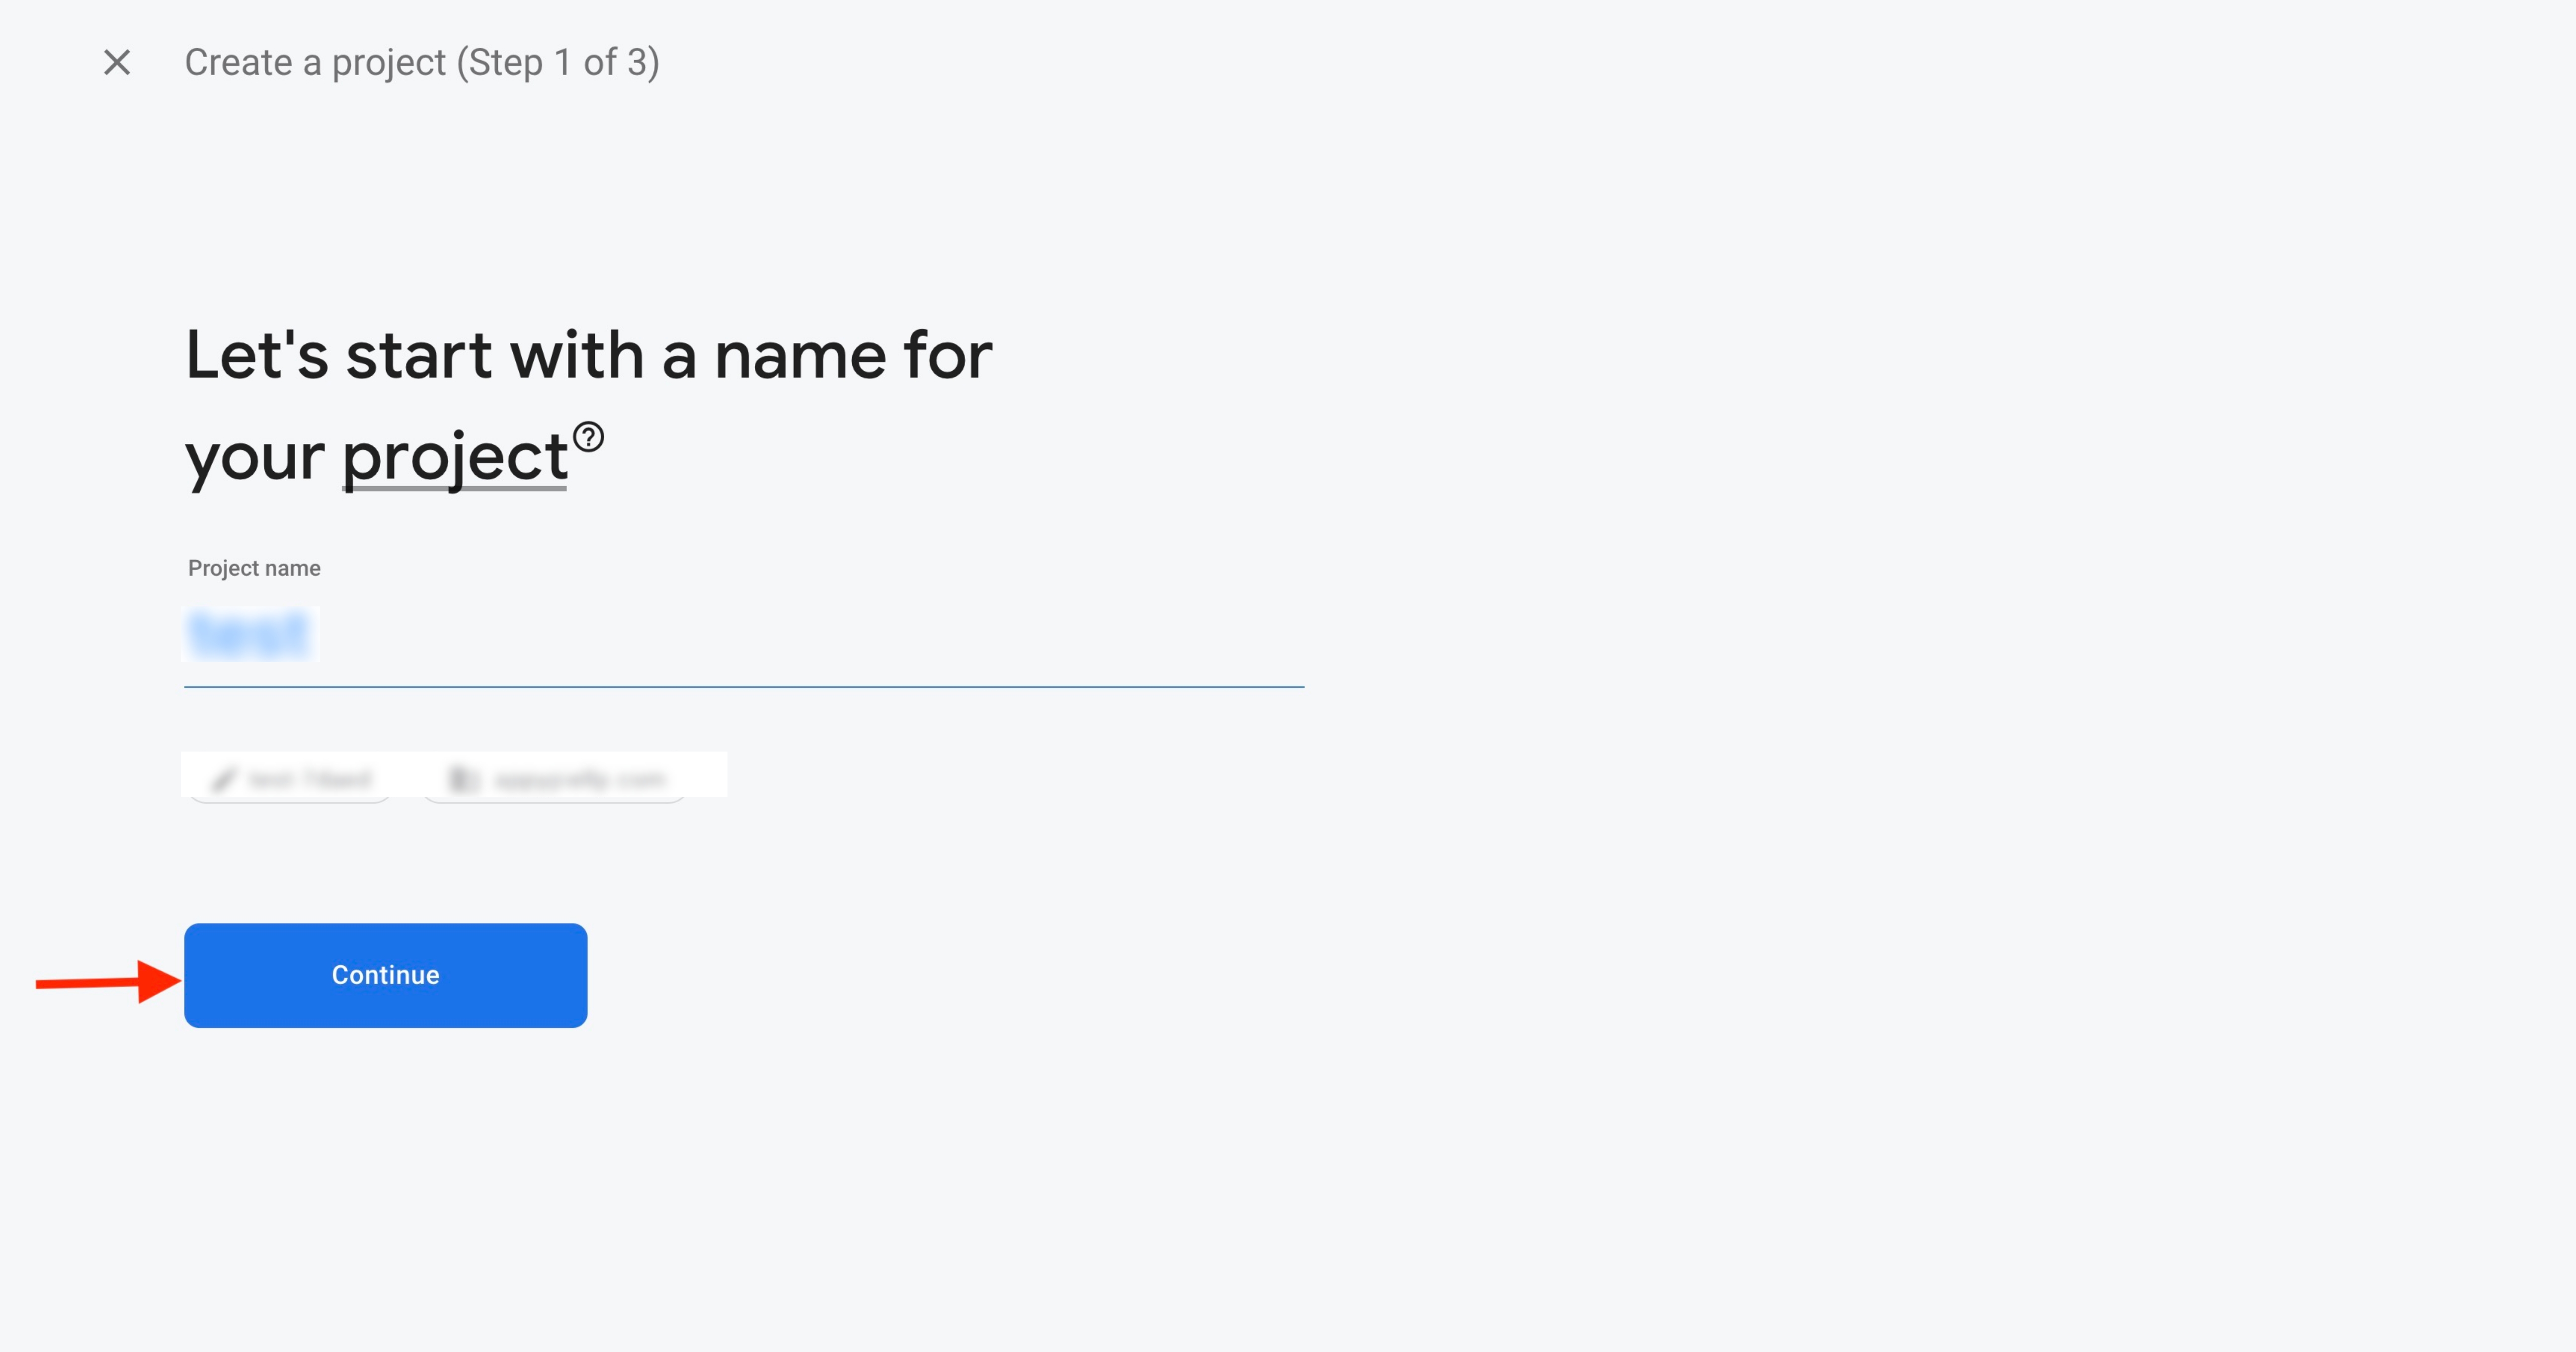
Step 7 : Enable Google Analytics for your project and click on Continue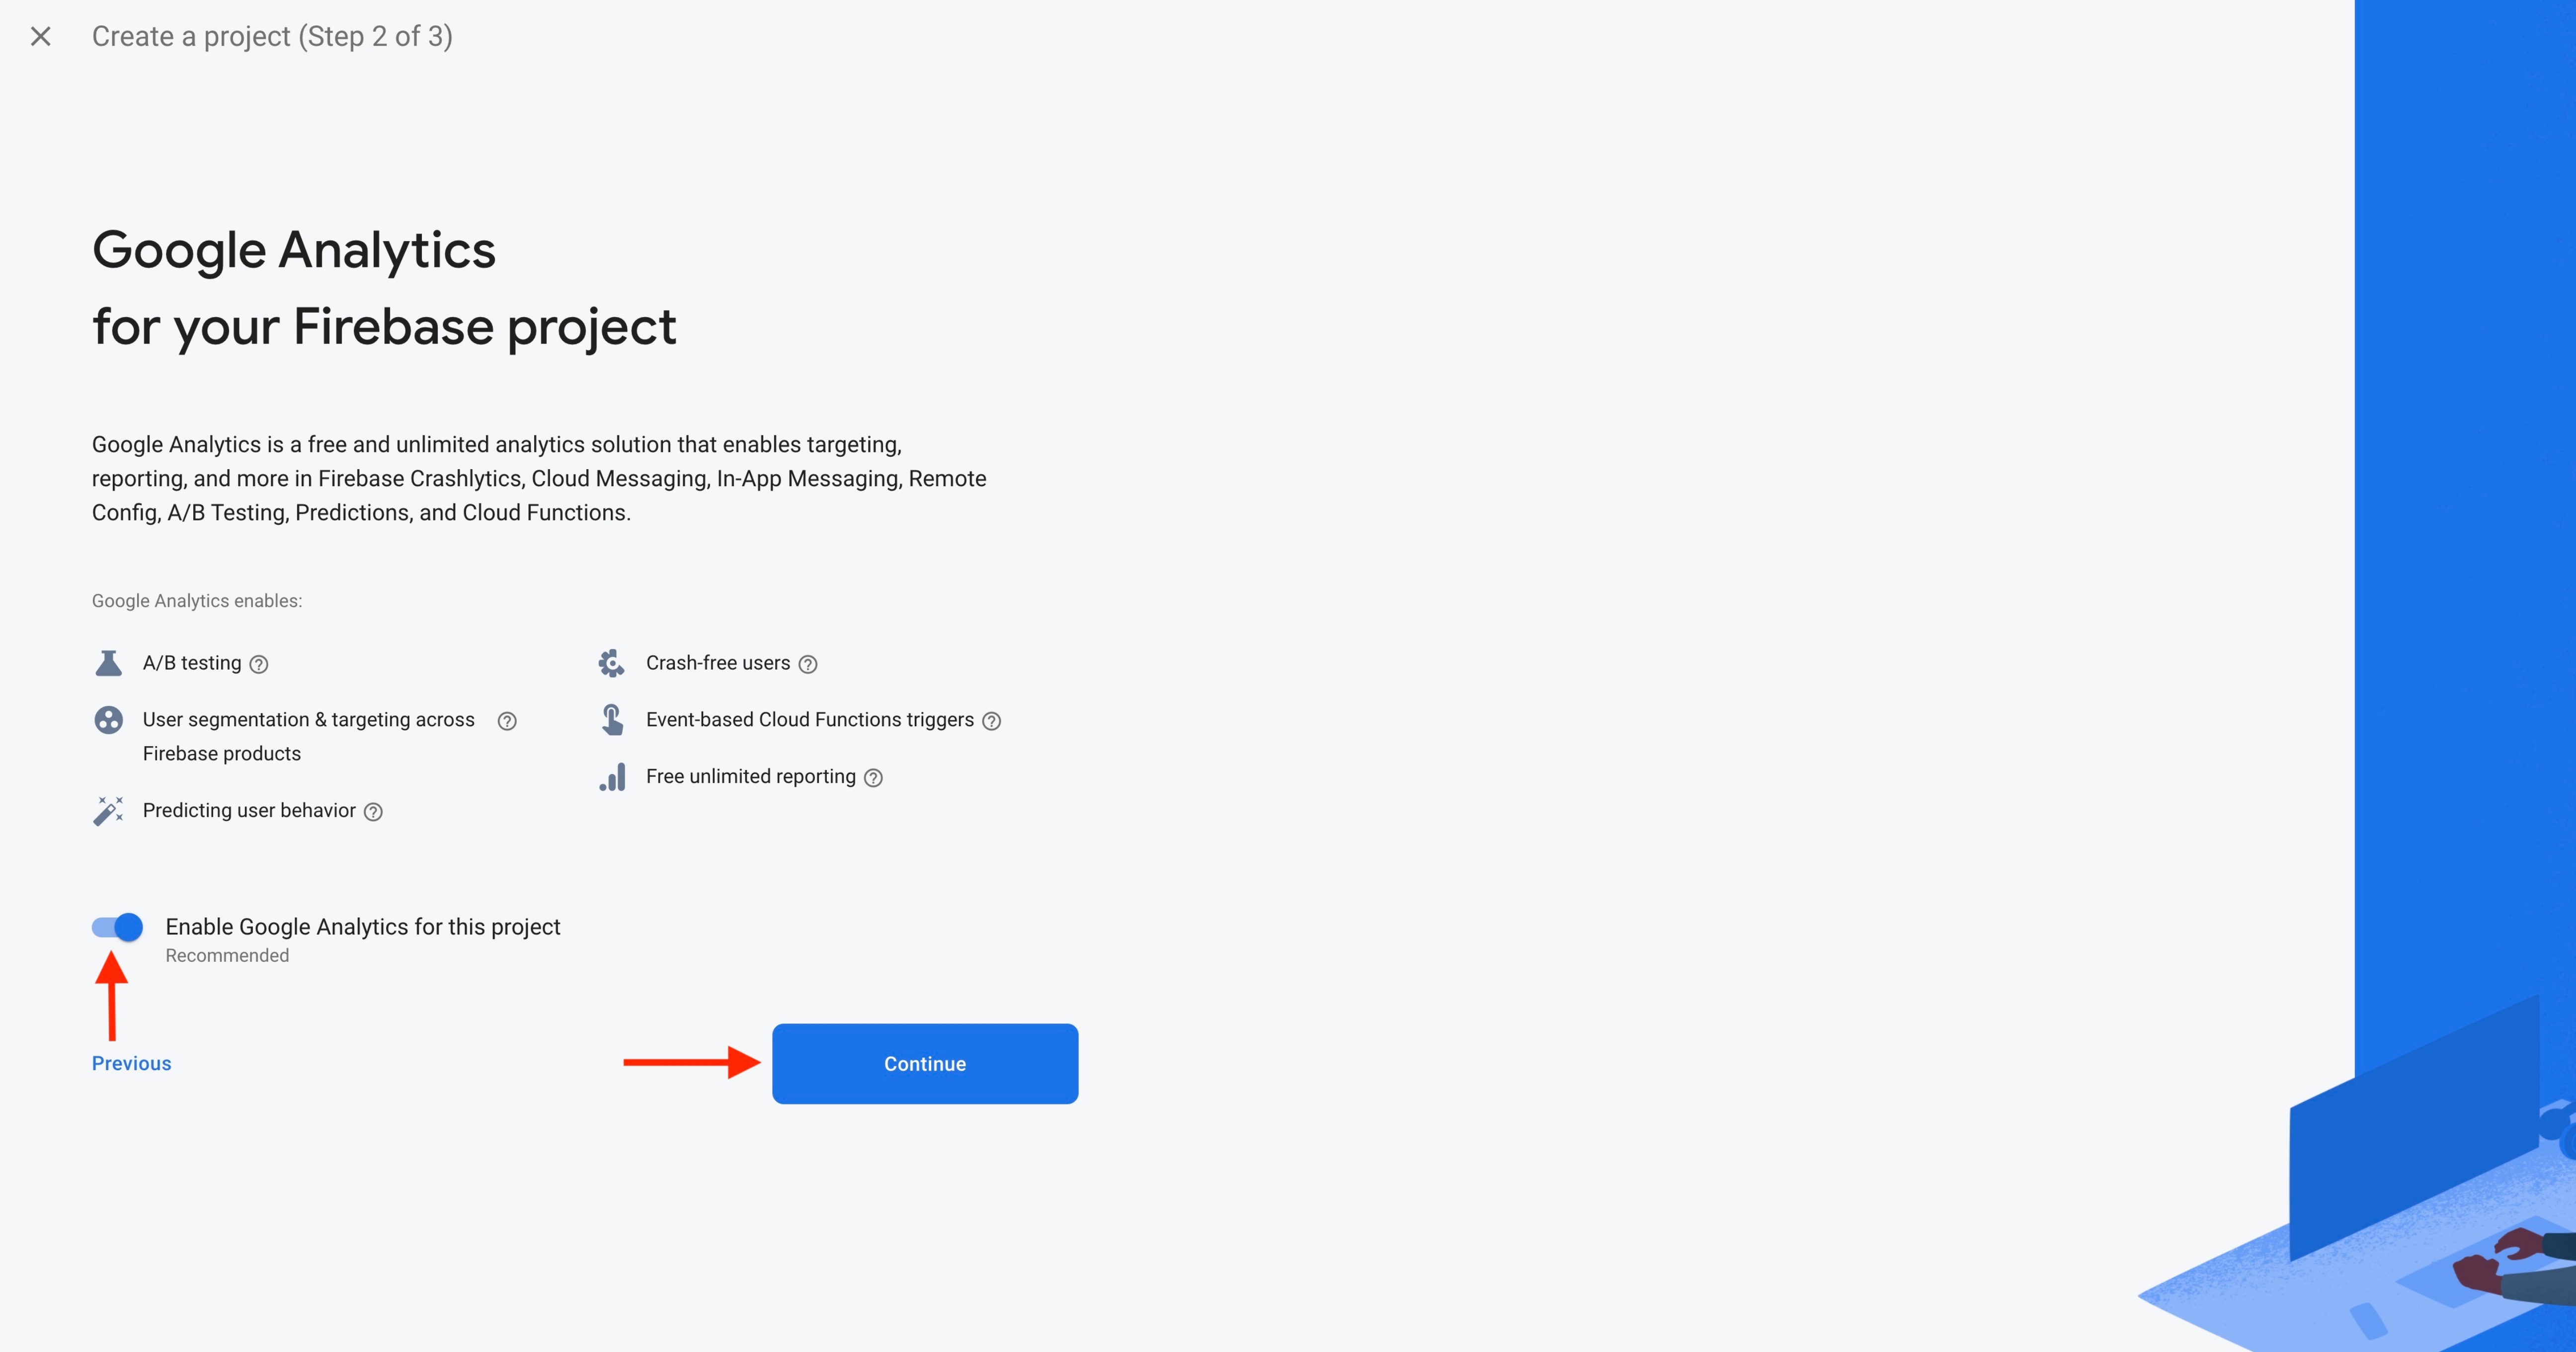
Step 8 : Open Configure Google Analytics dropdown menu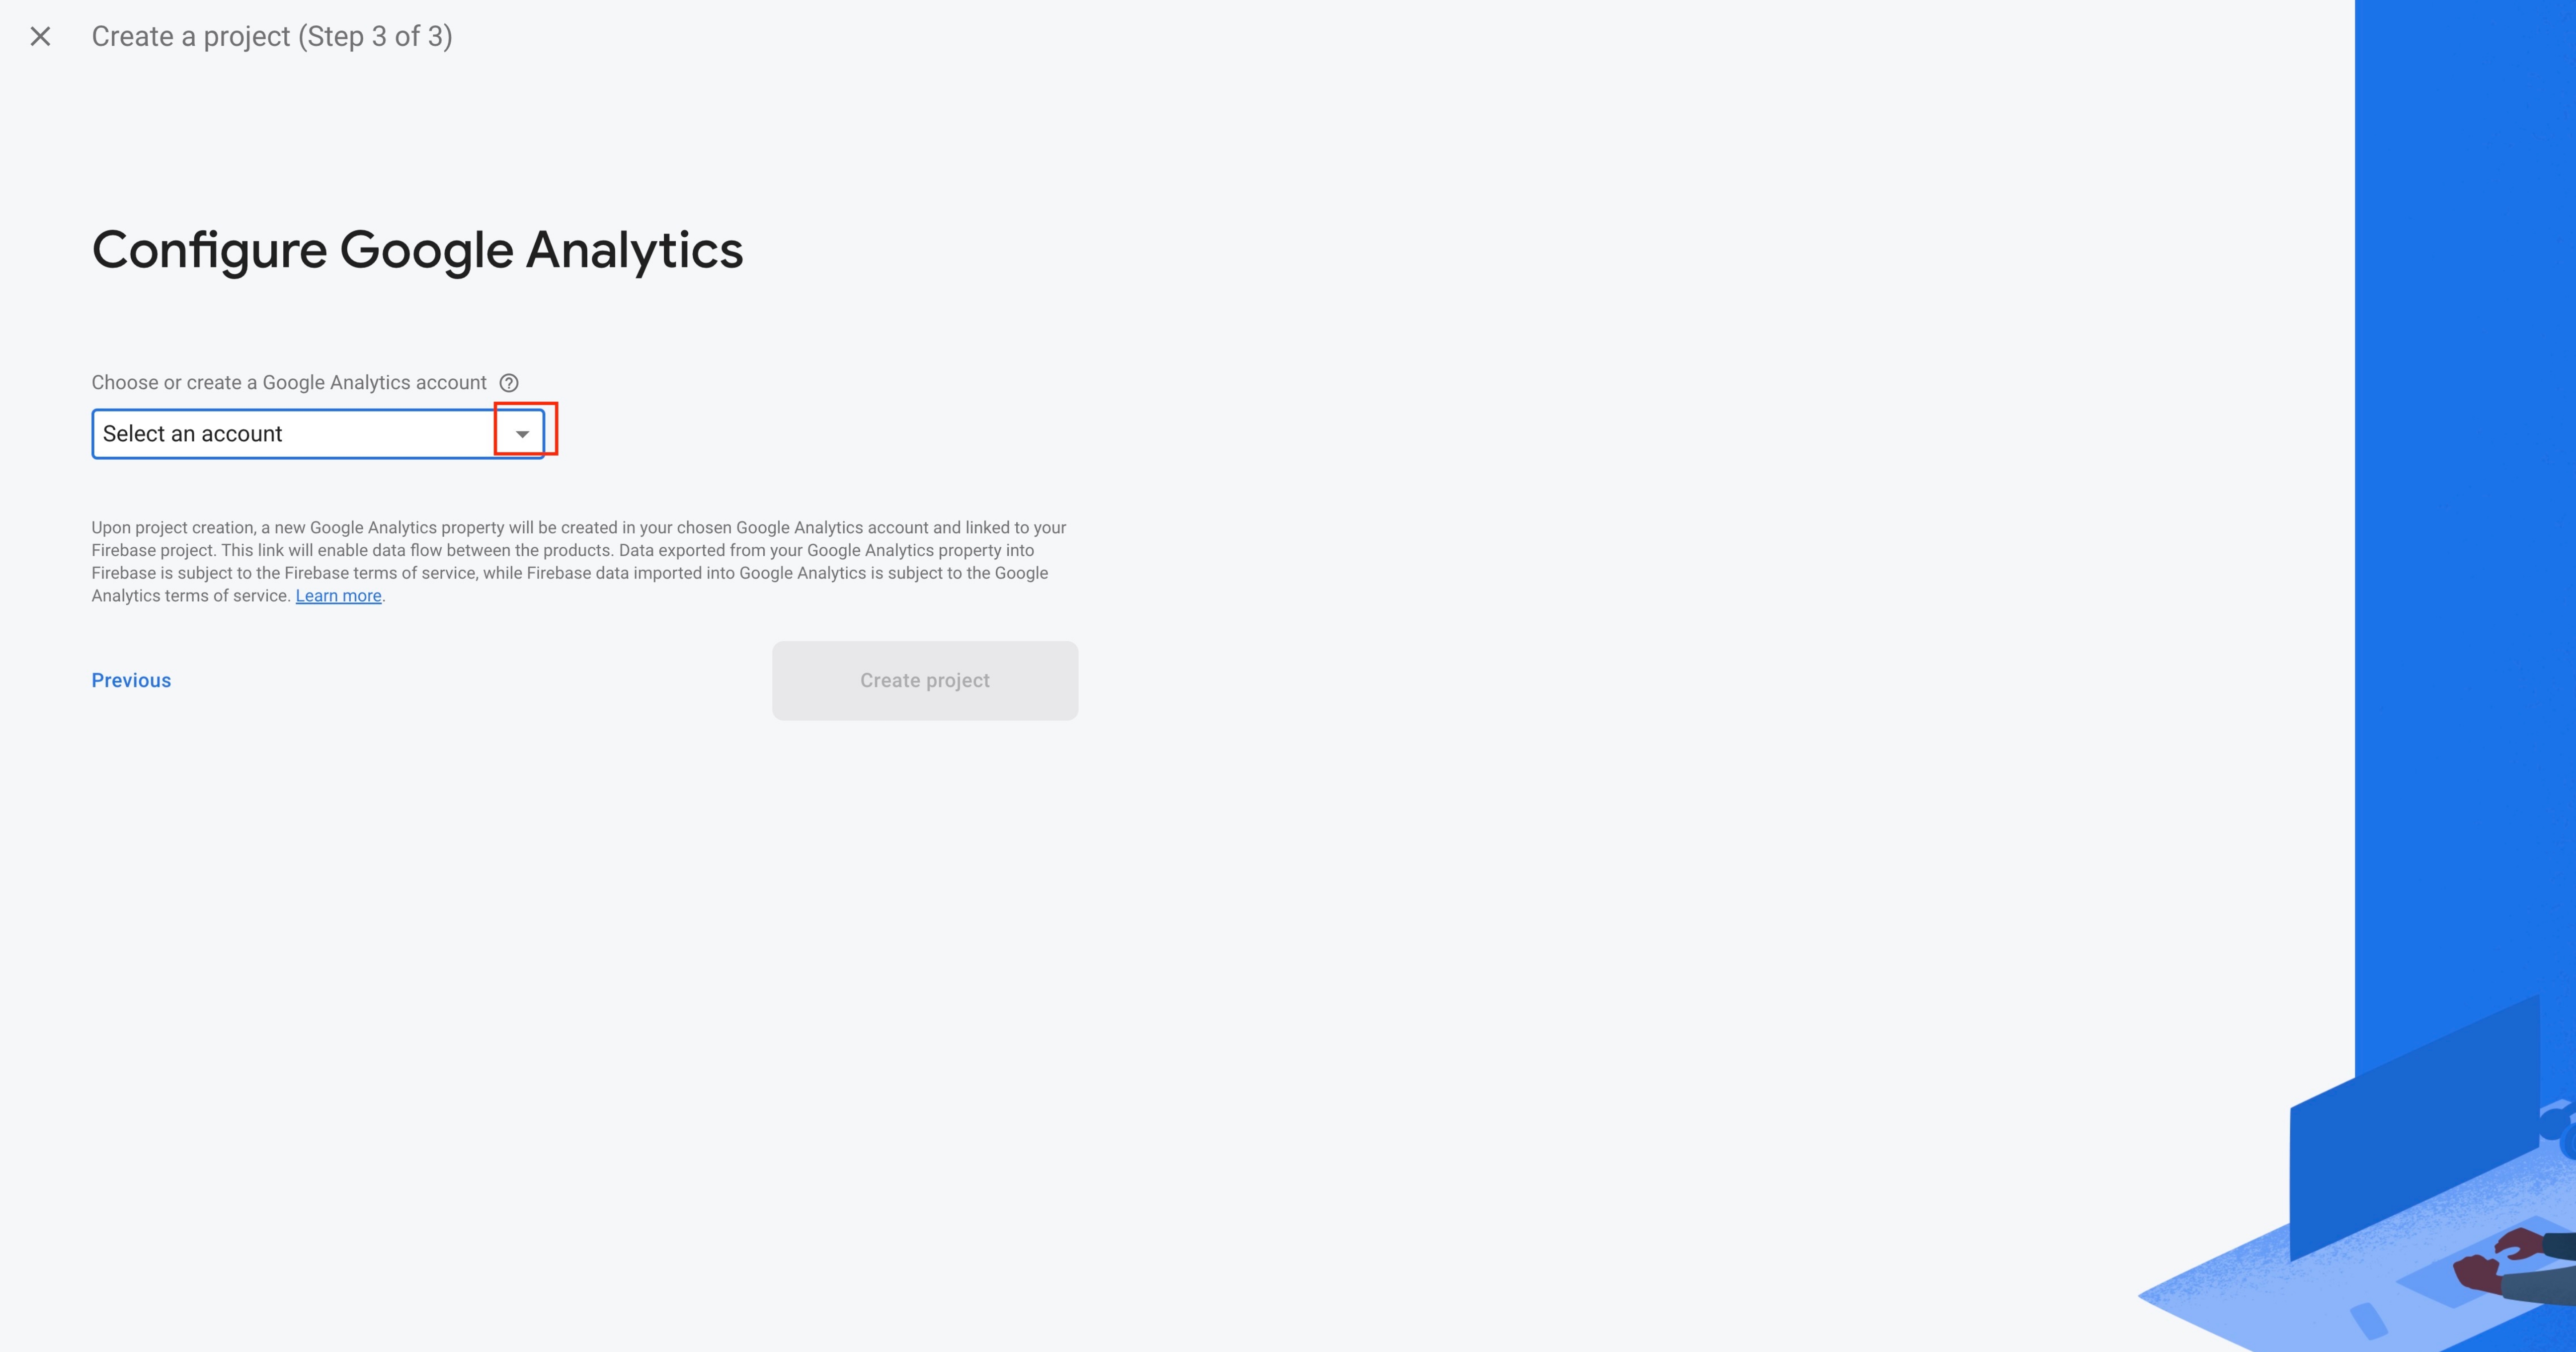
Step 9 : Select the Default Account for Firebase from the dropdown menu or create a new account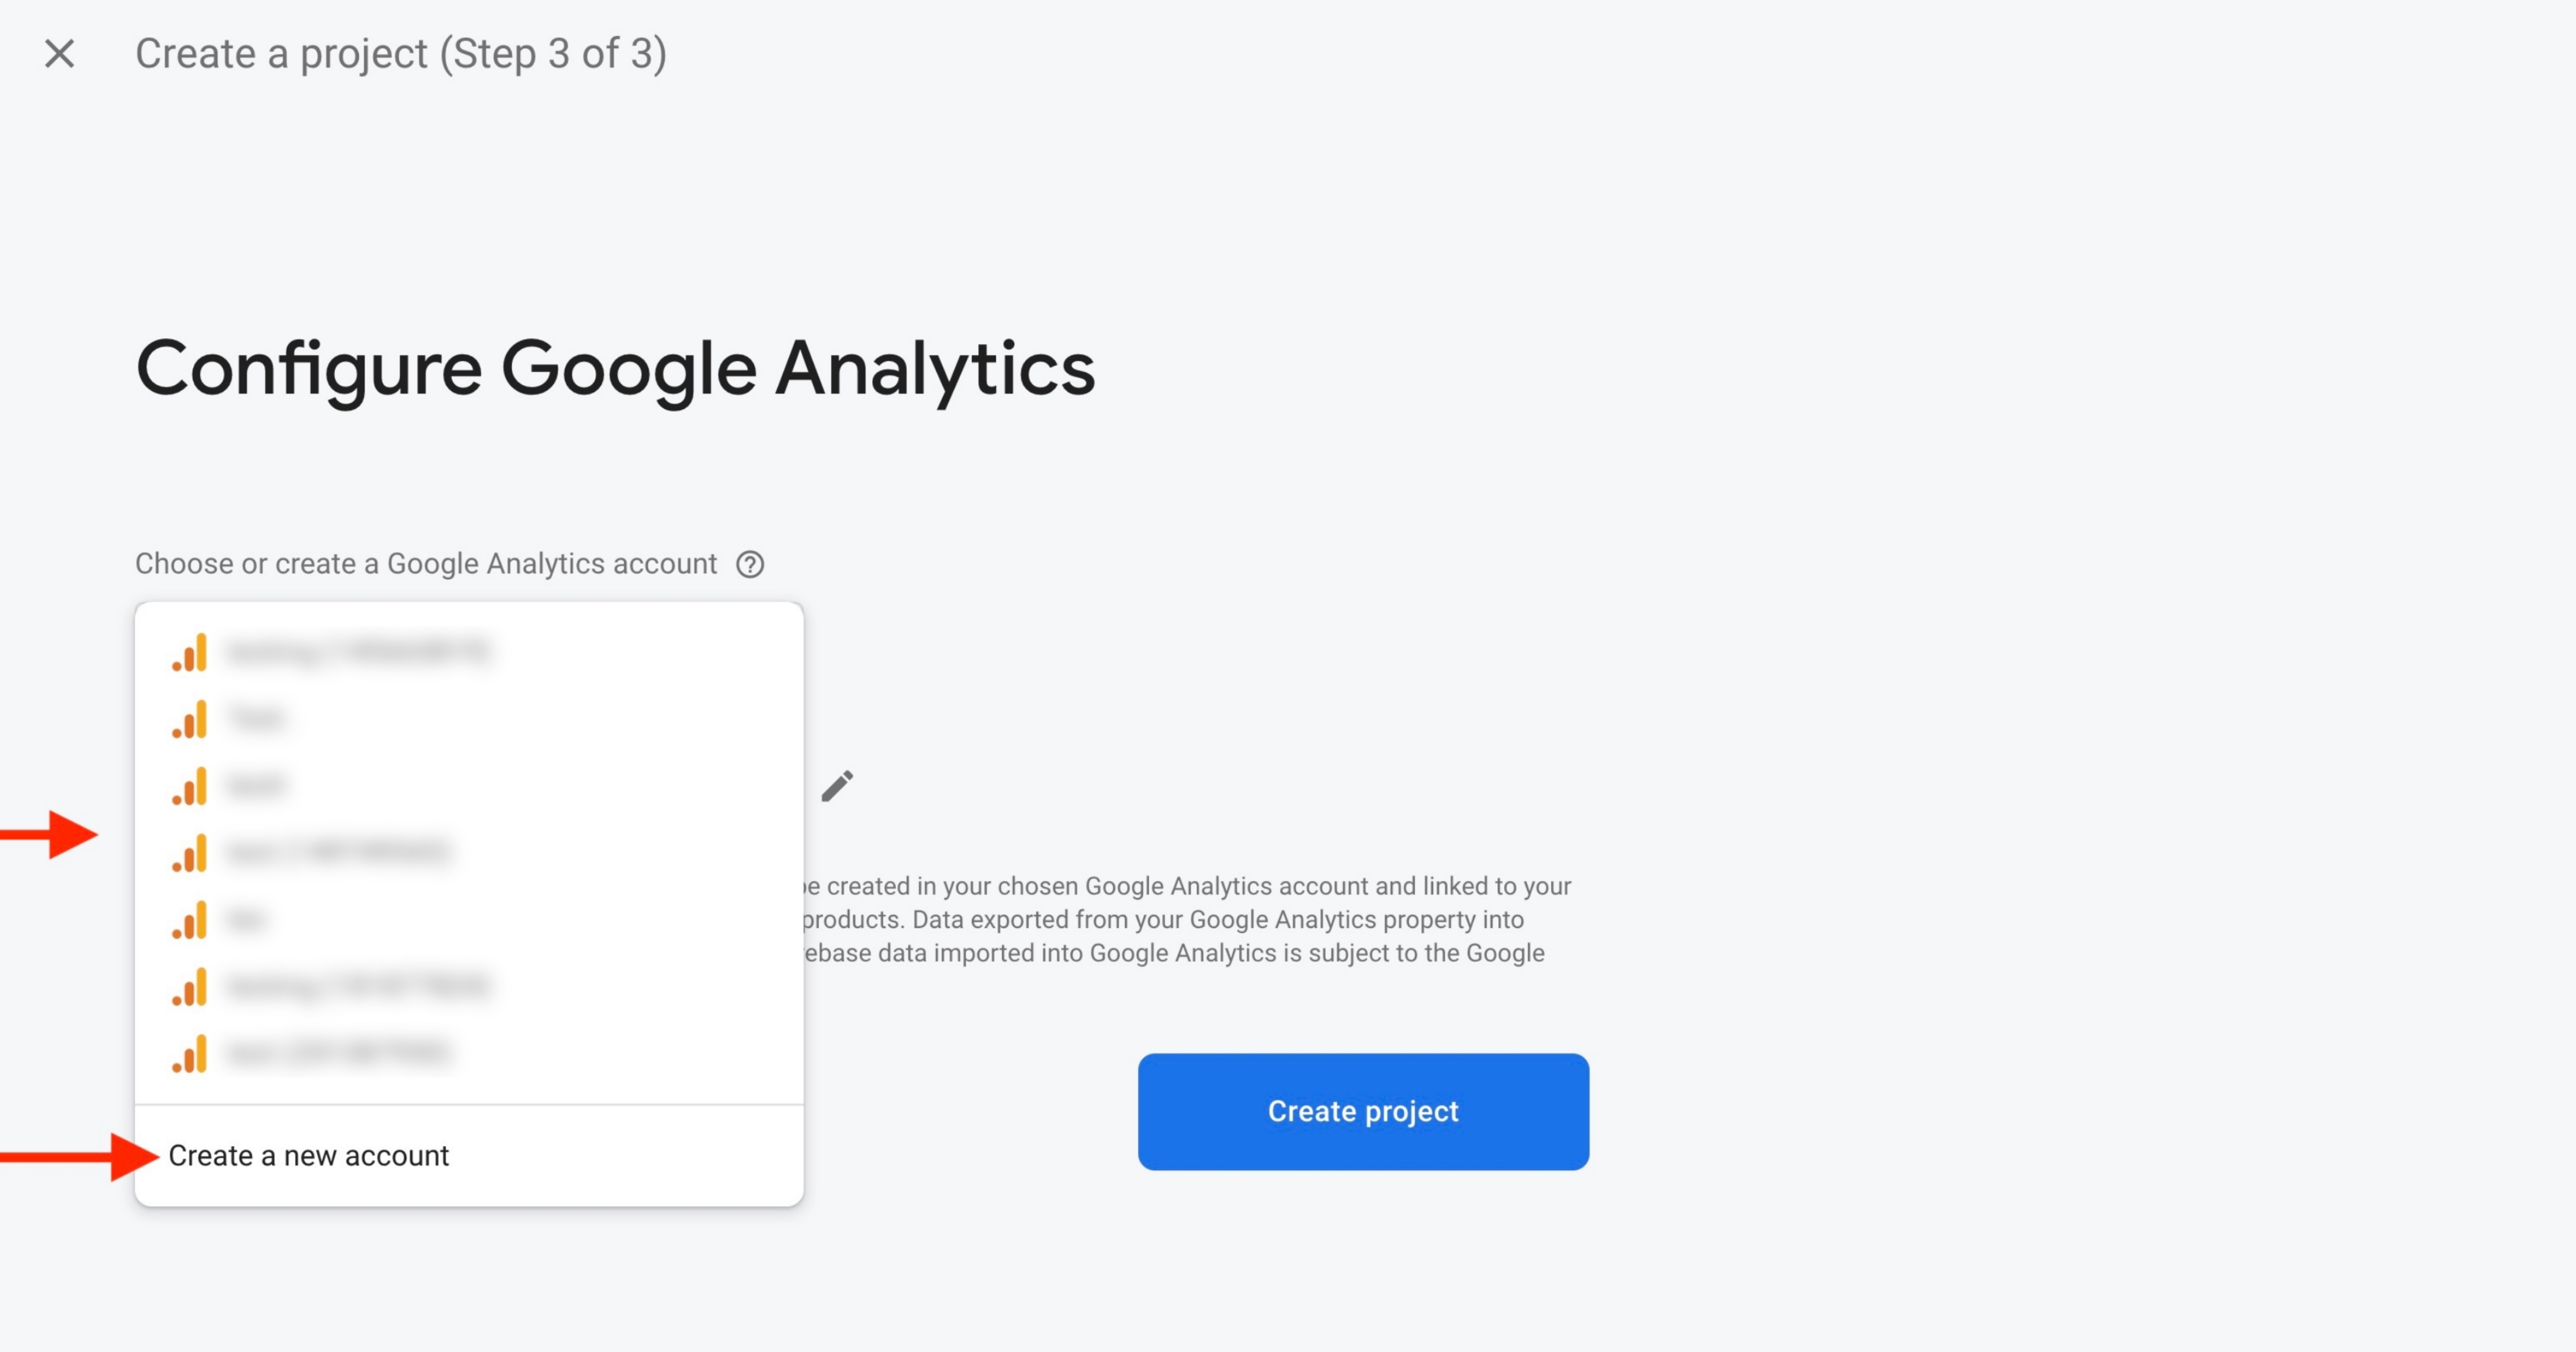
Step 10 : Click on Create Project.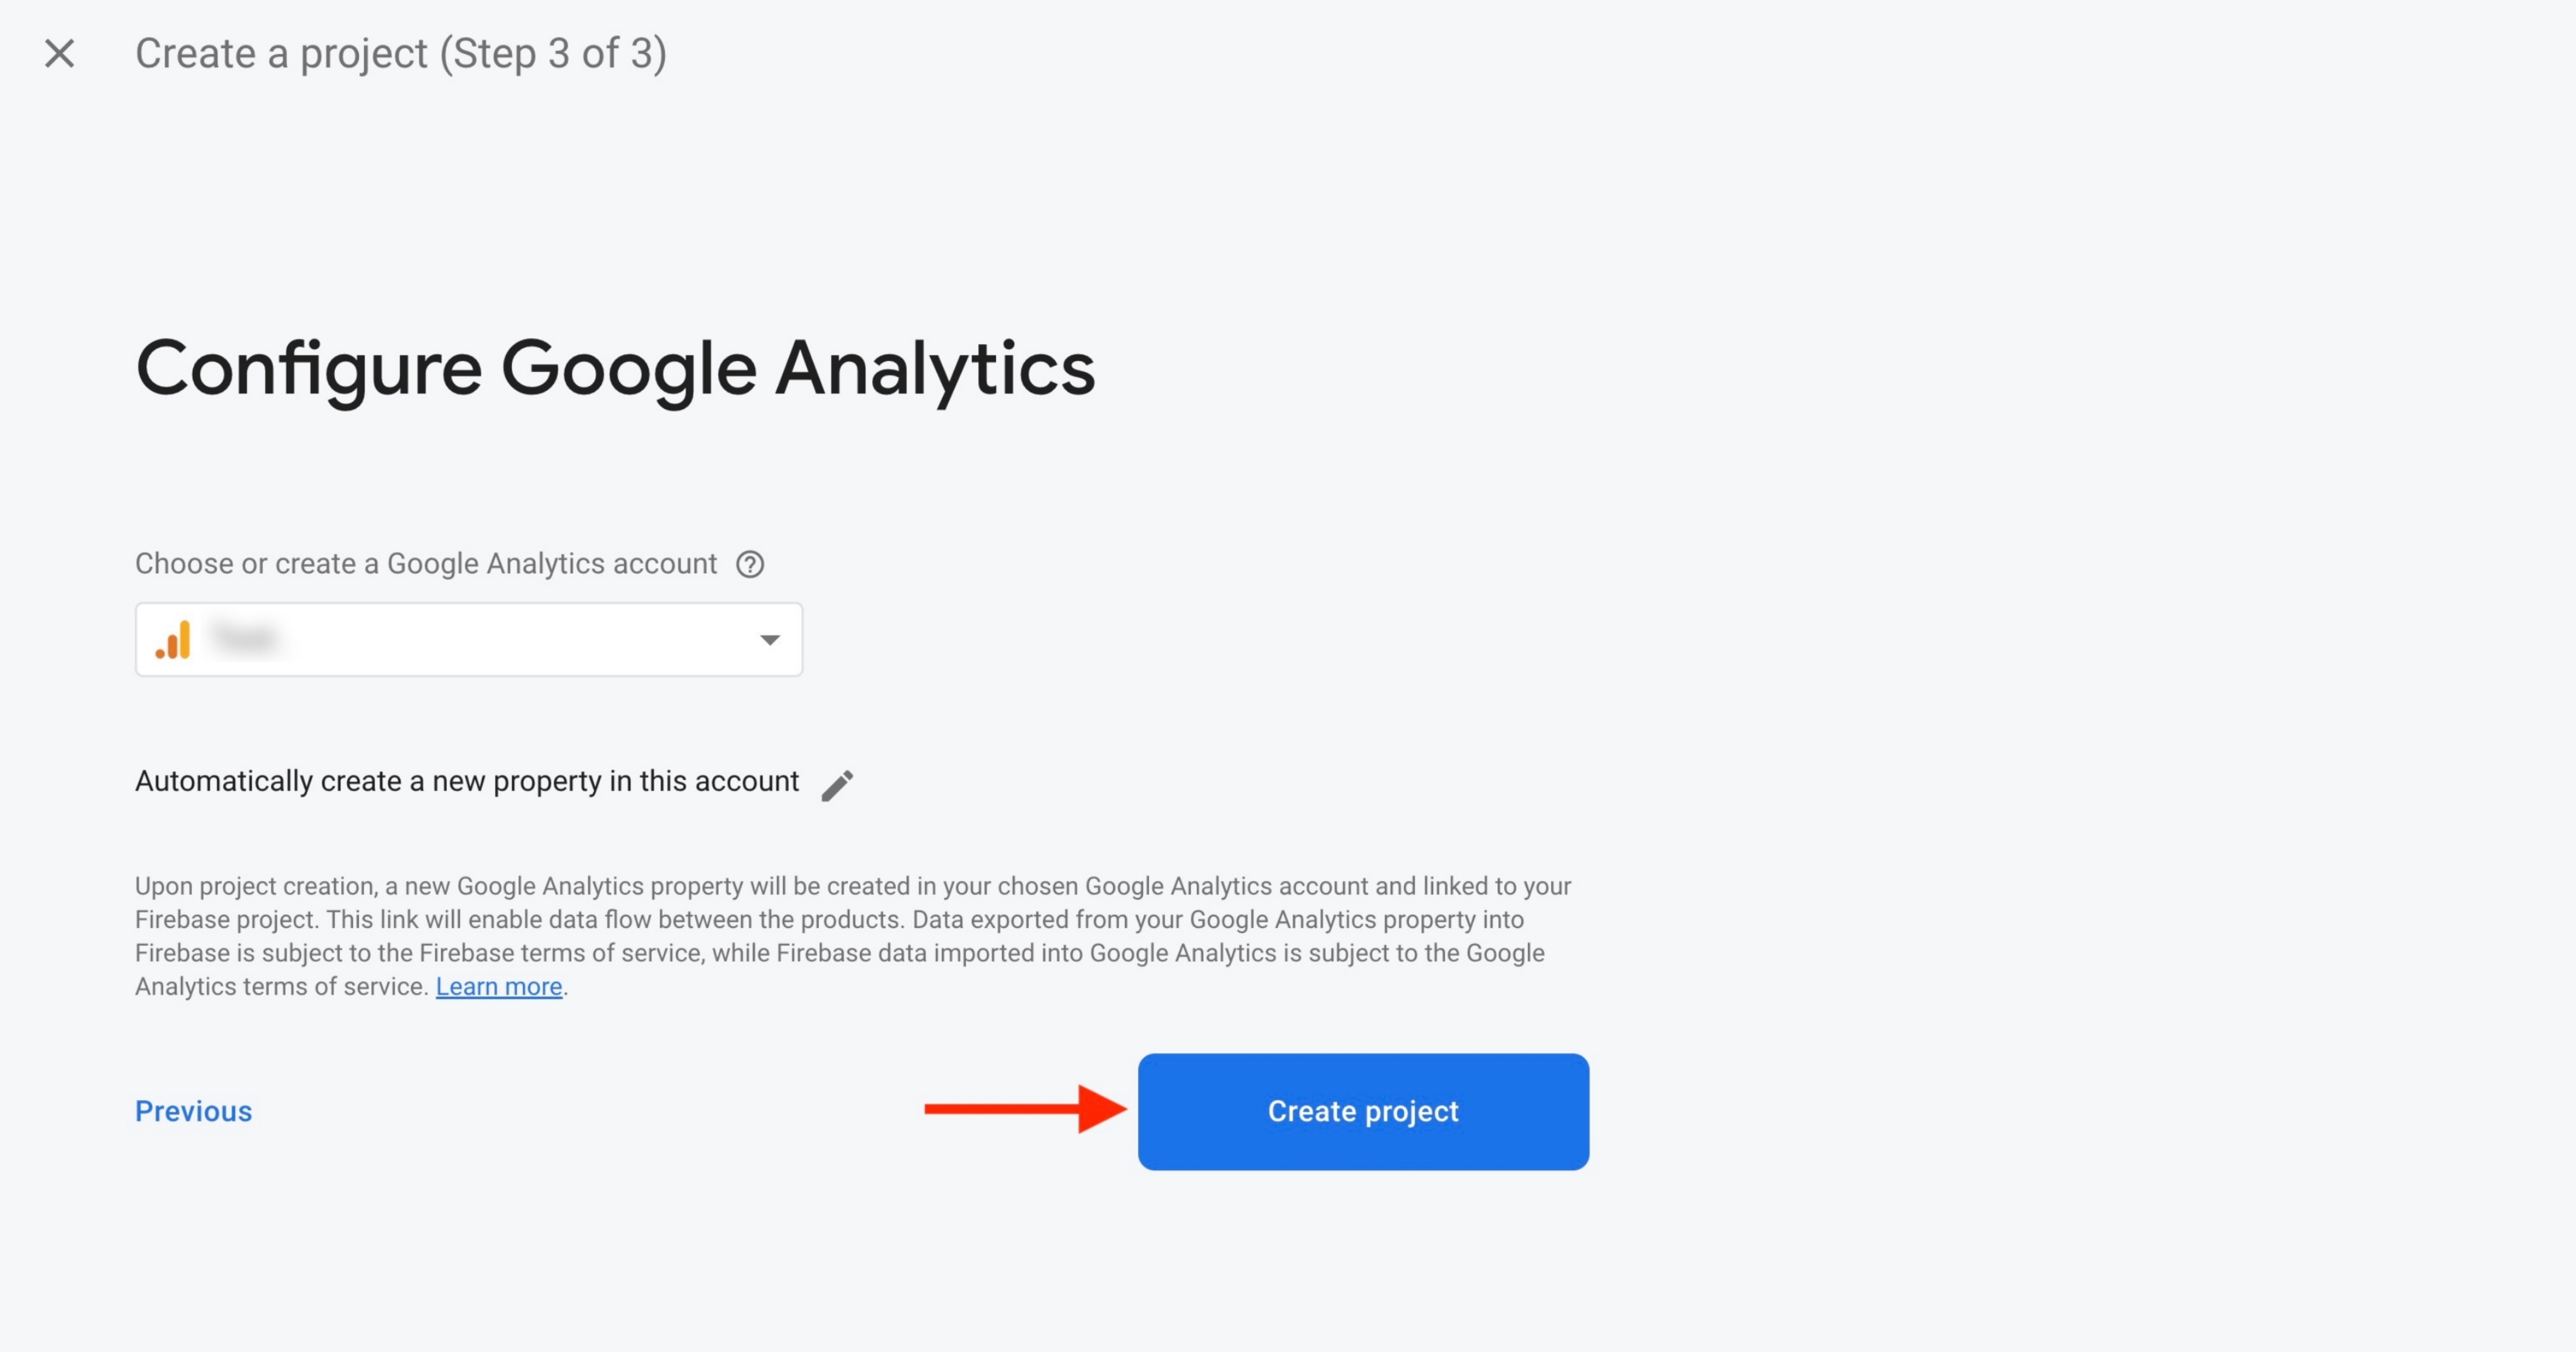
Step 11 : Click on Continue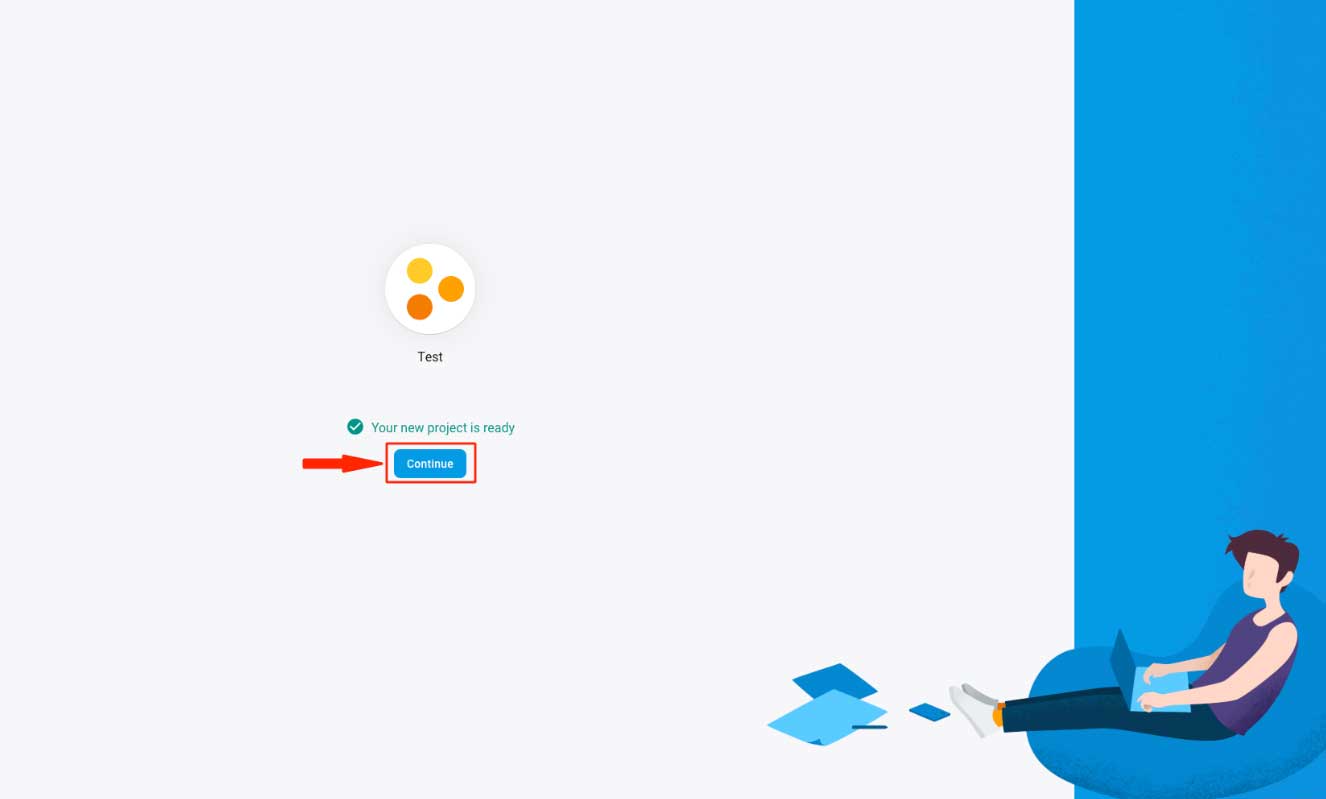 Step 12 : Click on Add Firebase to your web app
 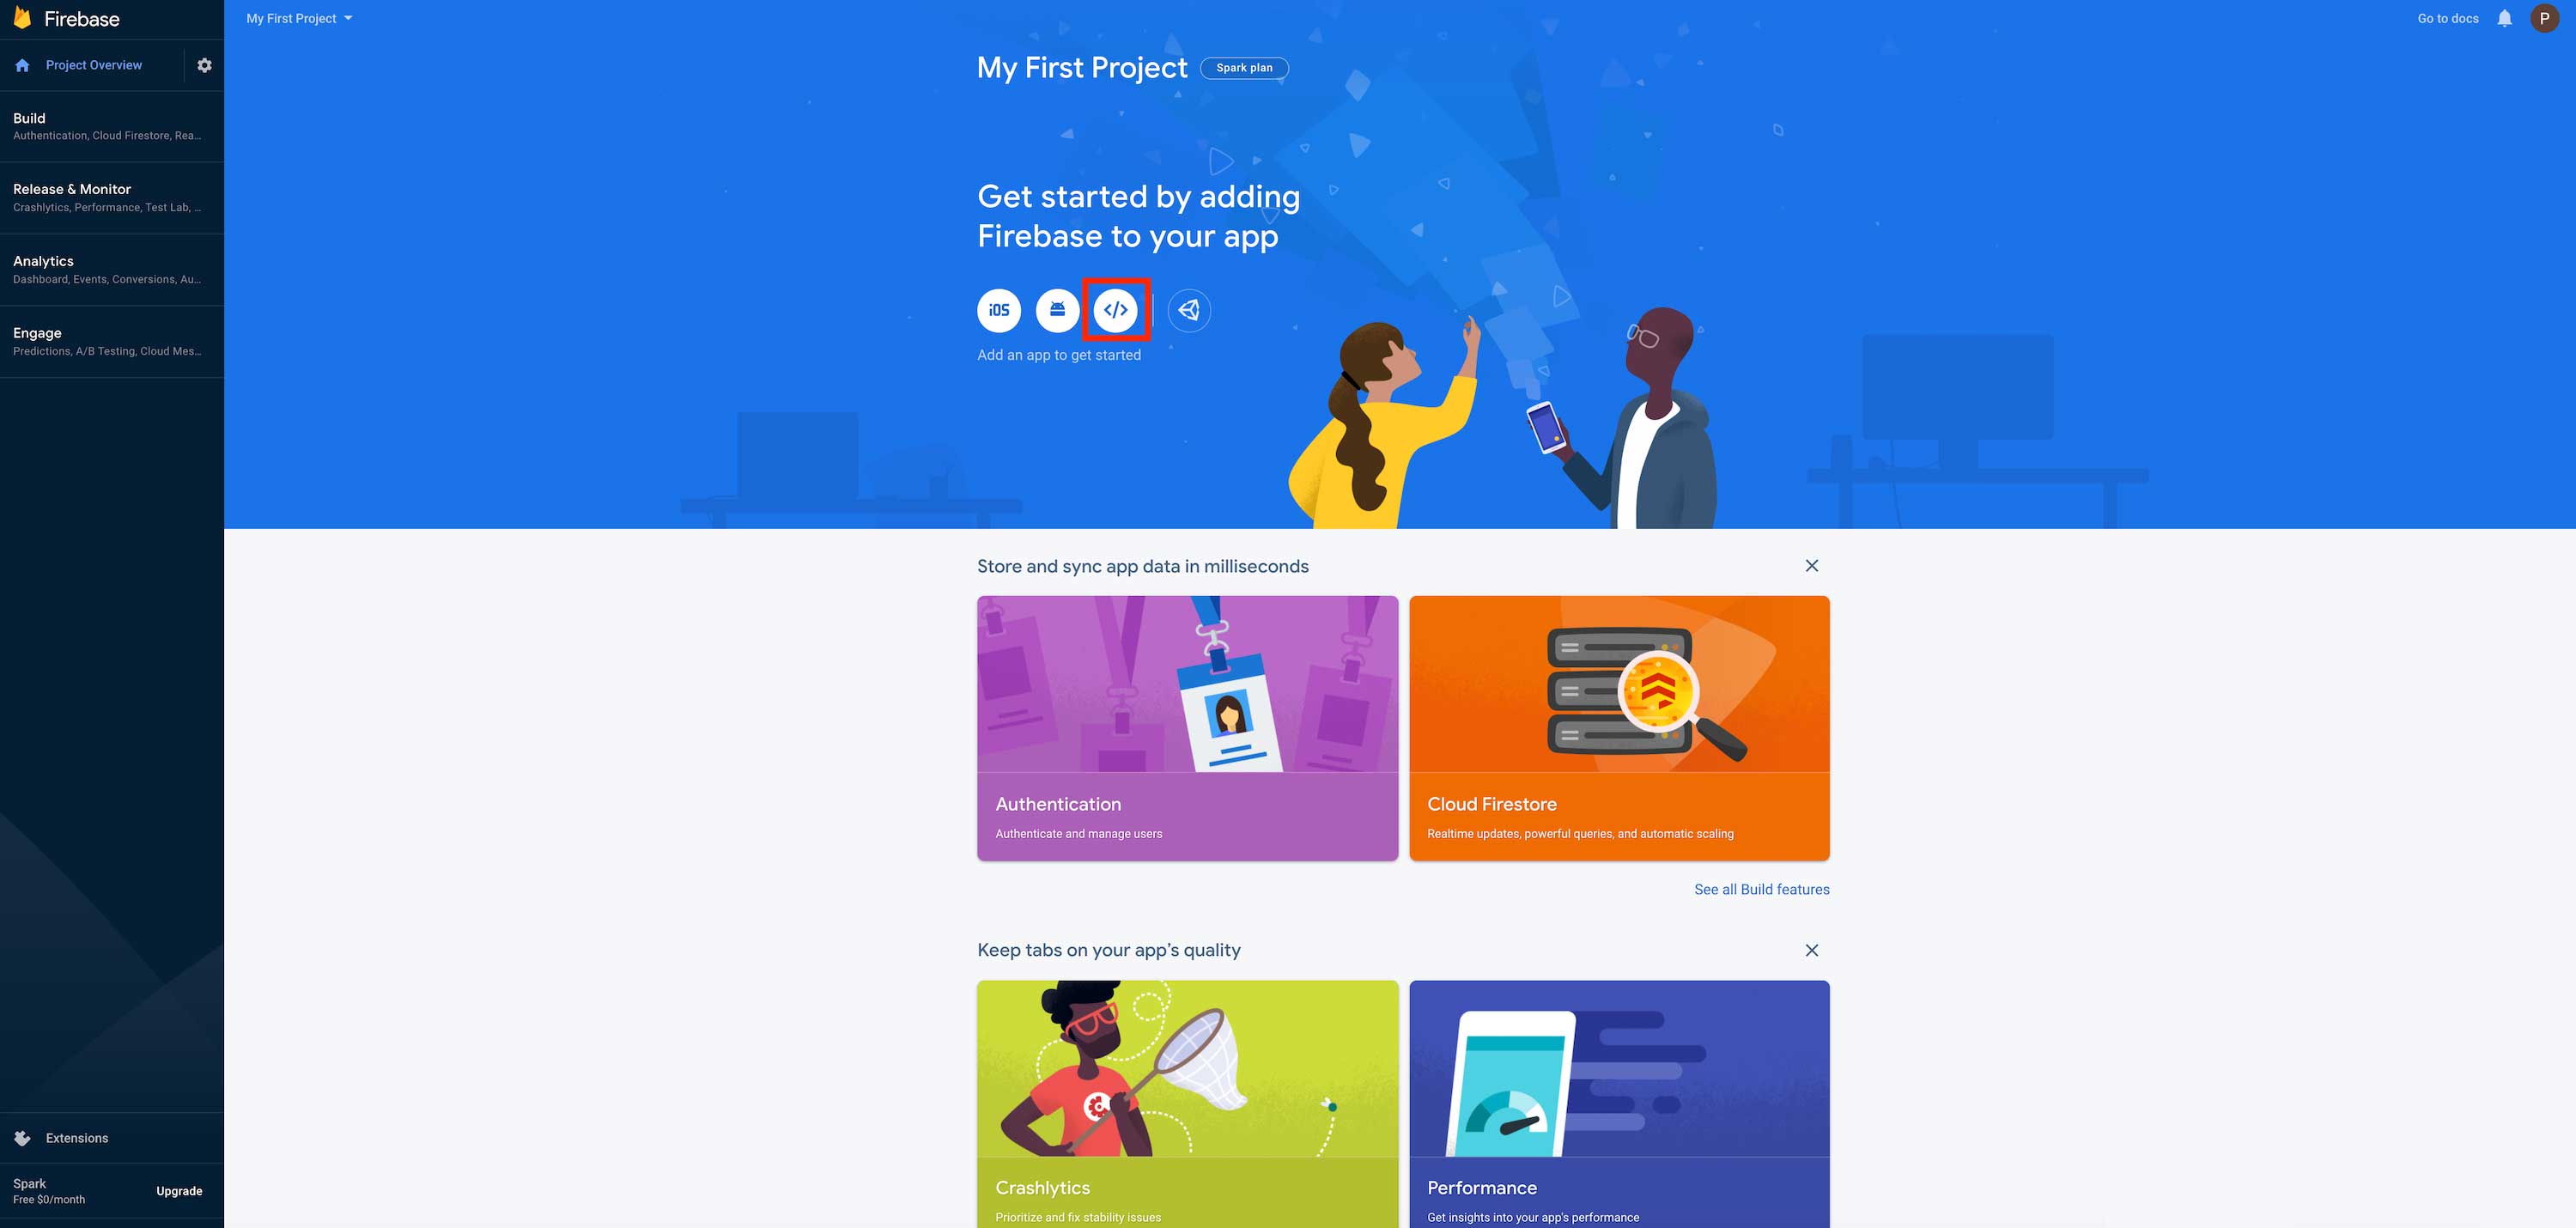 Step 13 : Enter App nickname
 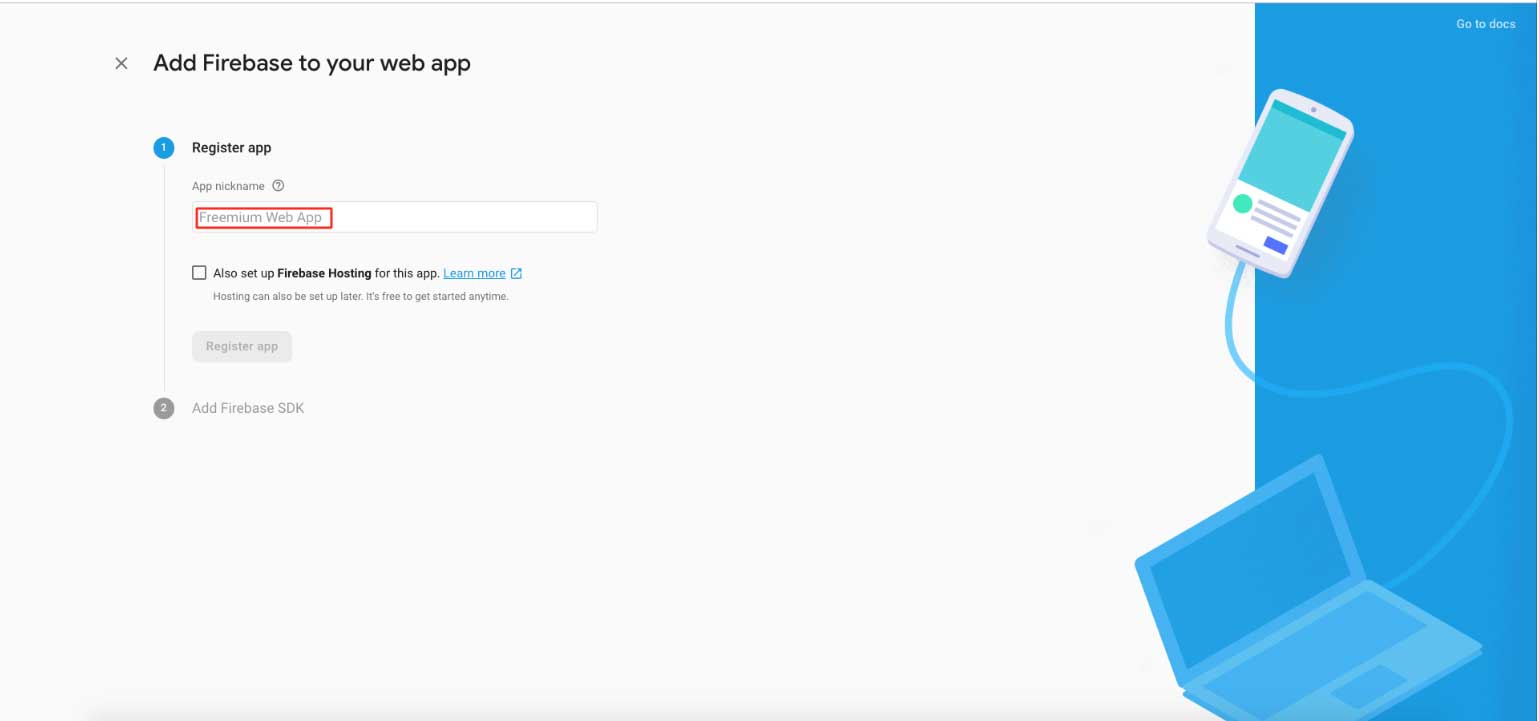 Step 14 : Click on Register app
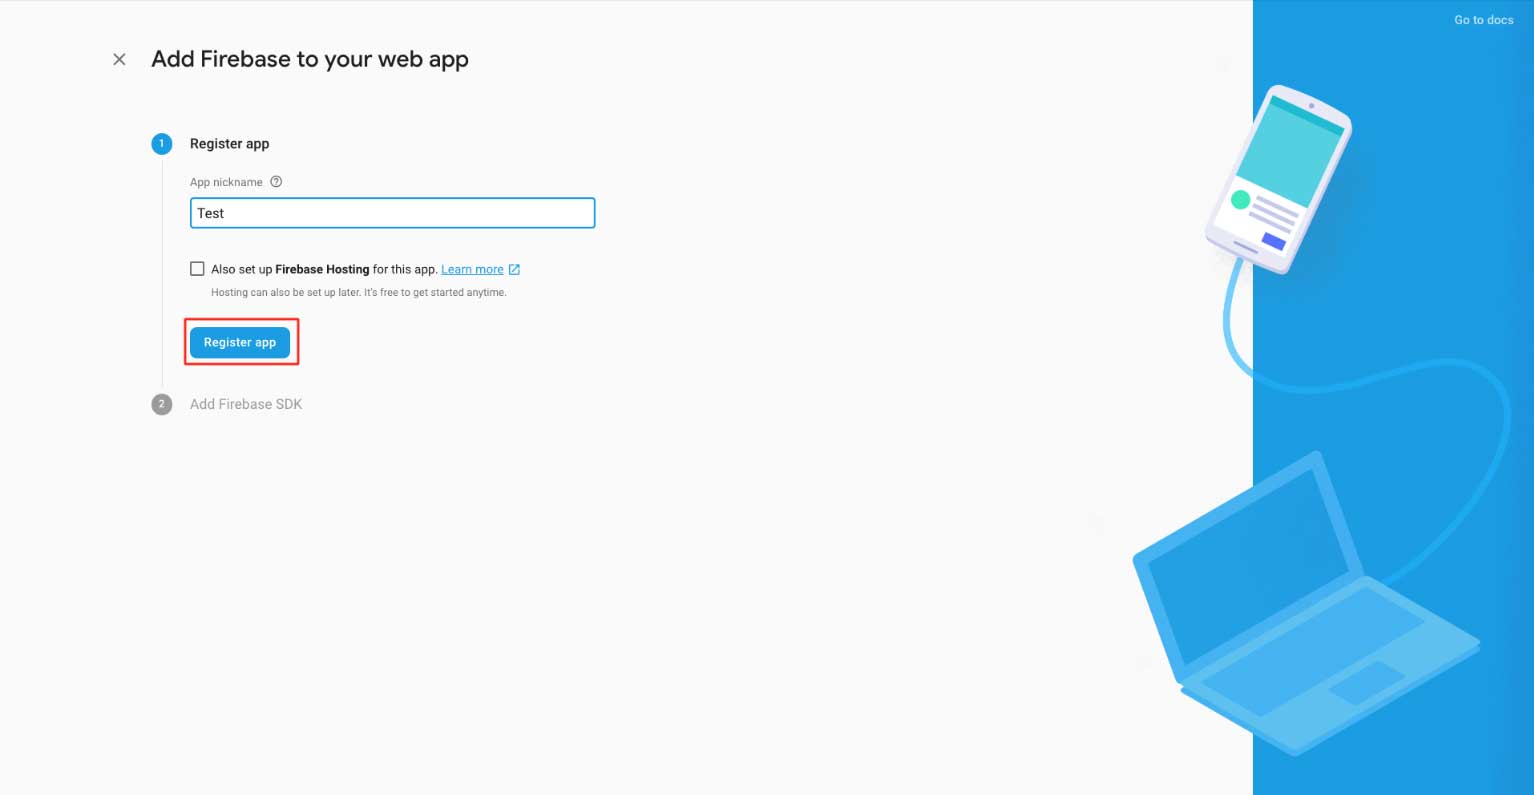 Step 15 : Click on Continue to Console
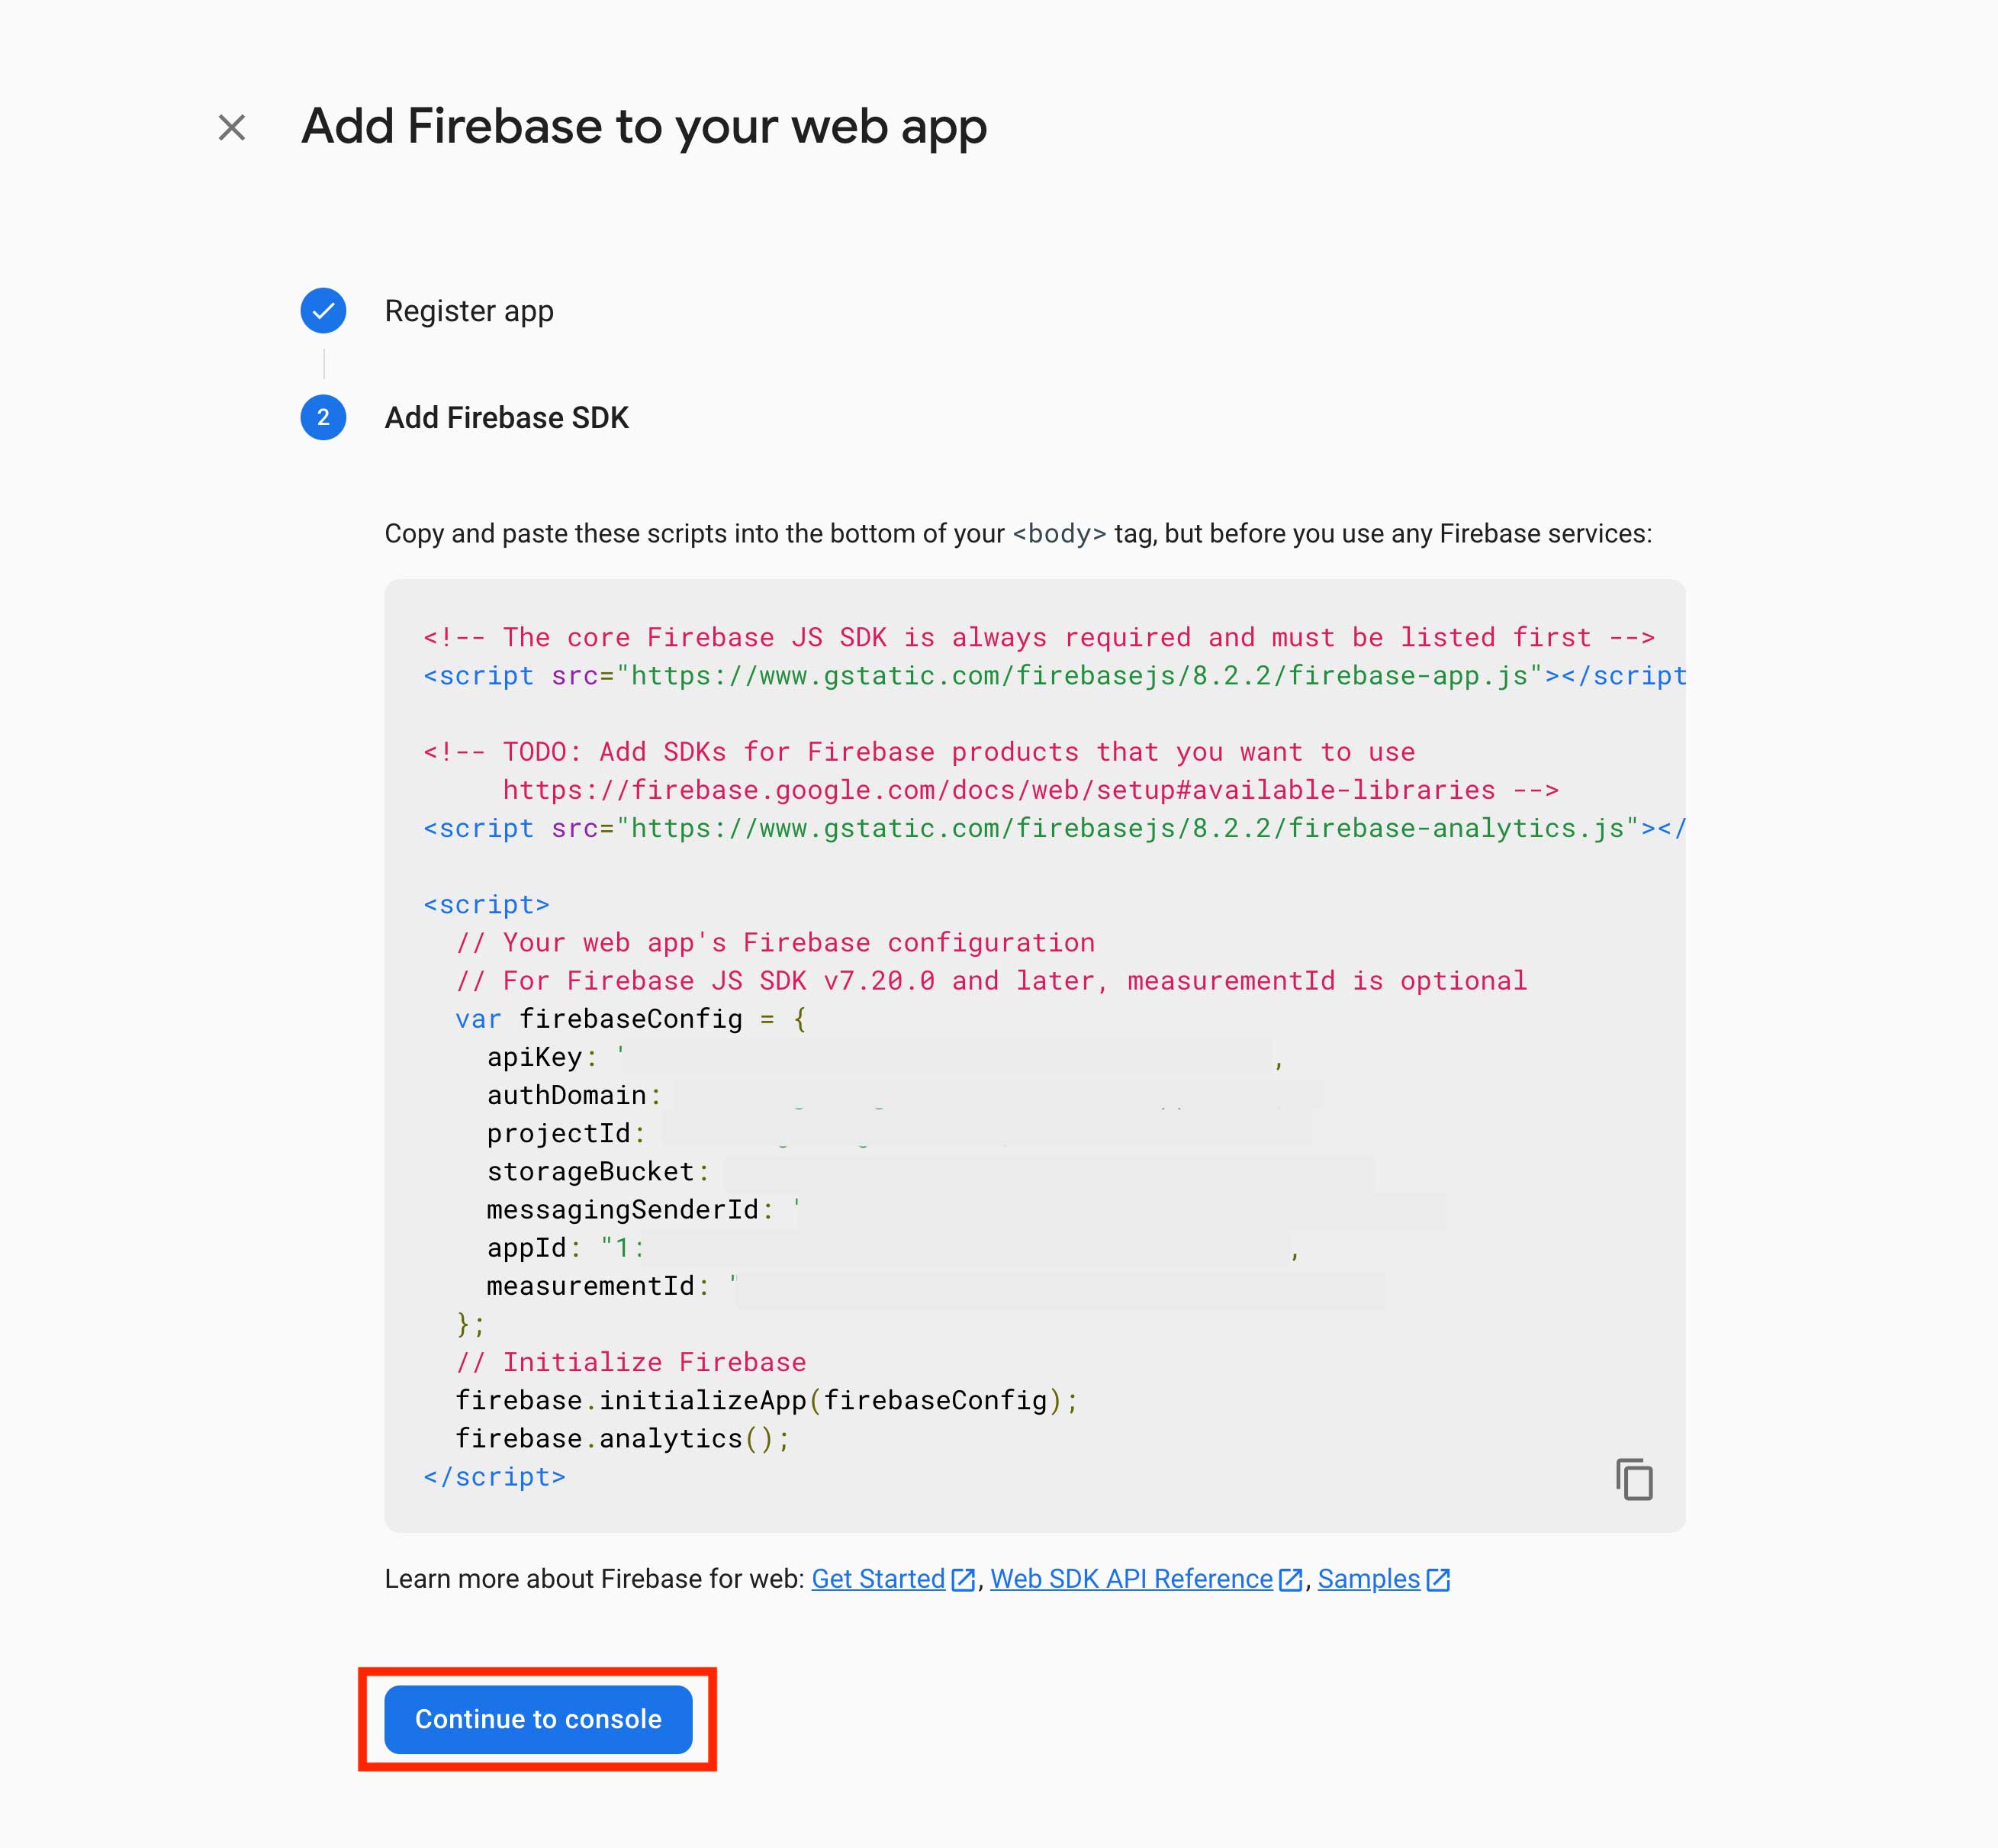 Step 16 : Click on Build menu
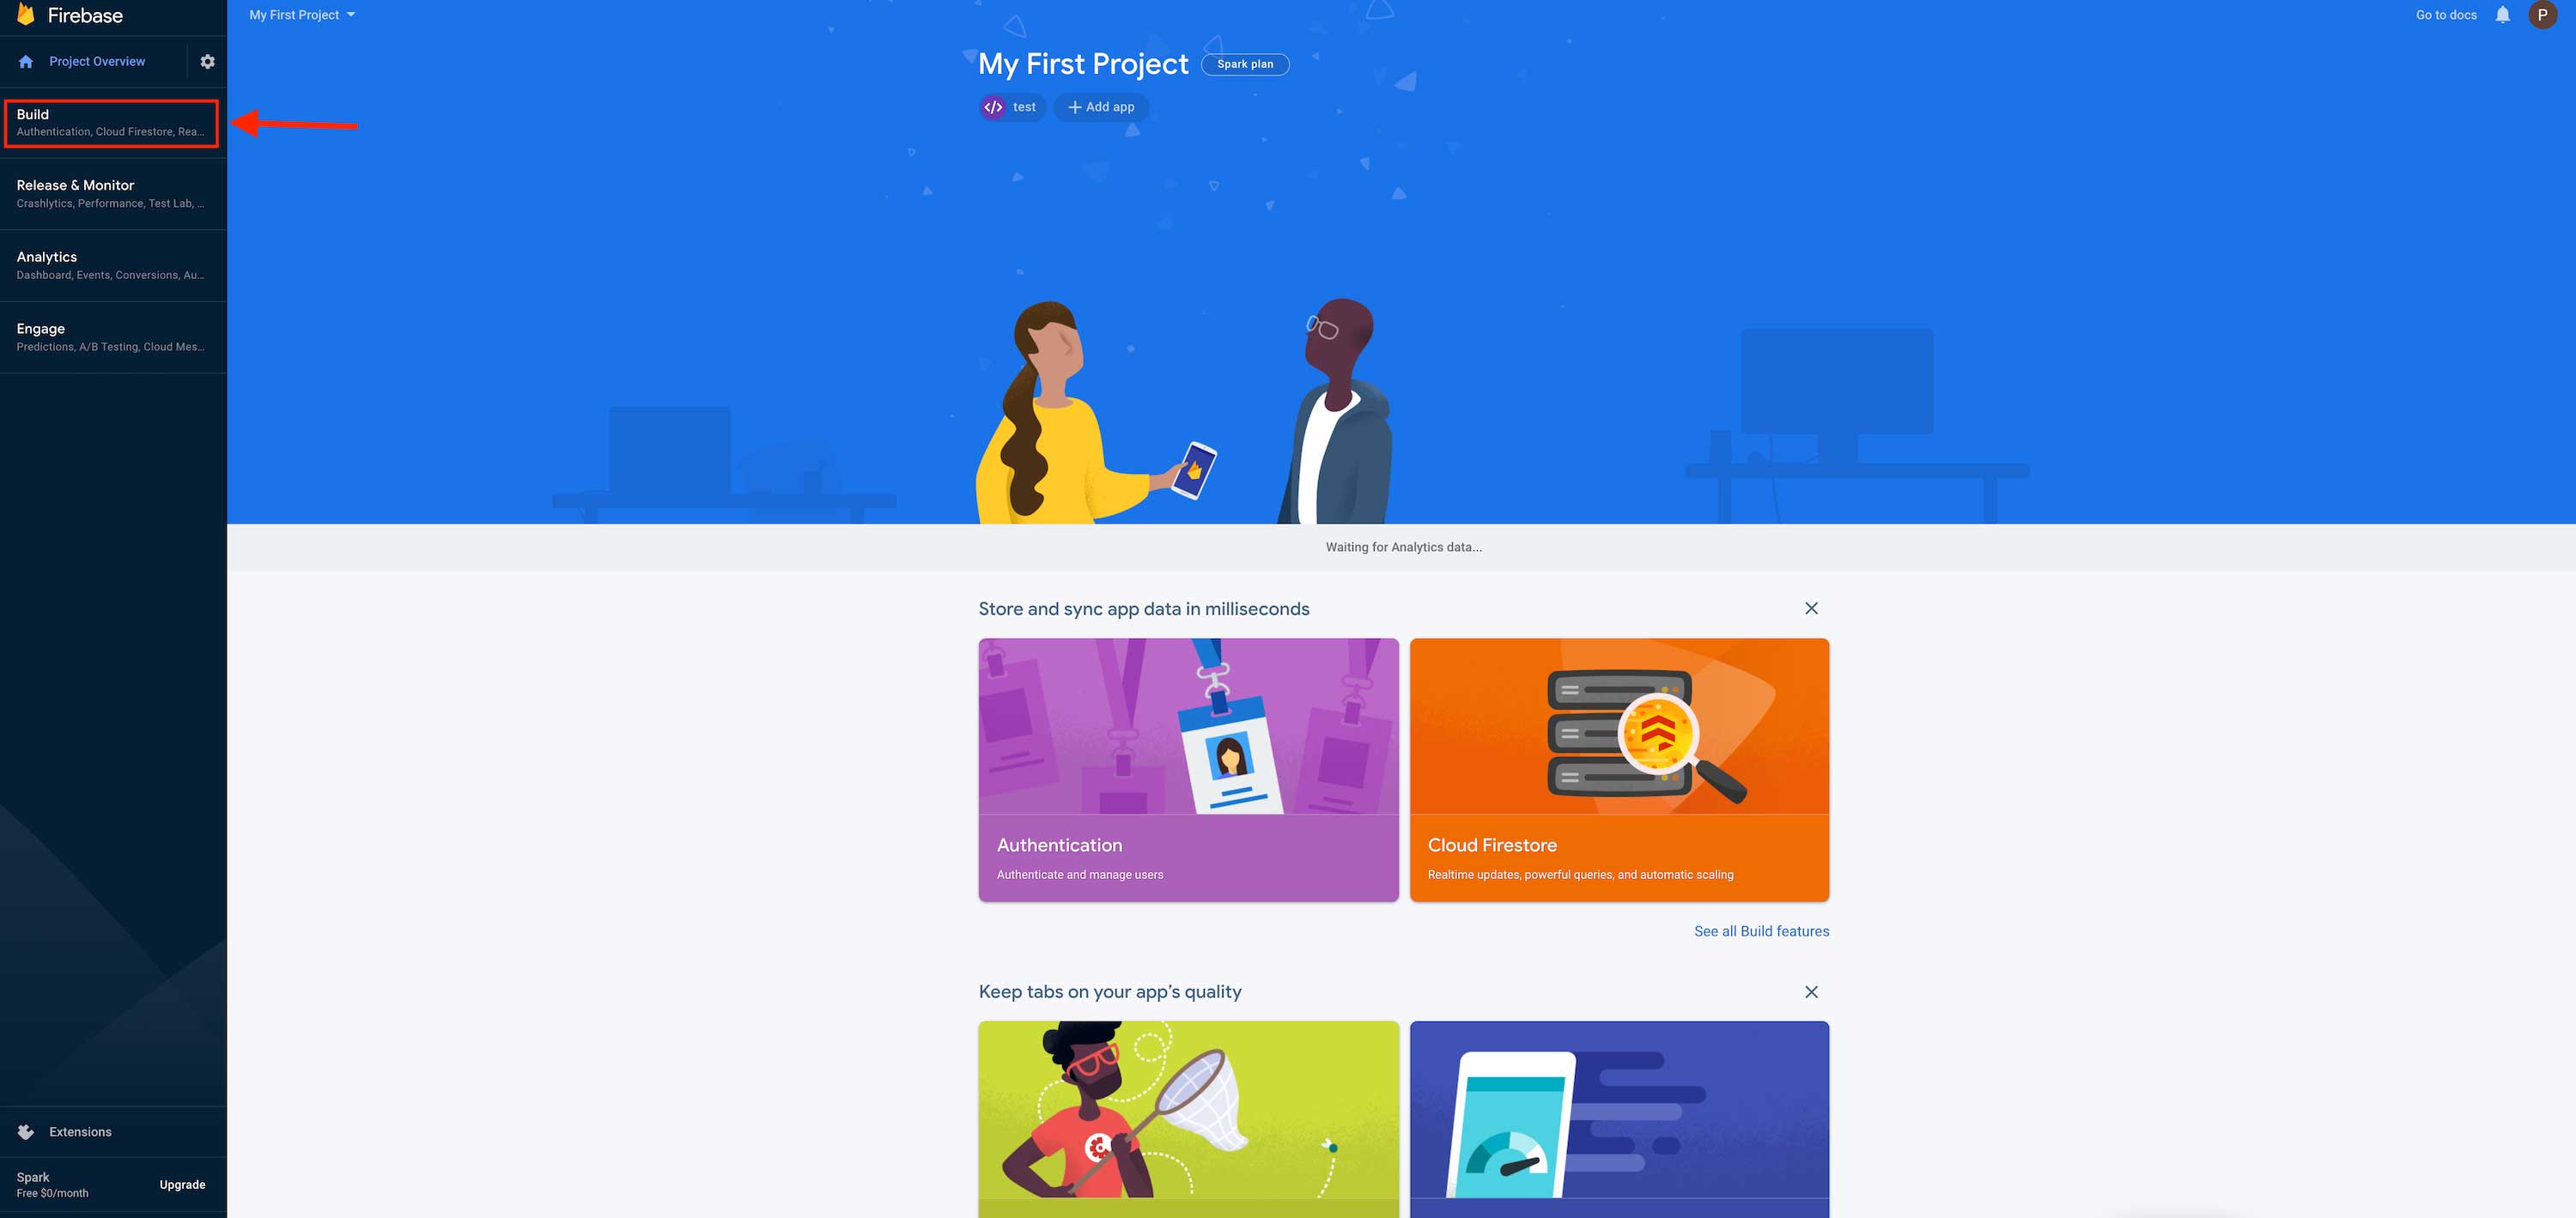 Step 17 : The Build dropdown menu will open on the left hand side panel, click on Authentication
 Step 18 : Click on Get Started
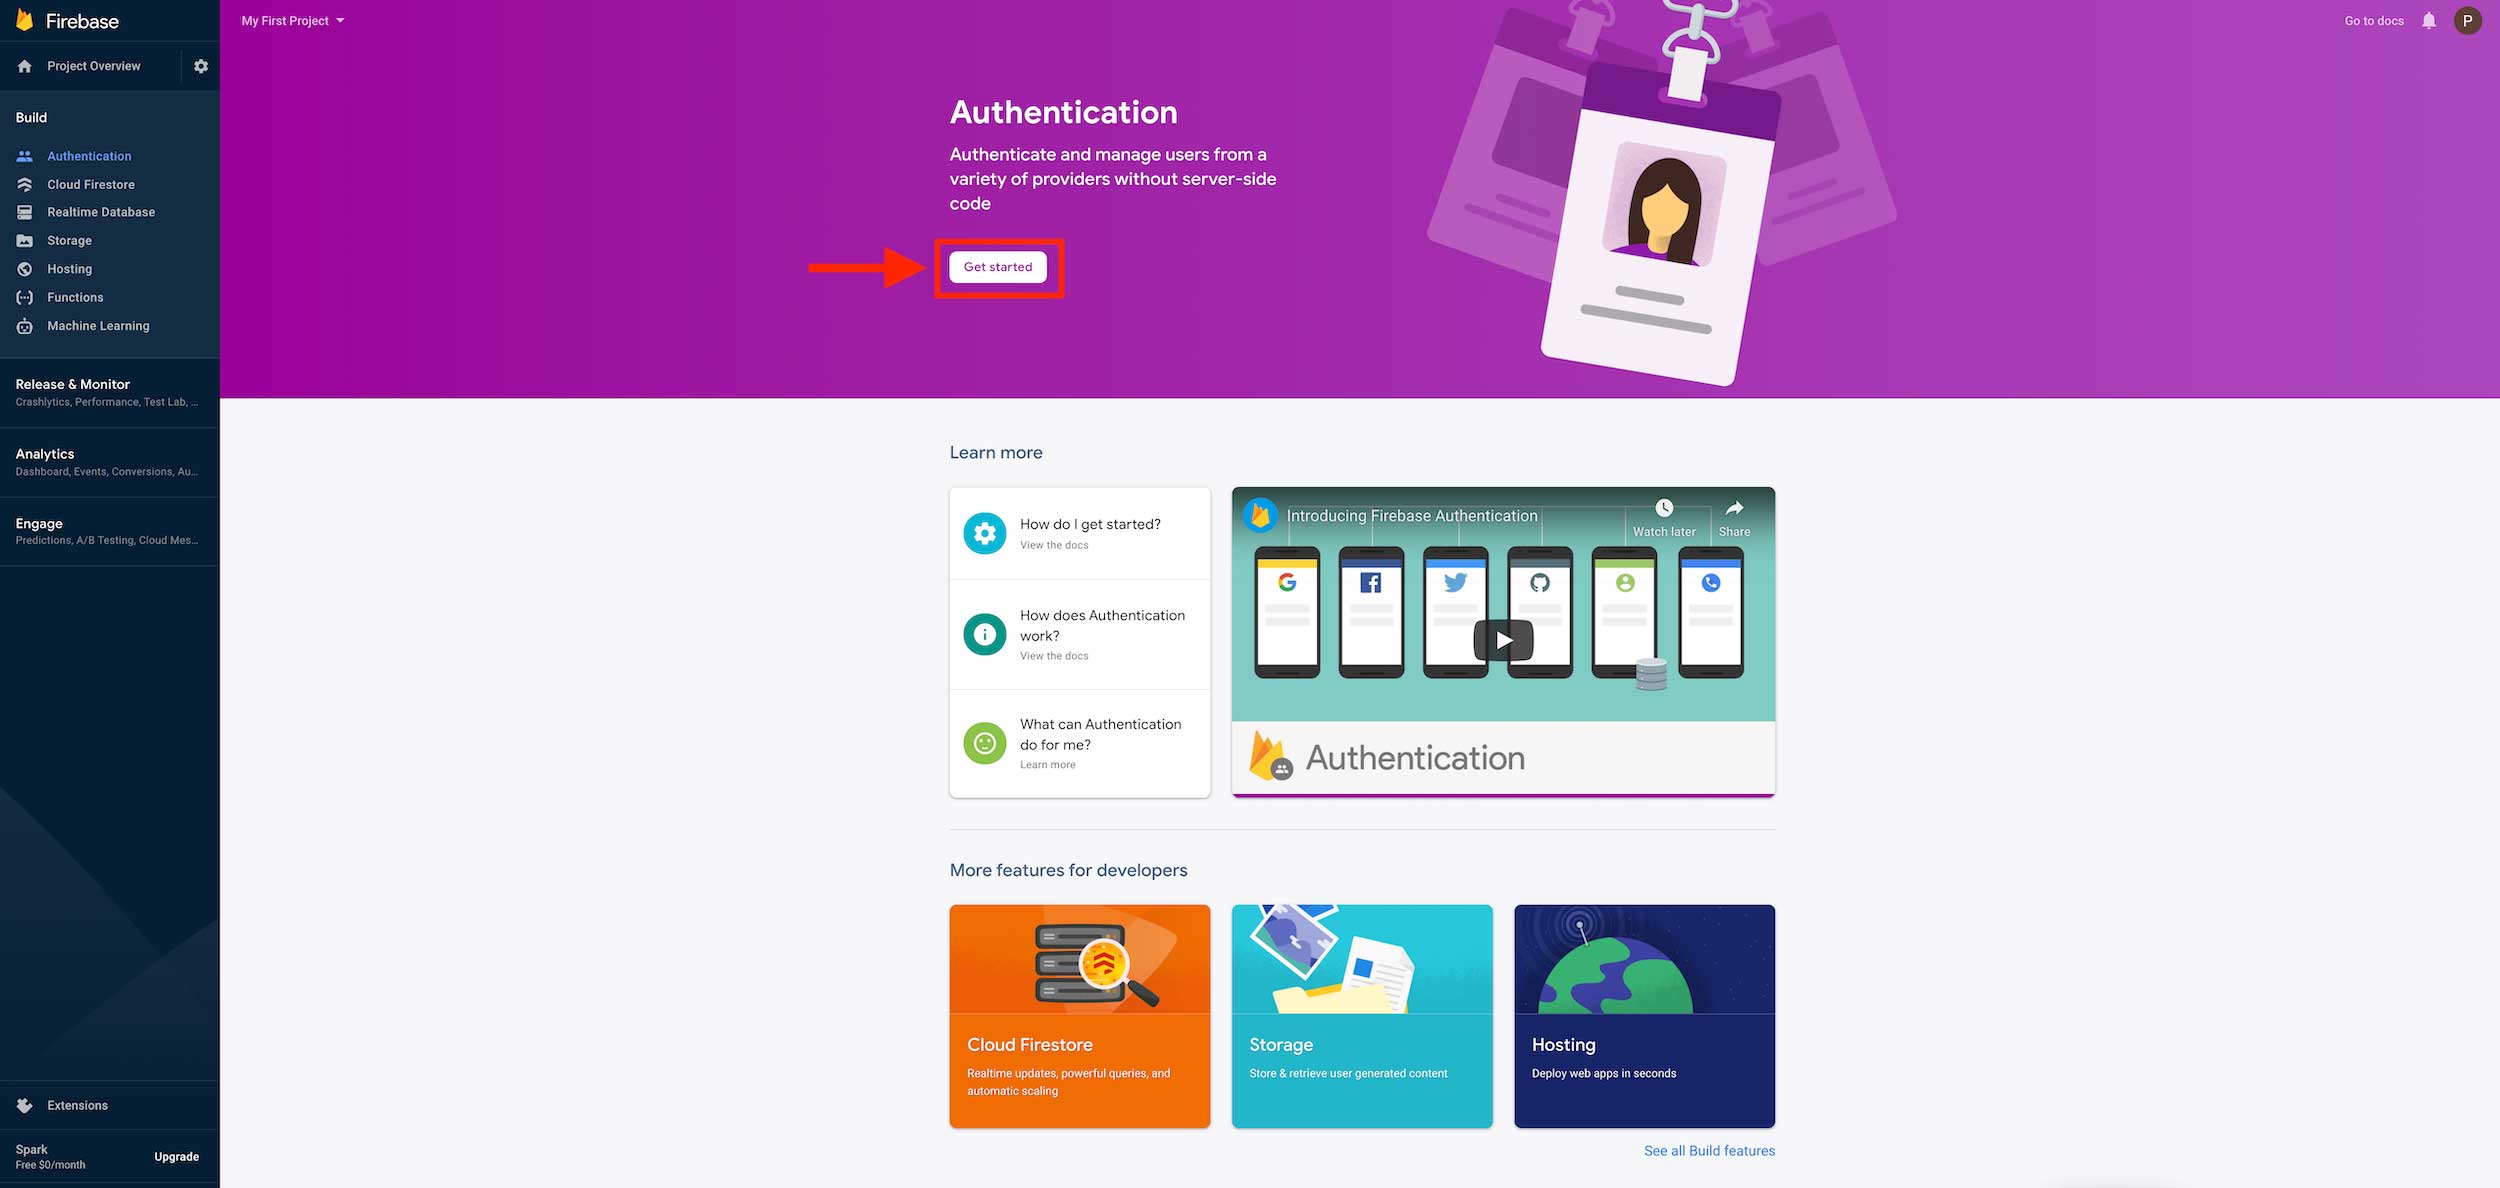 Step 19 : Click on Anonymous
 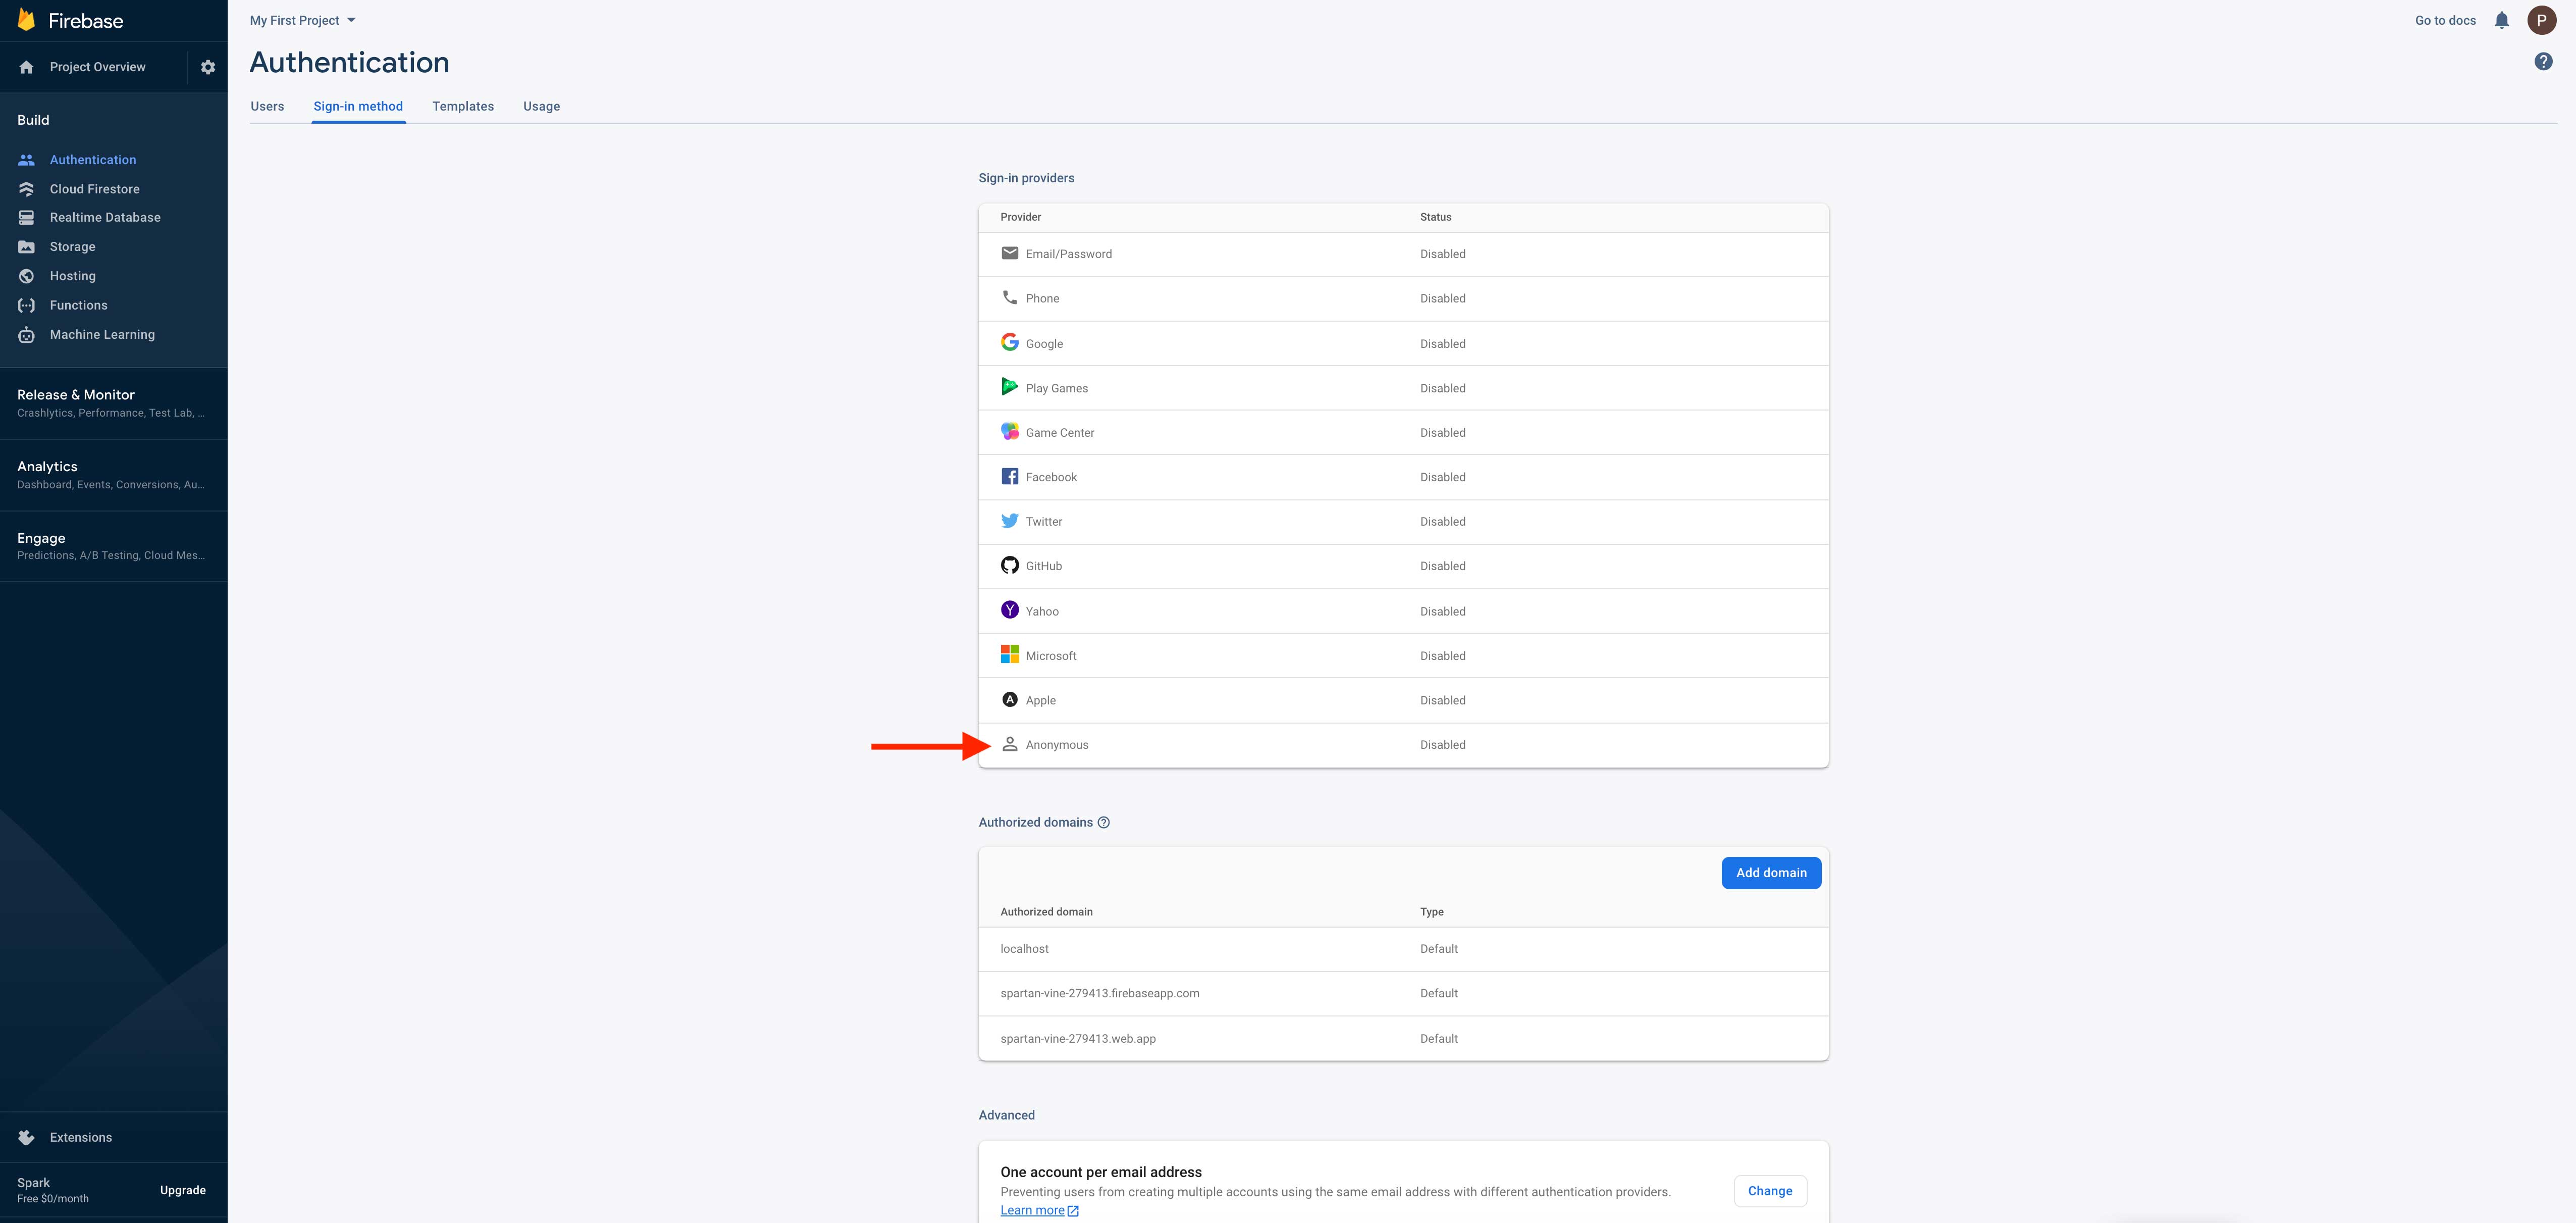 Step 20 : Enable Anonymous
 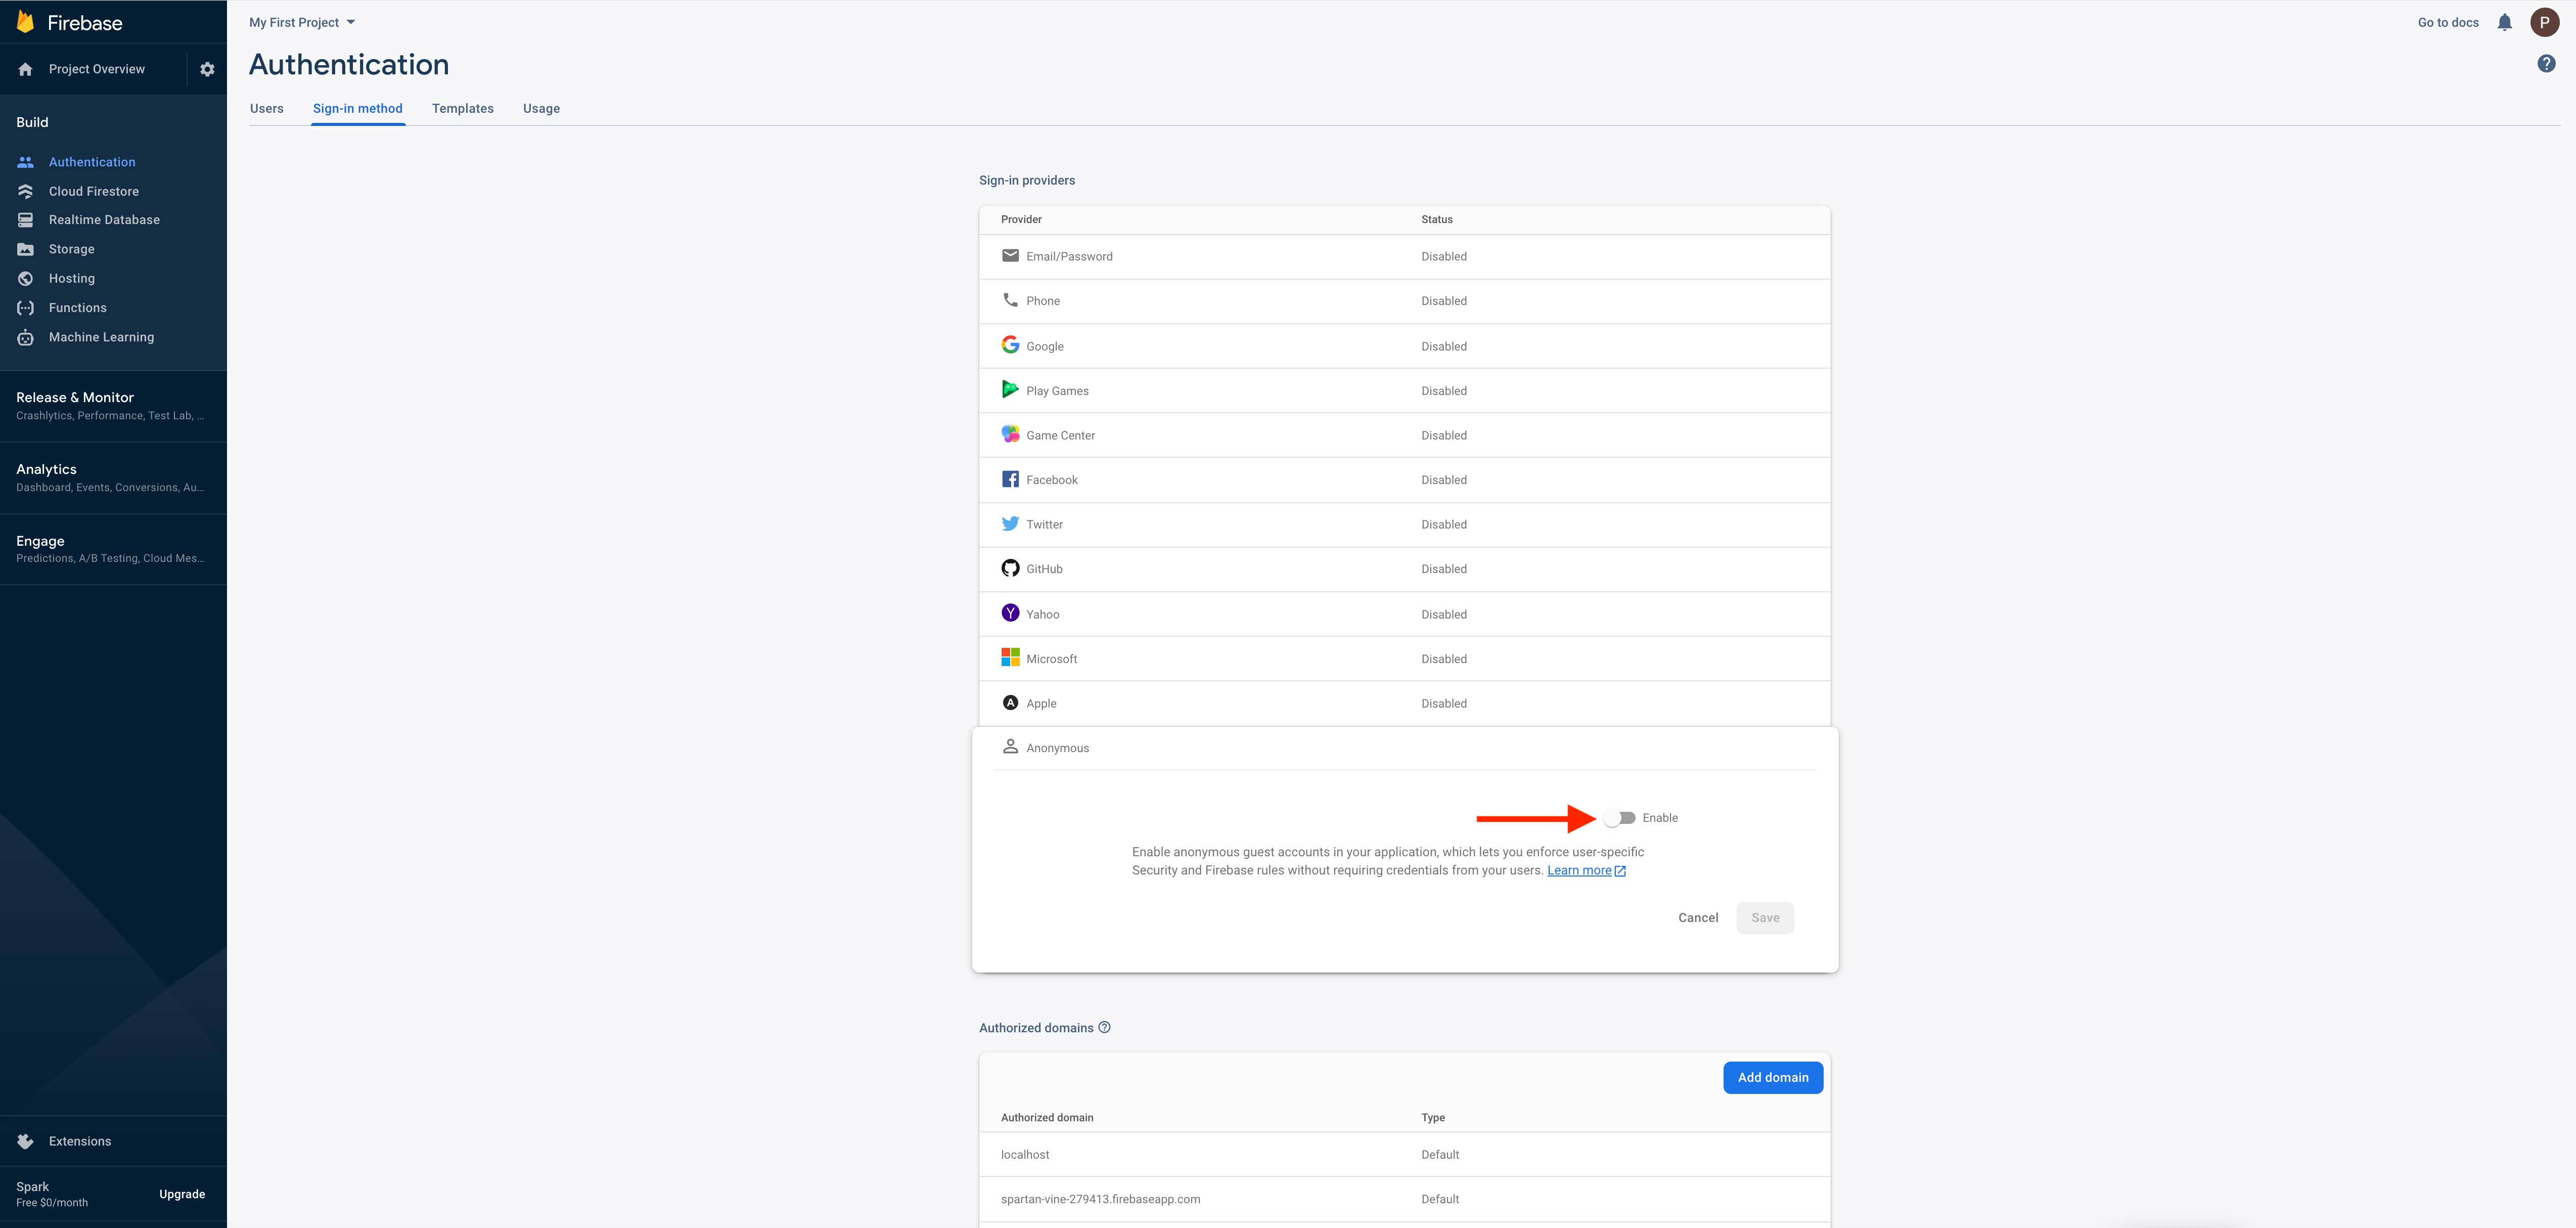 Step 21 : Once done, click on Save button
 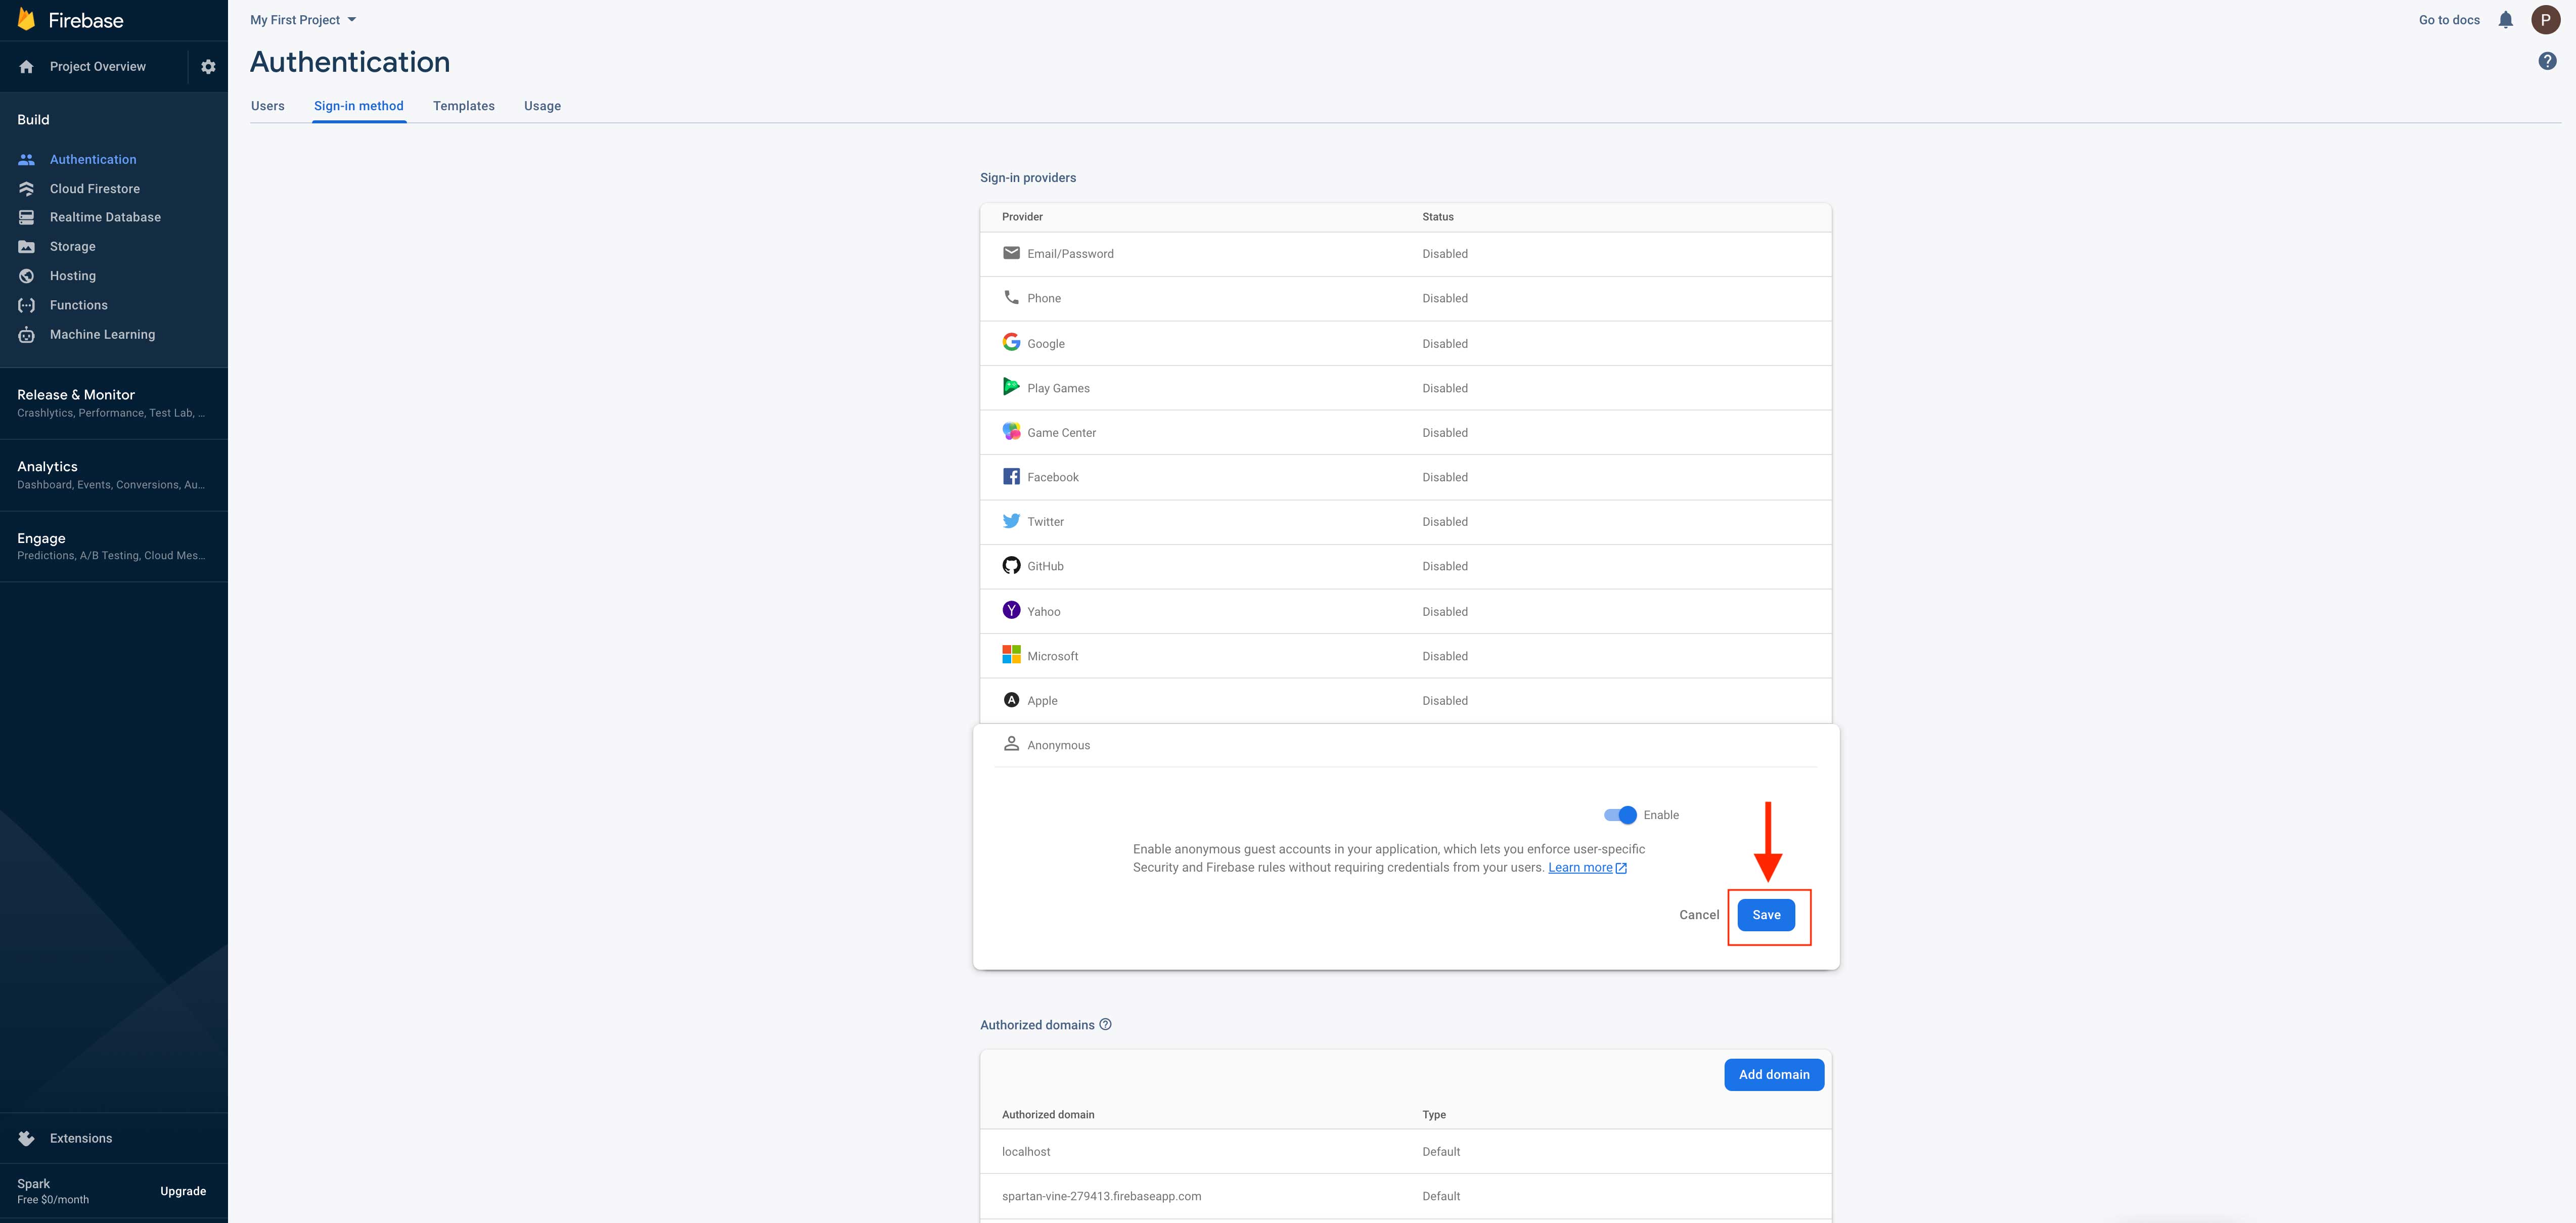 Step 22 : In build menu on the left hand side panel, click on Realtime databas
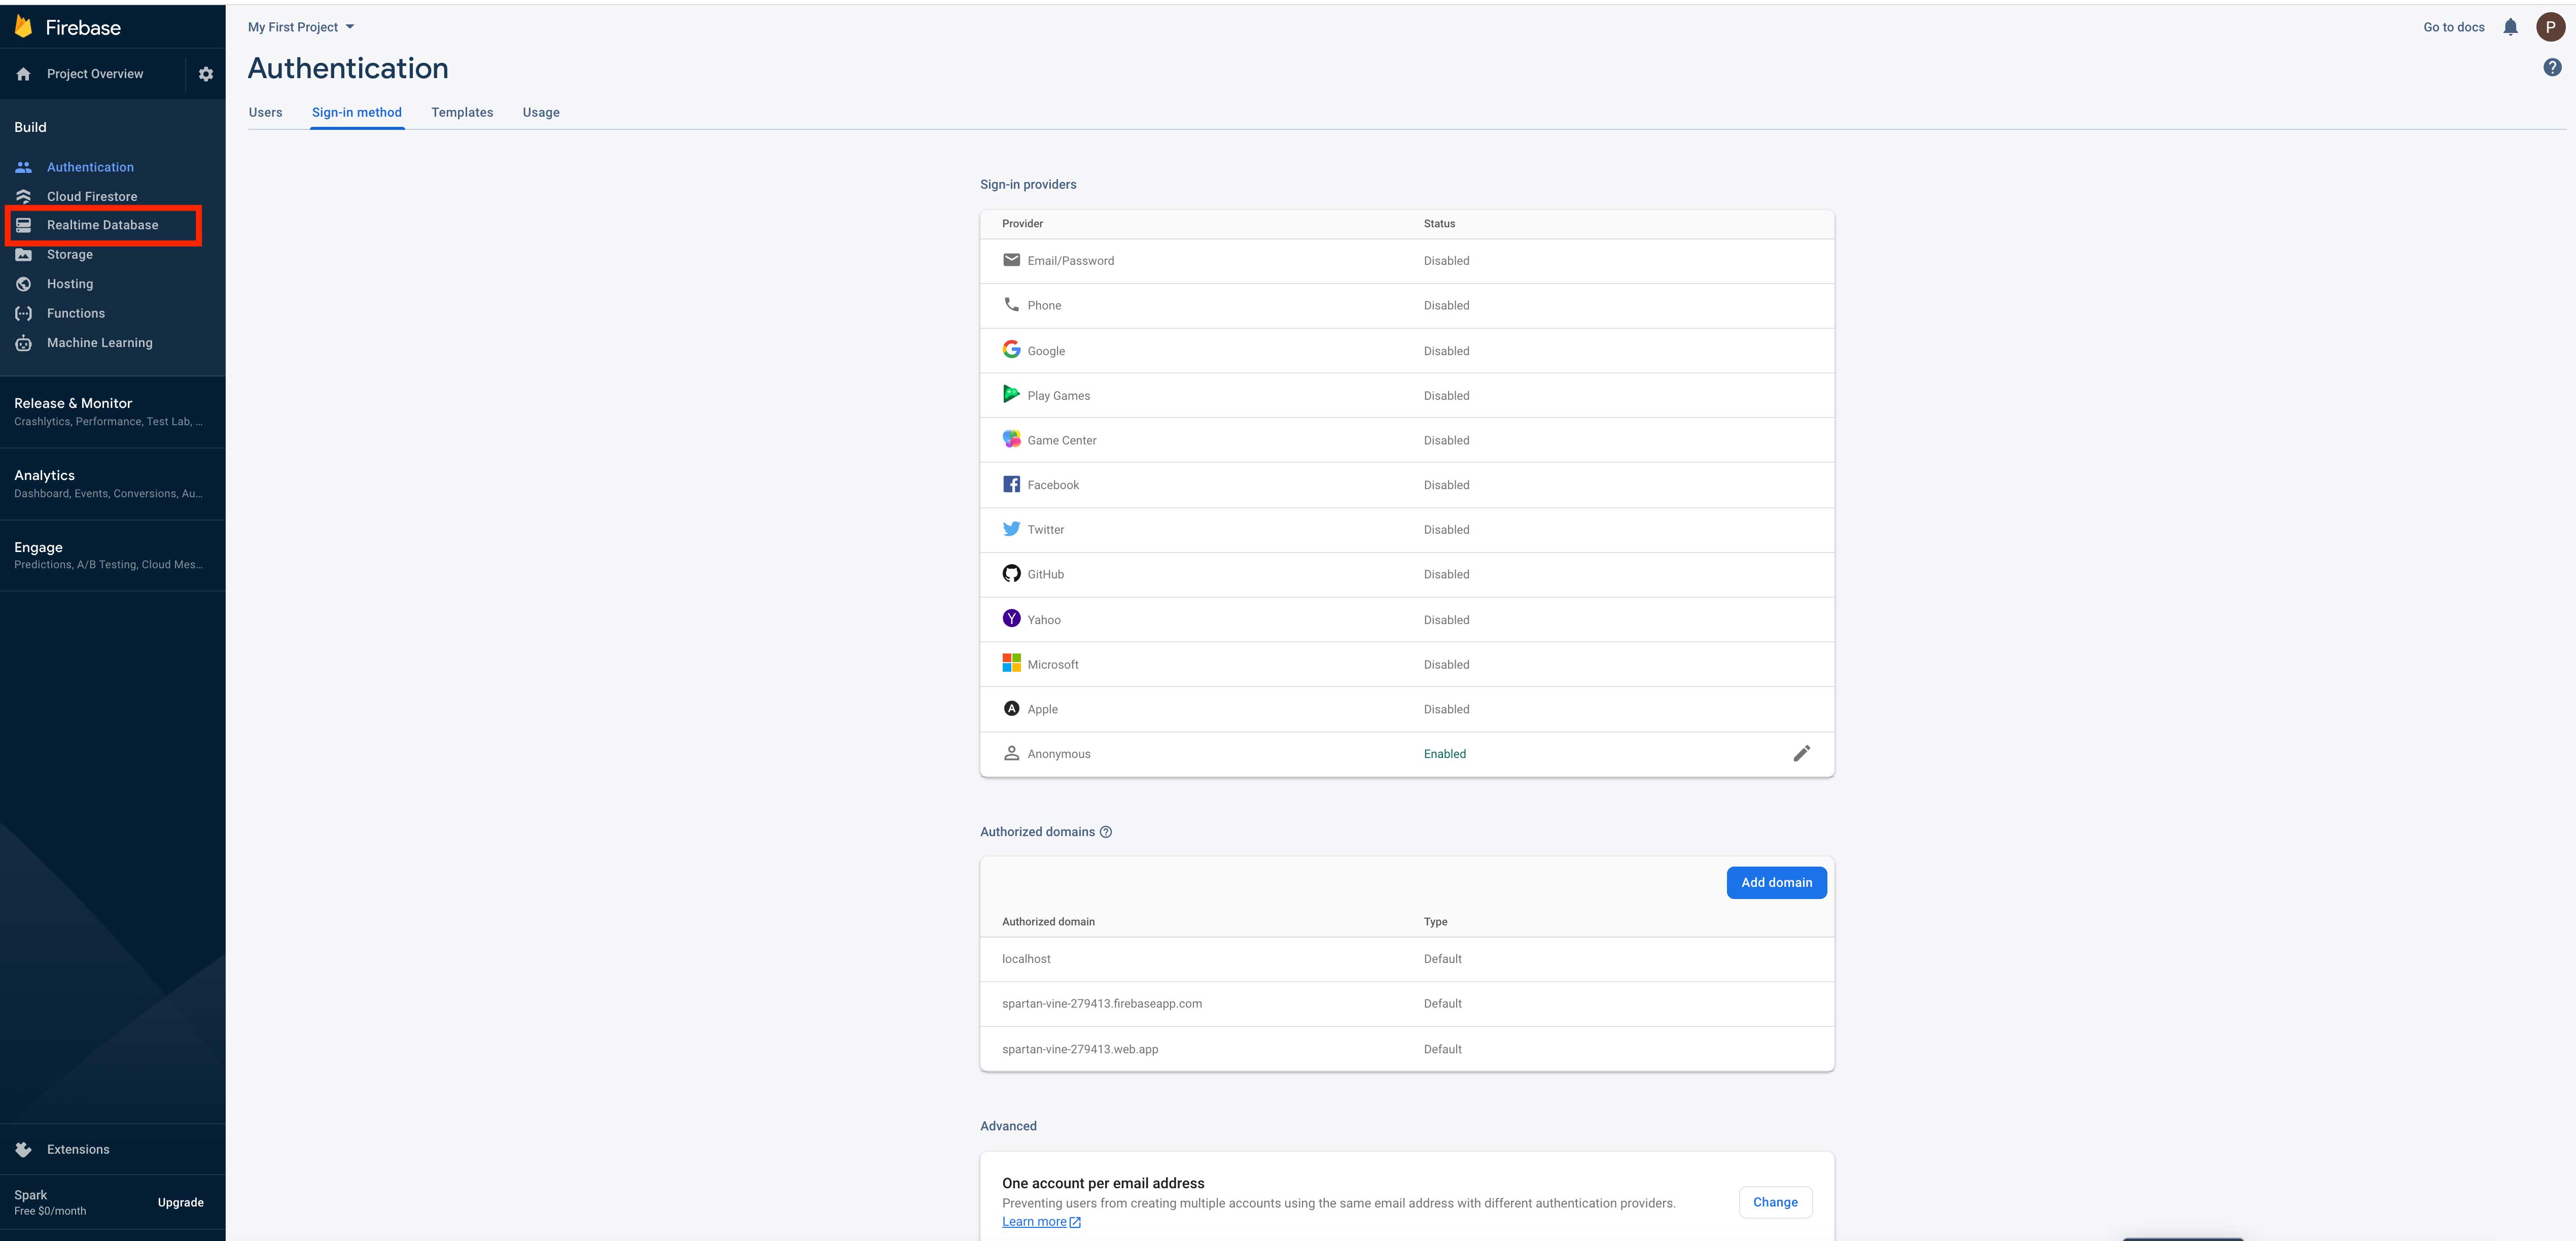 Step 23 : Click on Create database
 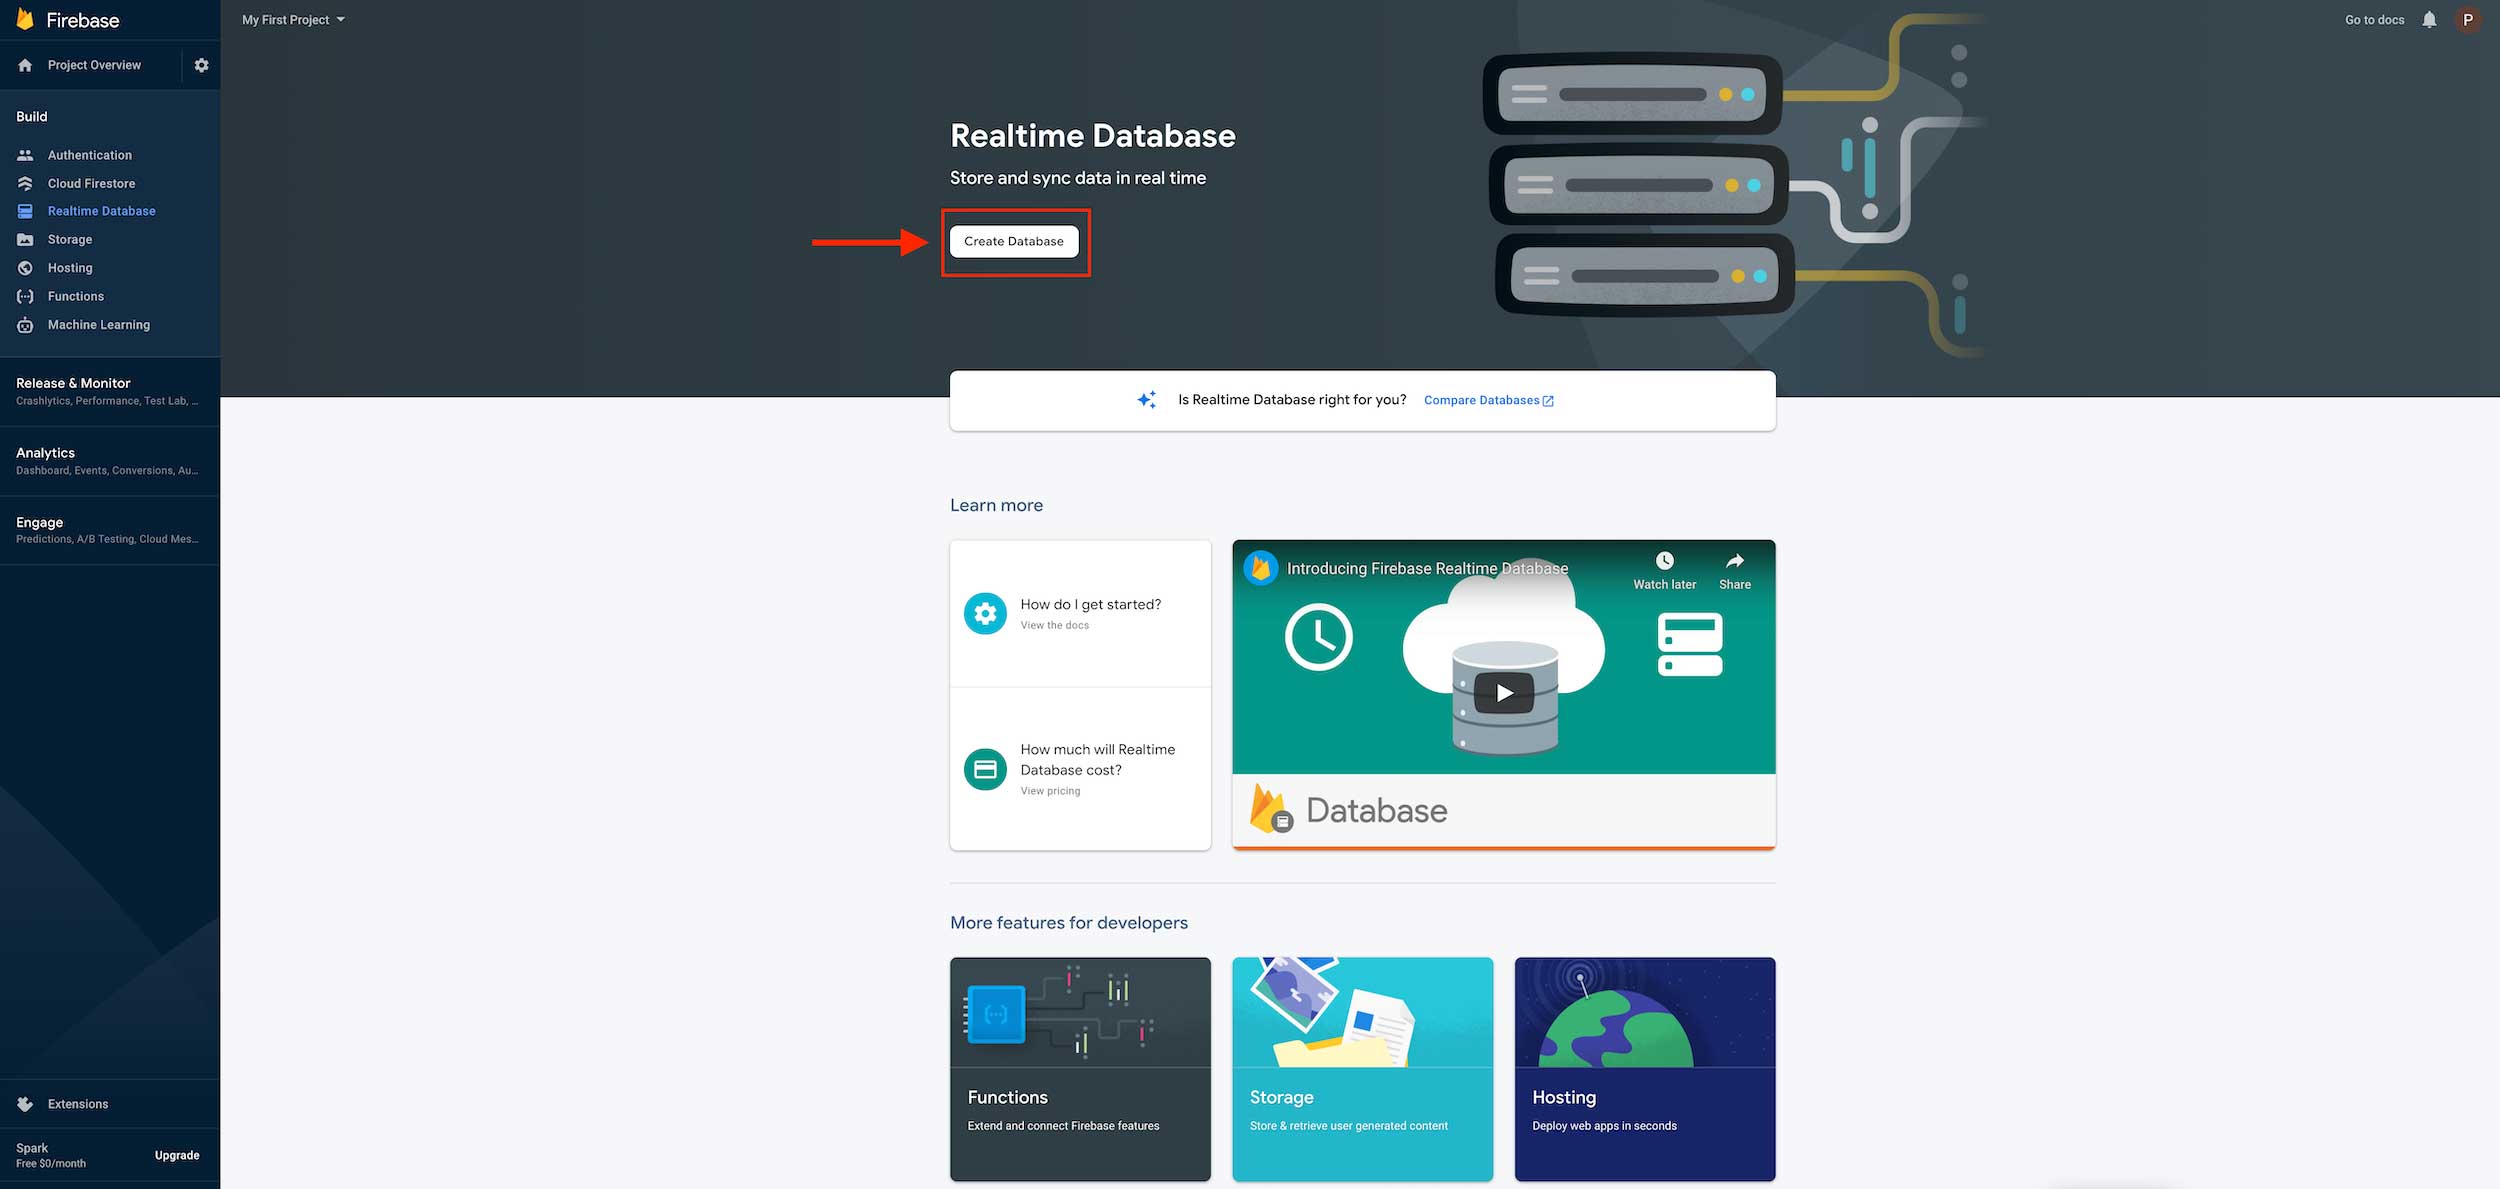 Step 24 : Select Realtime database location by click on dropdown menu and after select click on next
 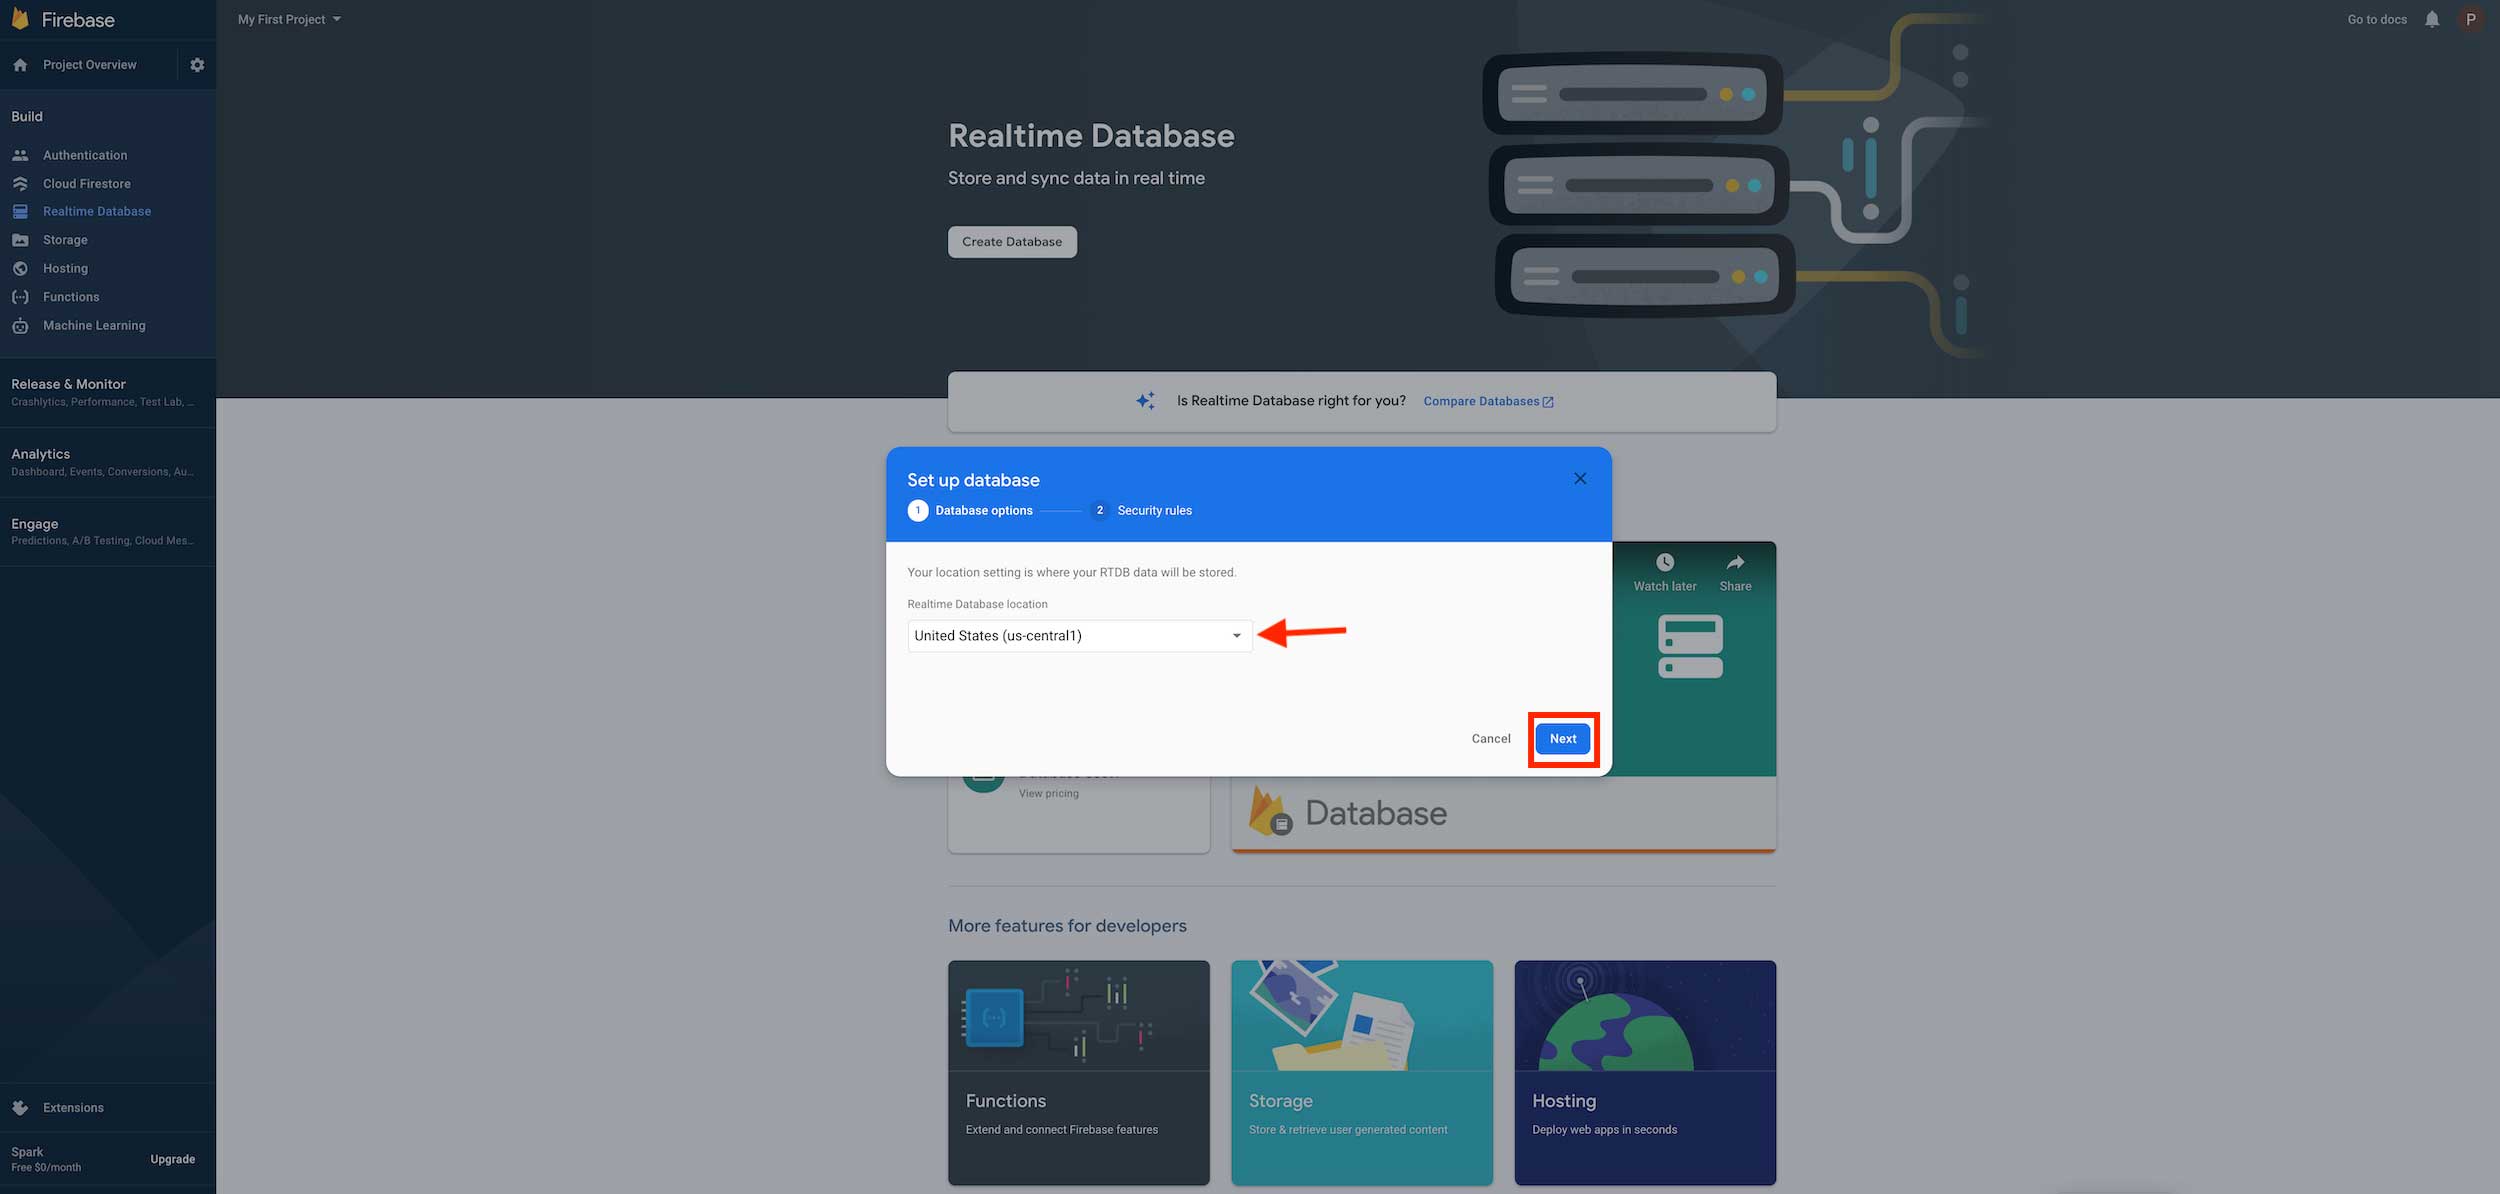 Step 25 : Click on Enable
 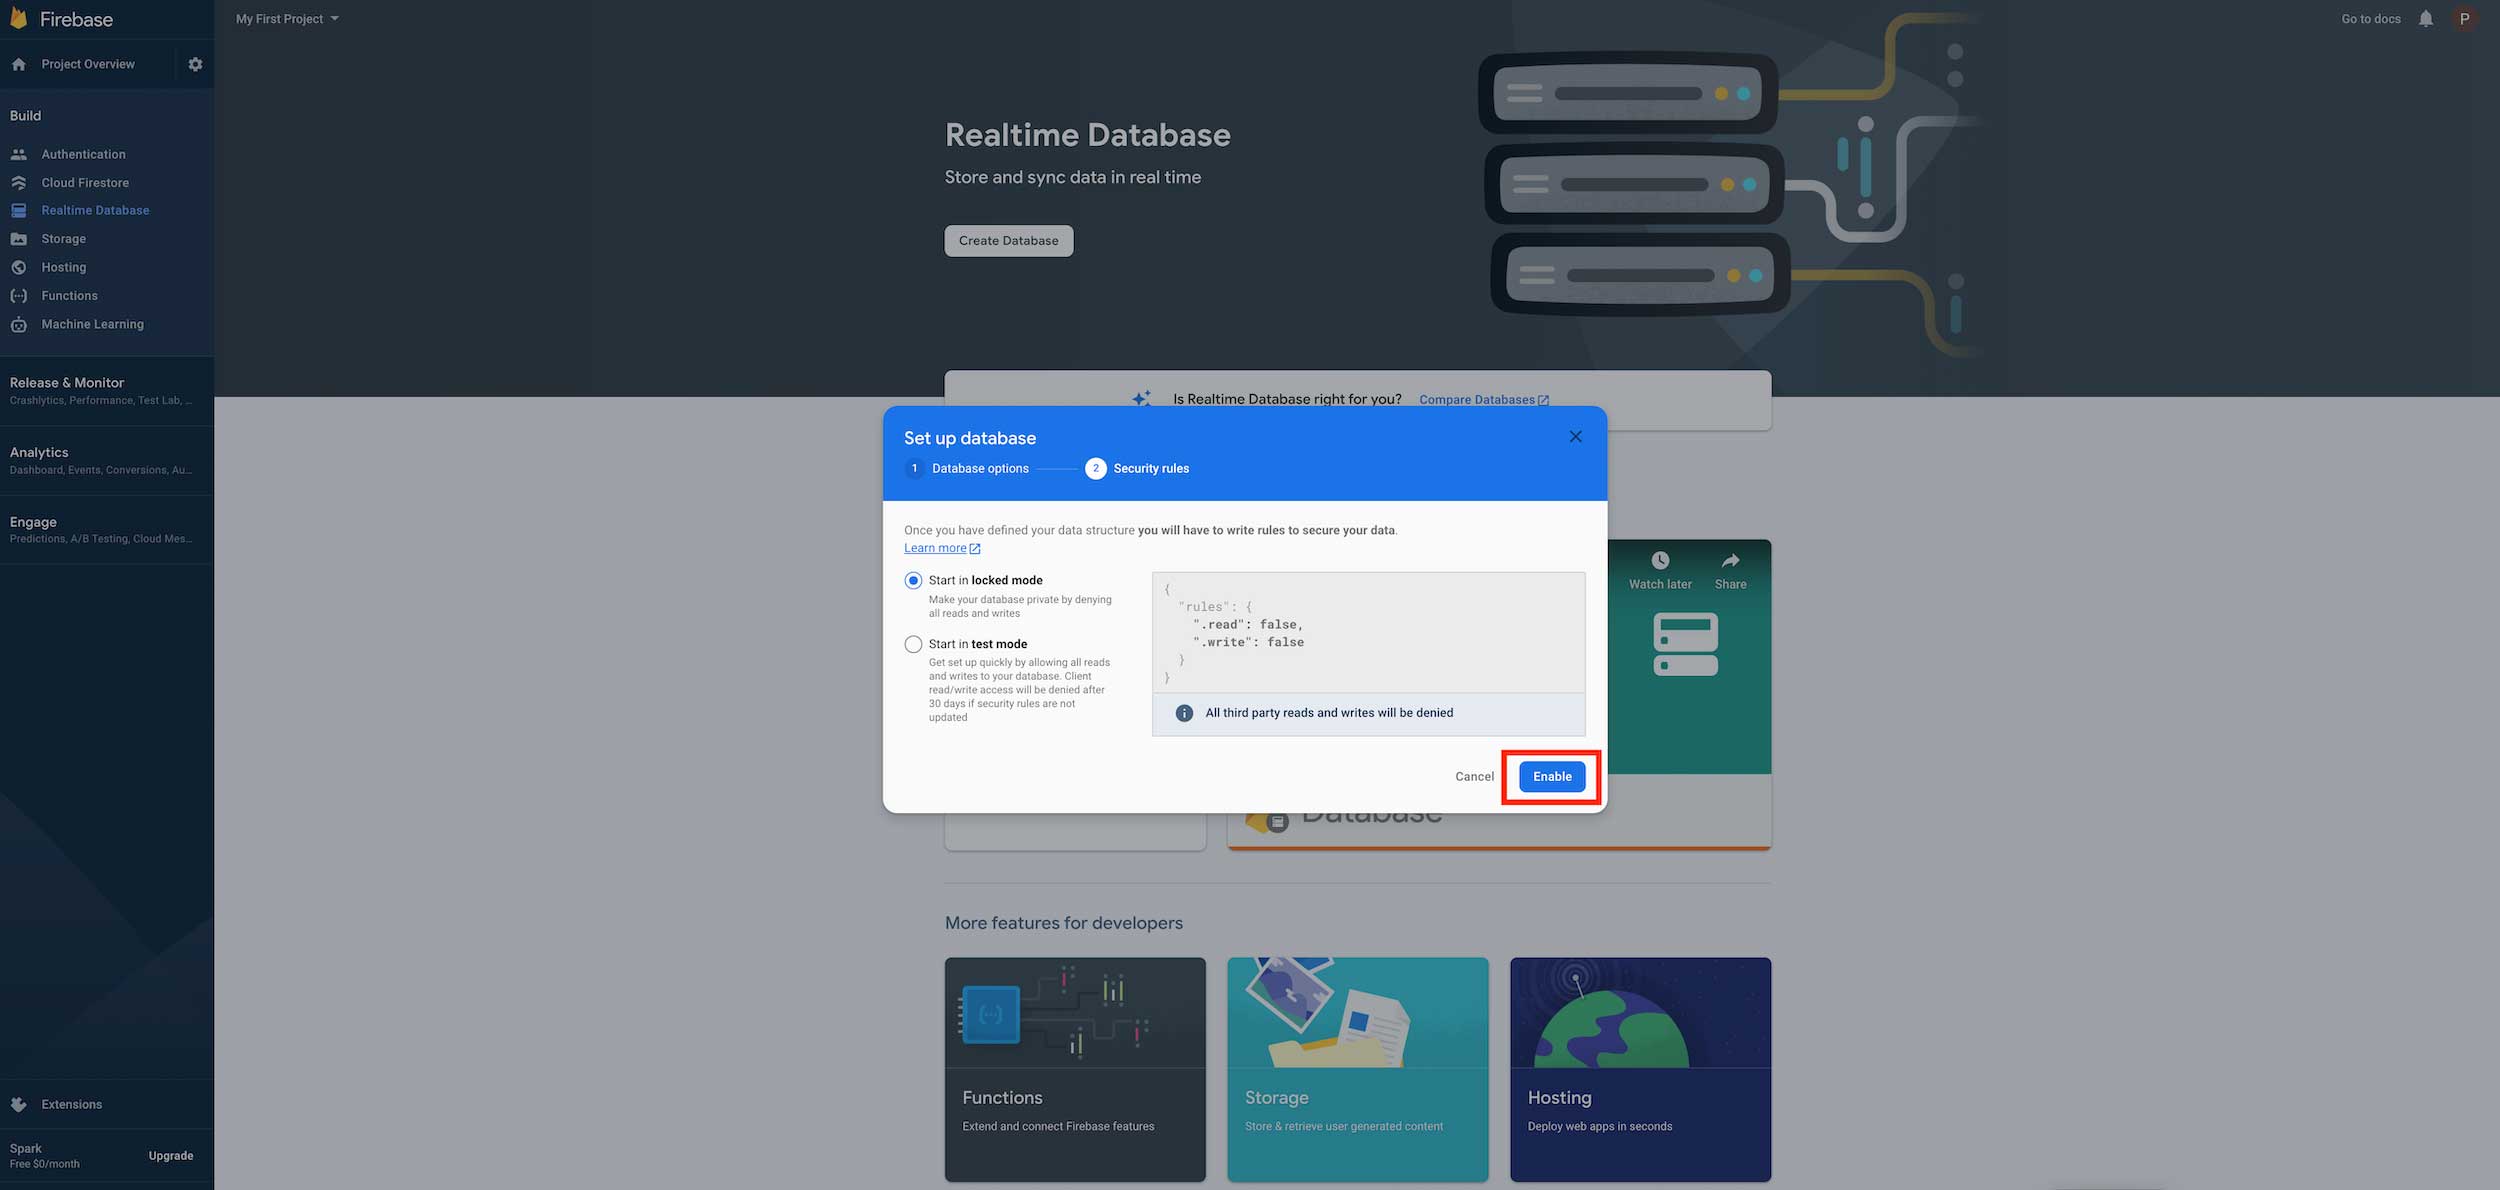 Step 26 : Click on Rules
 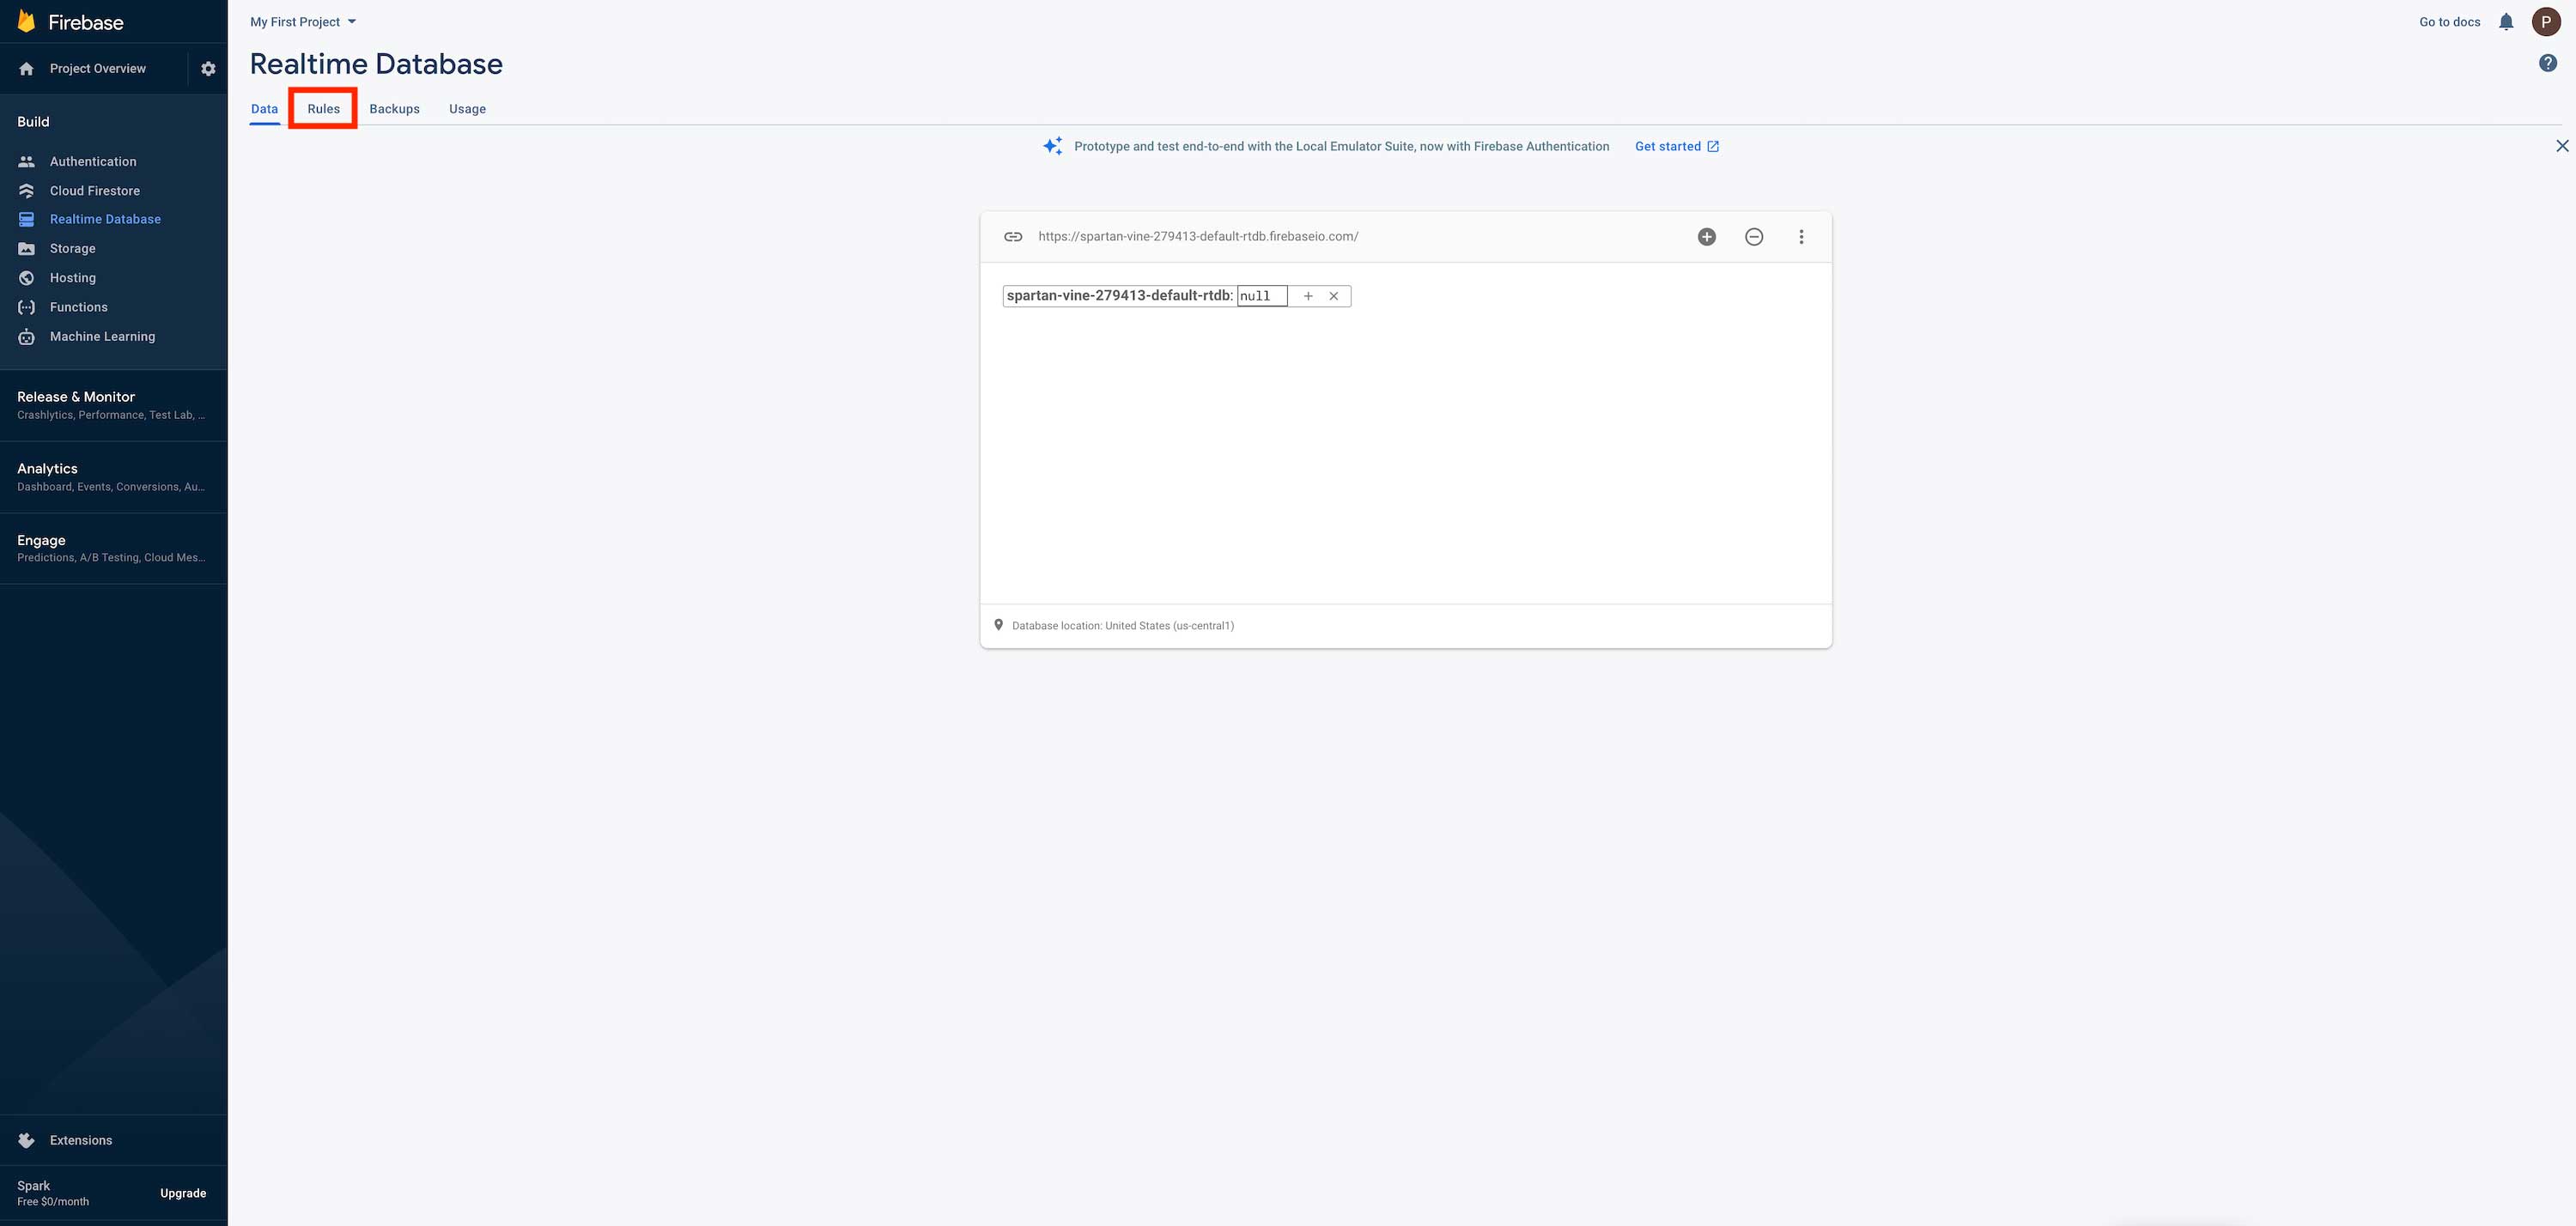 Step 27 : Delete the entire code
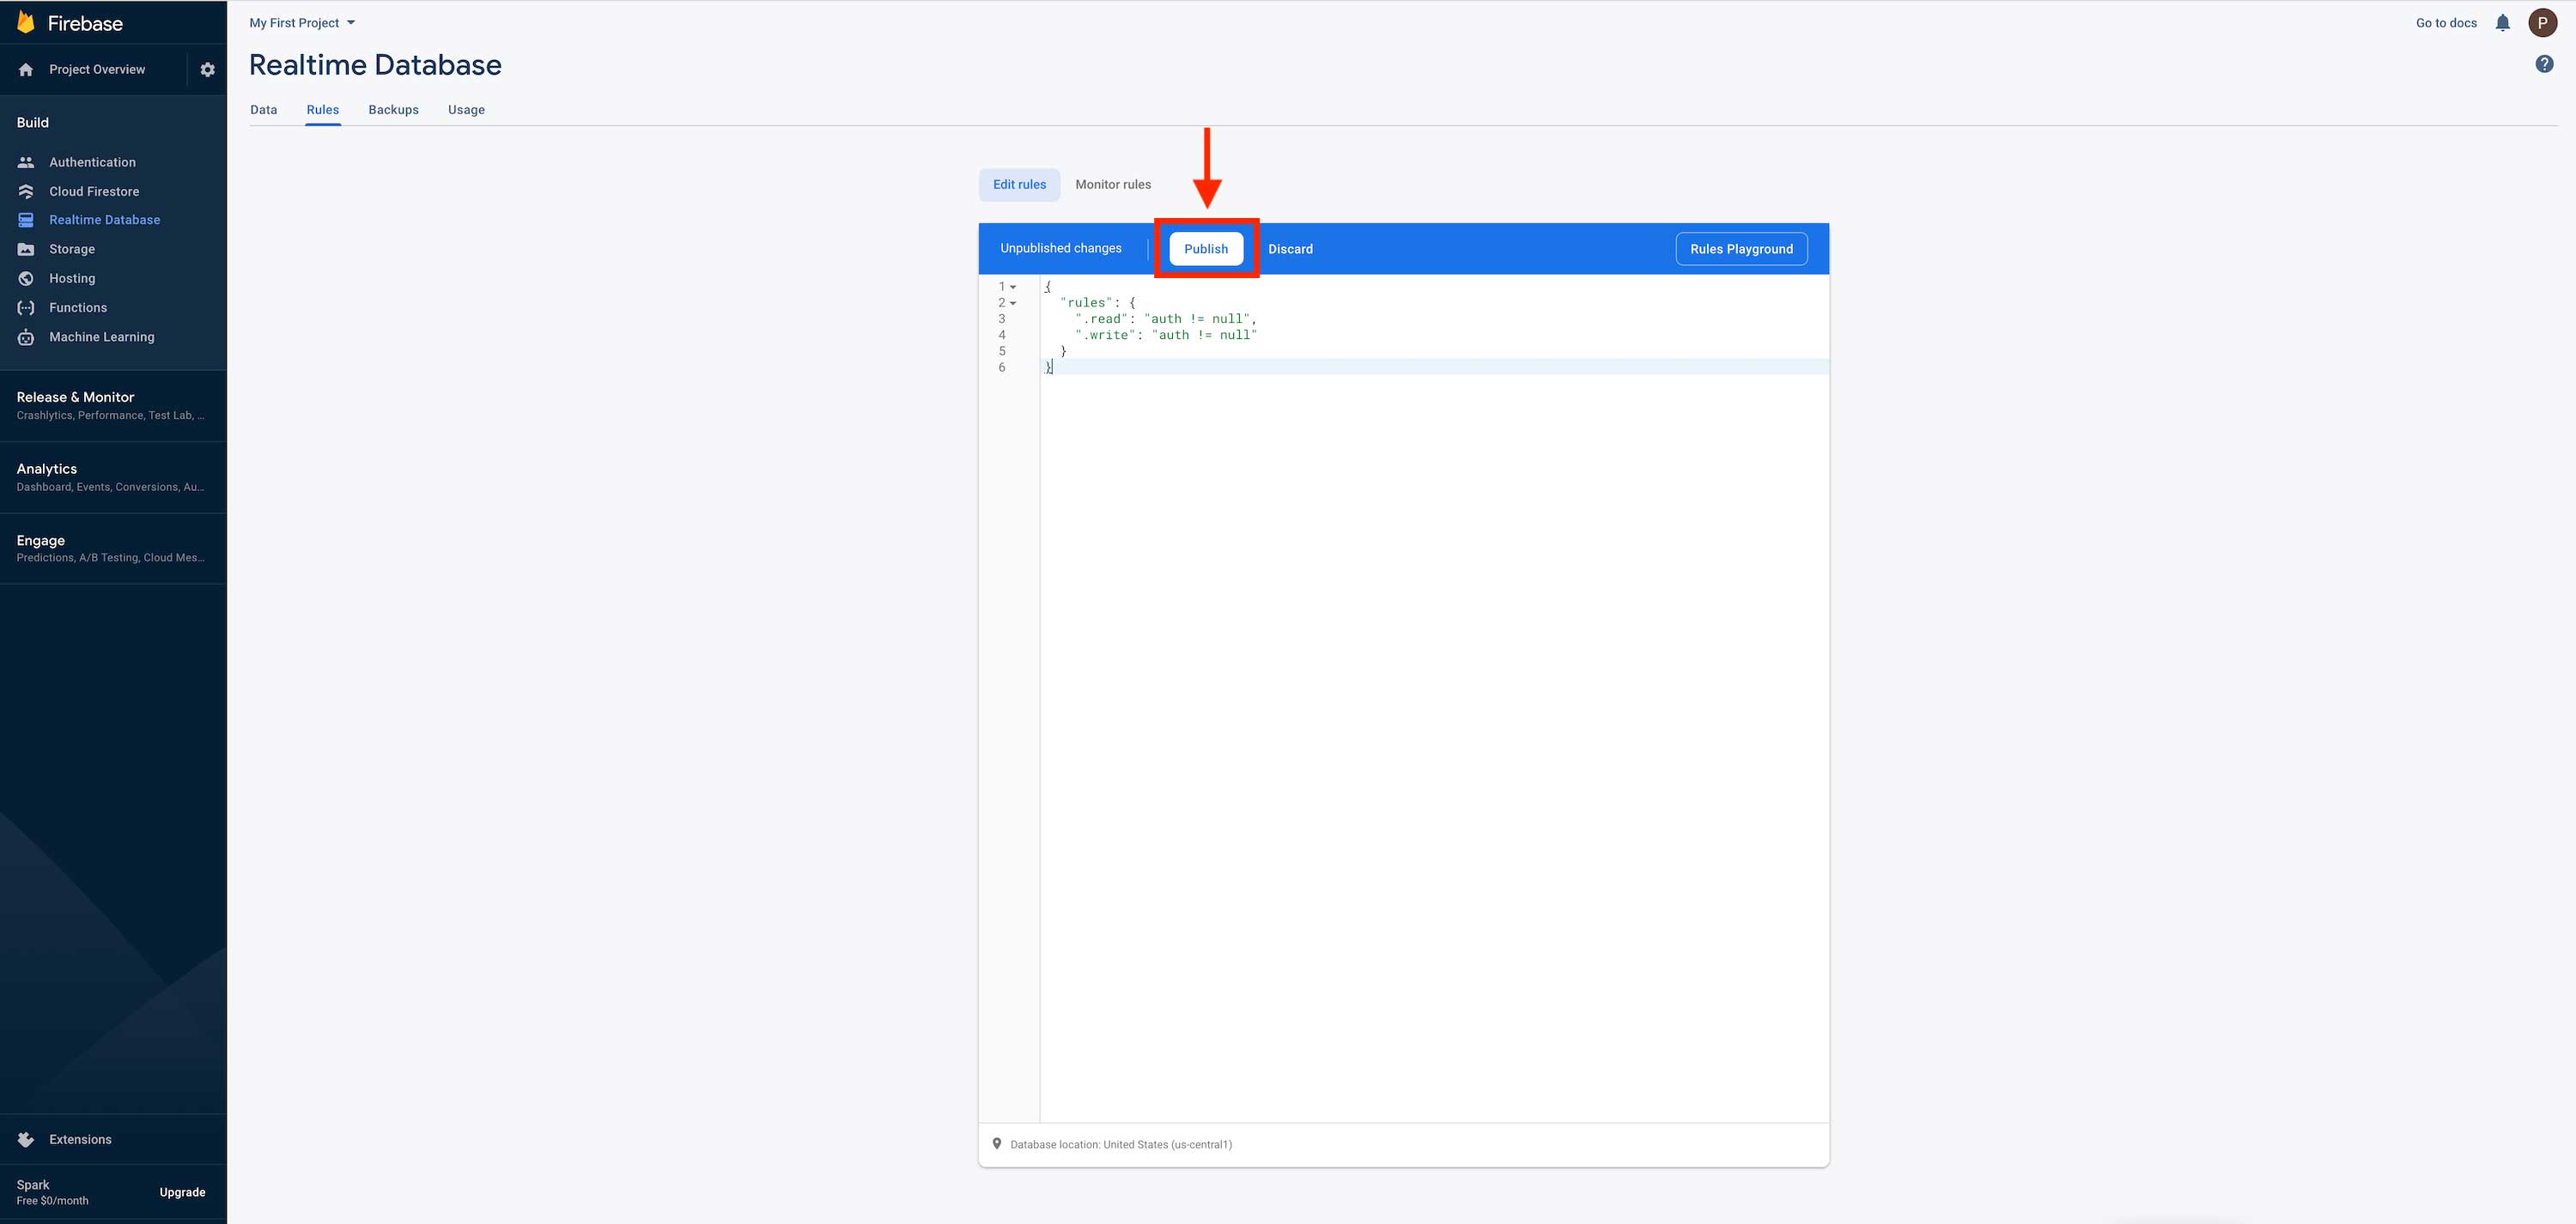
 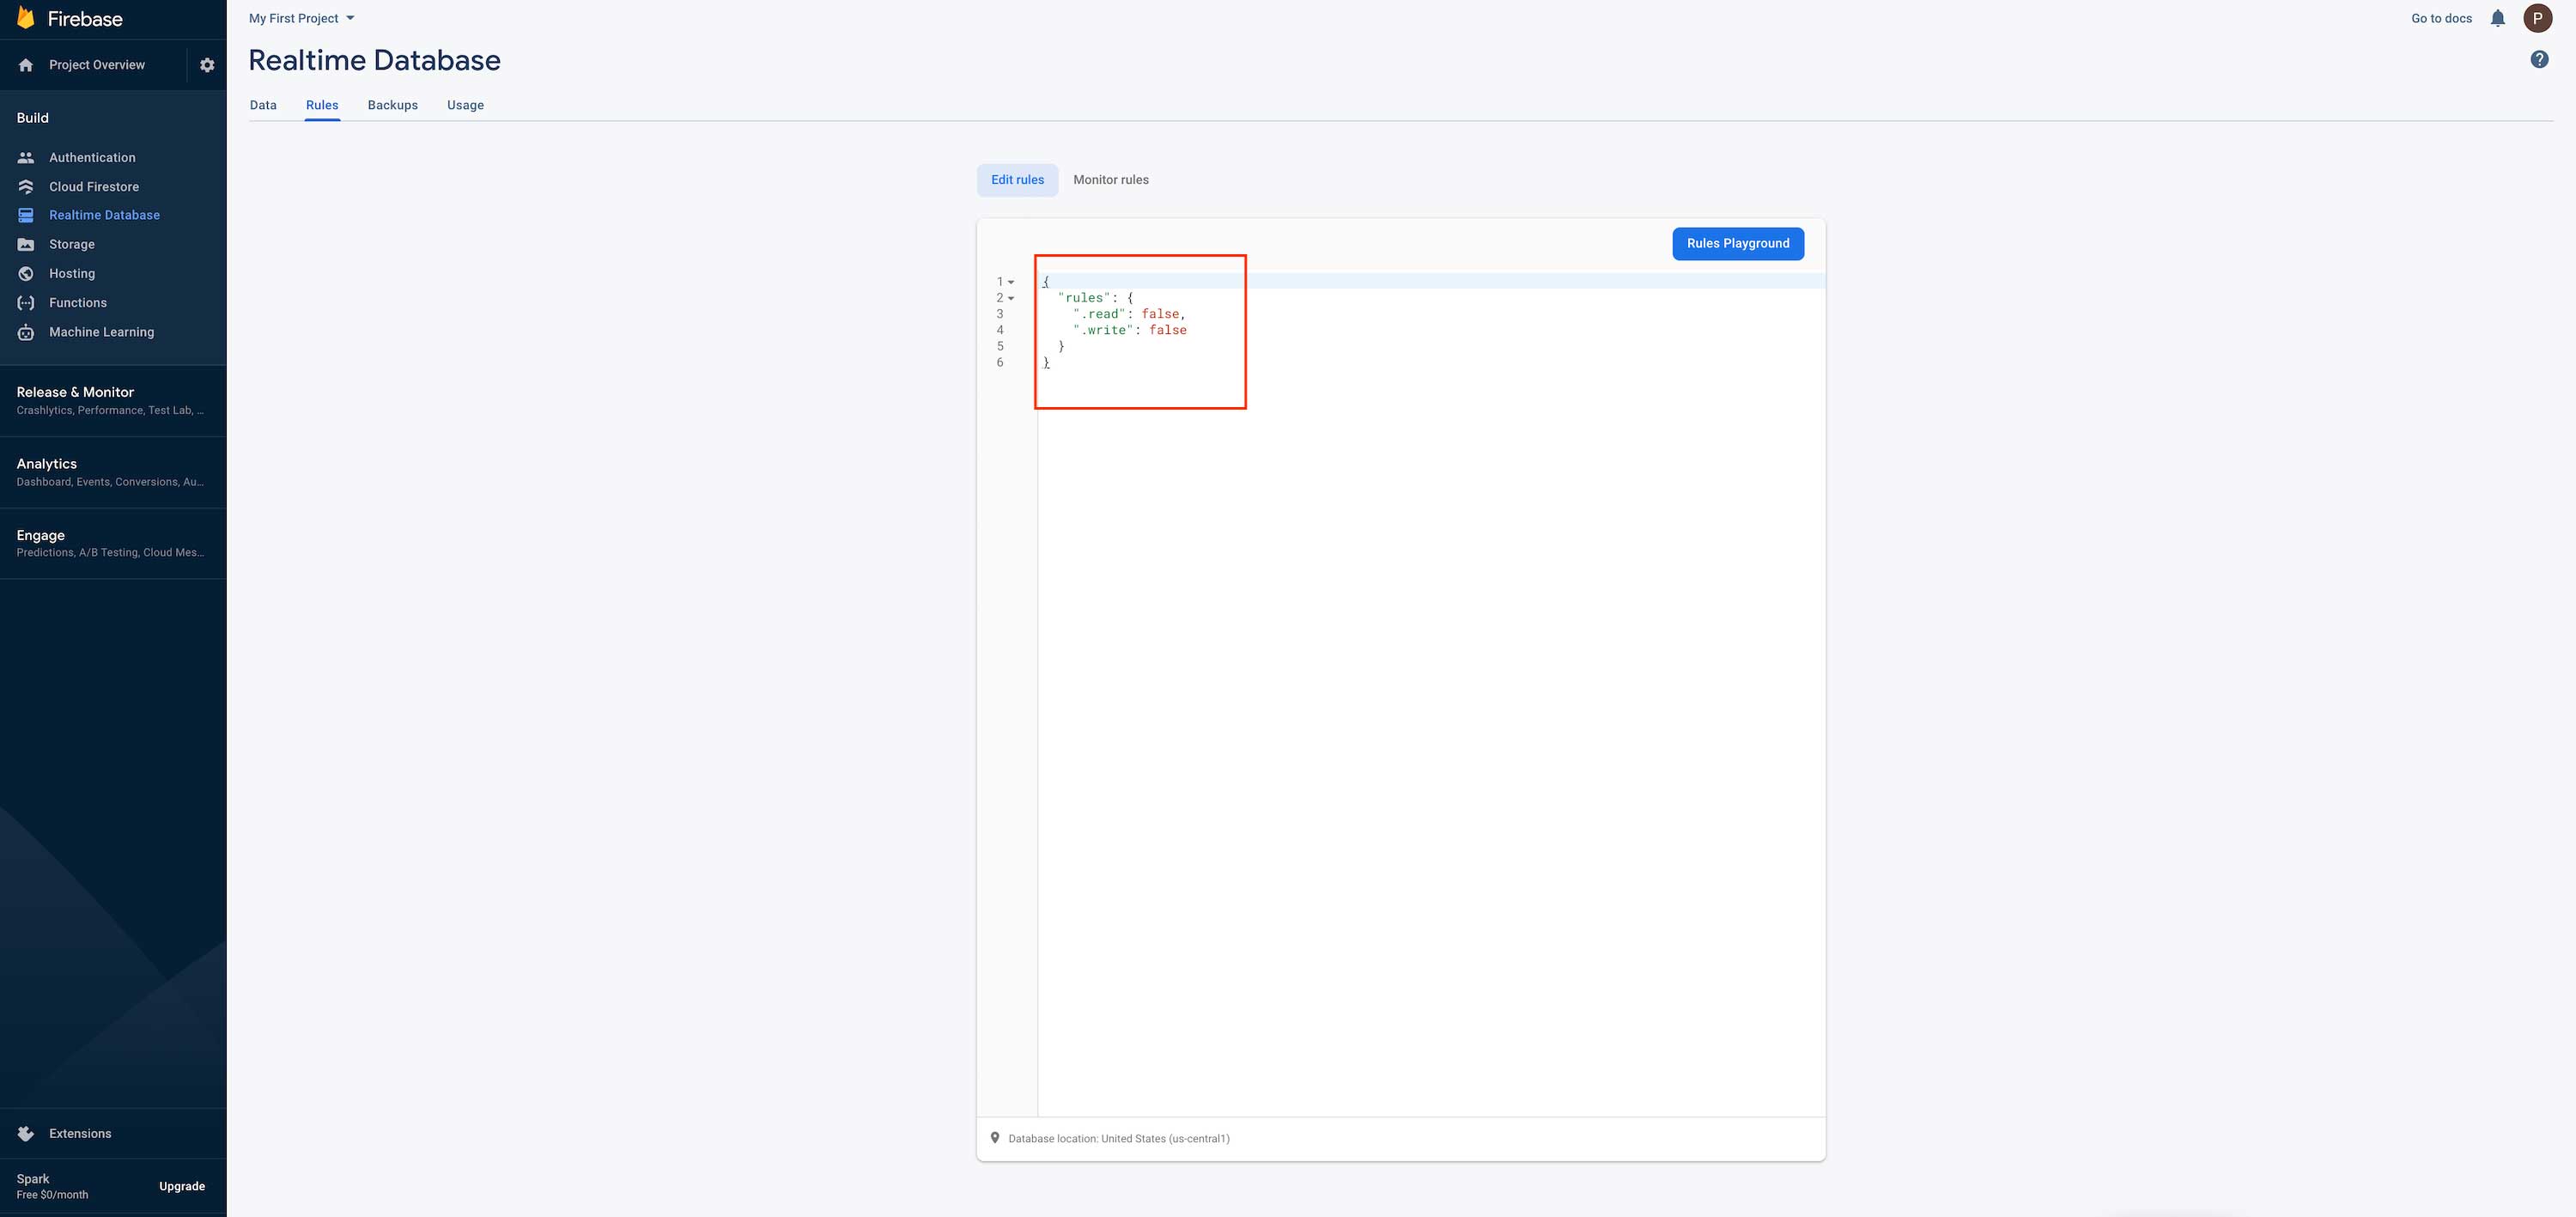 Step 28 : Now enter the following code, and click on Publish
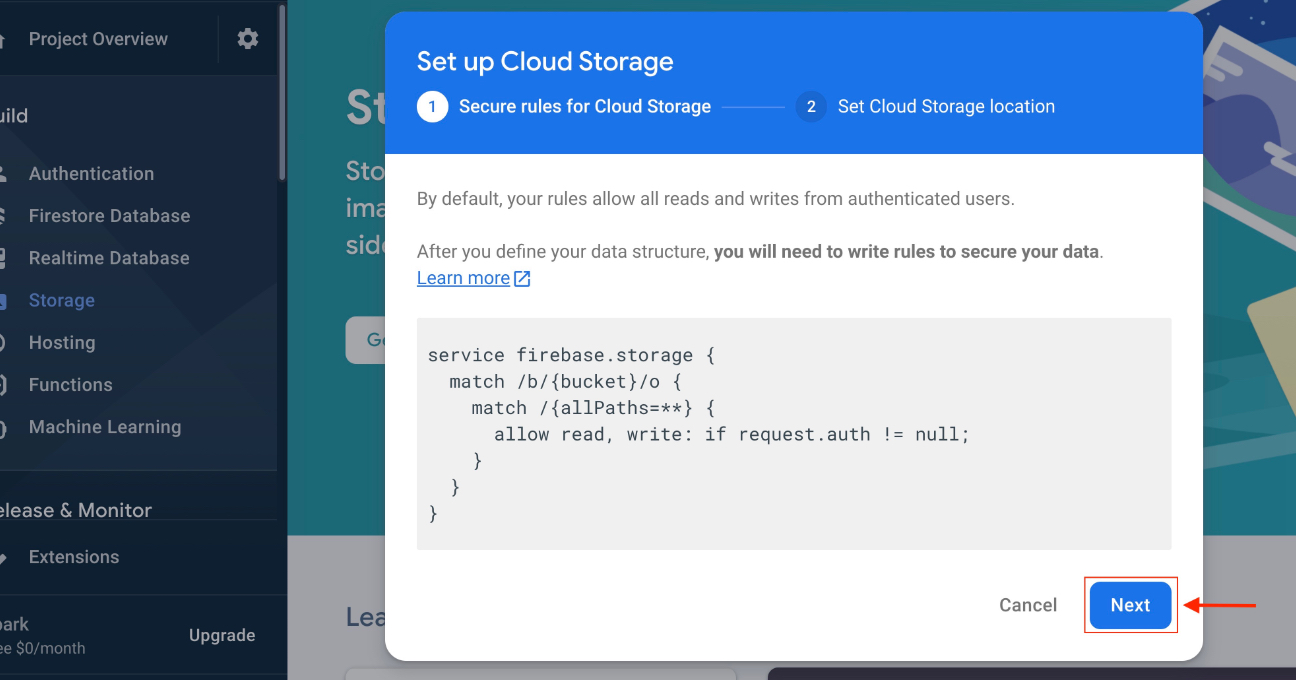
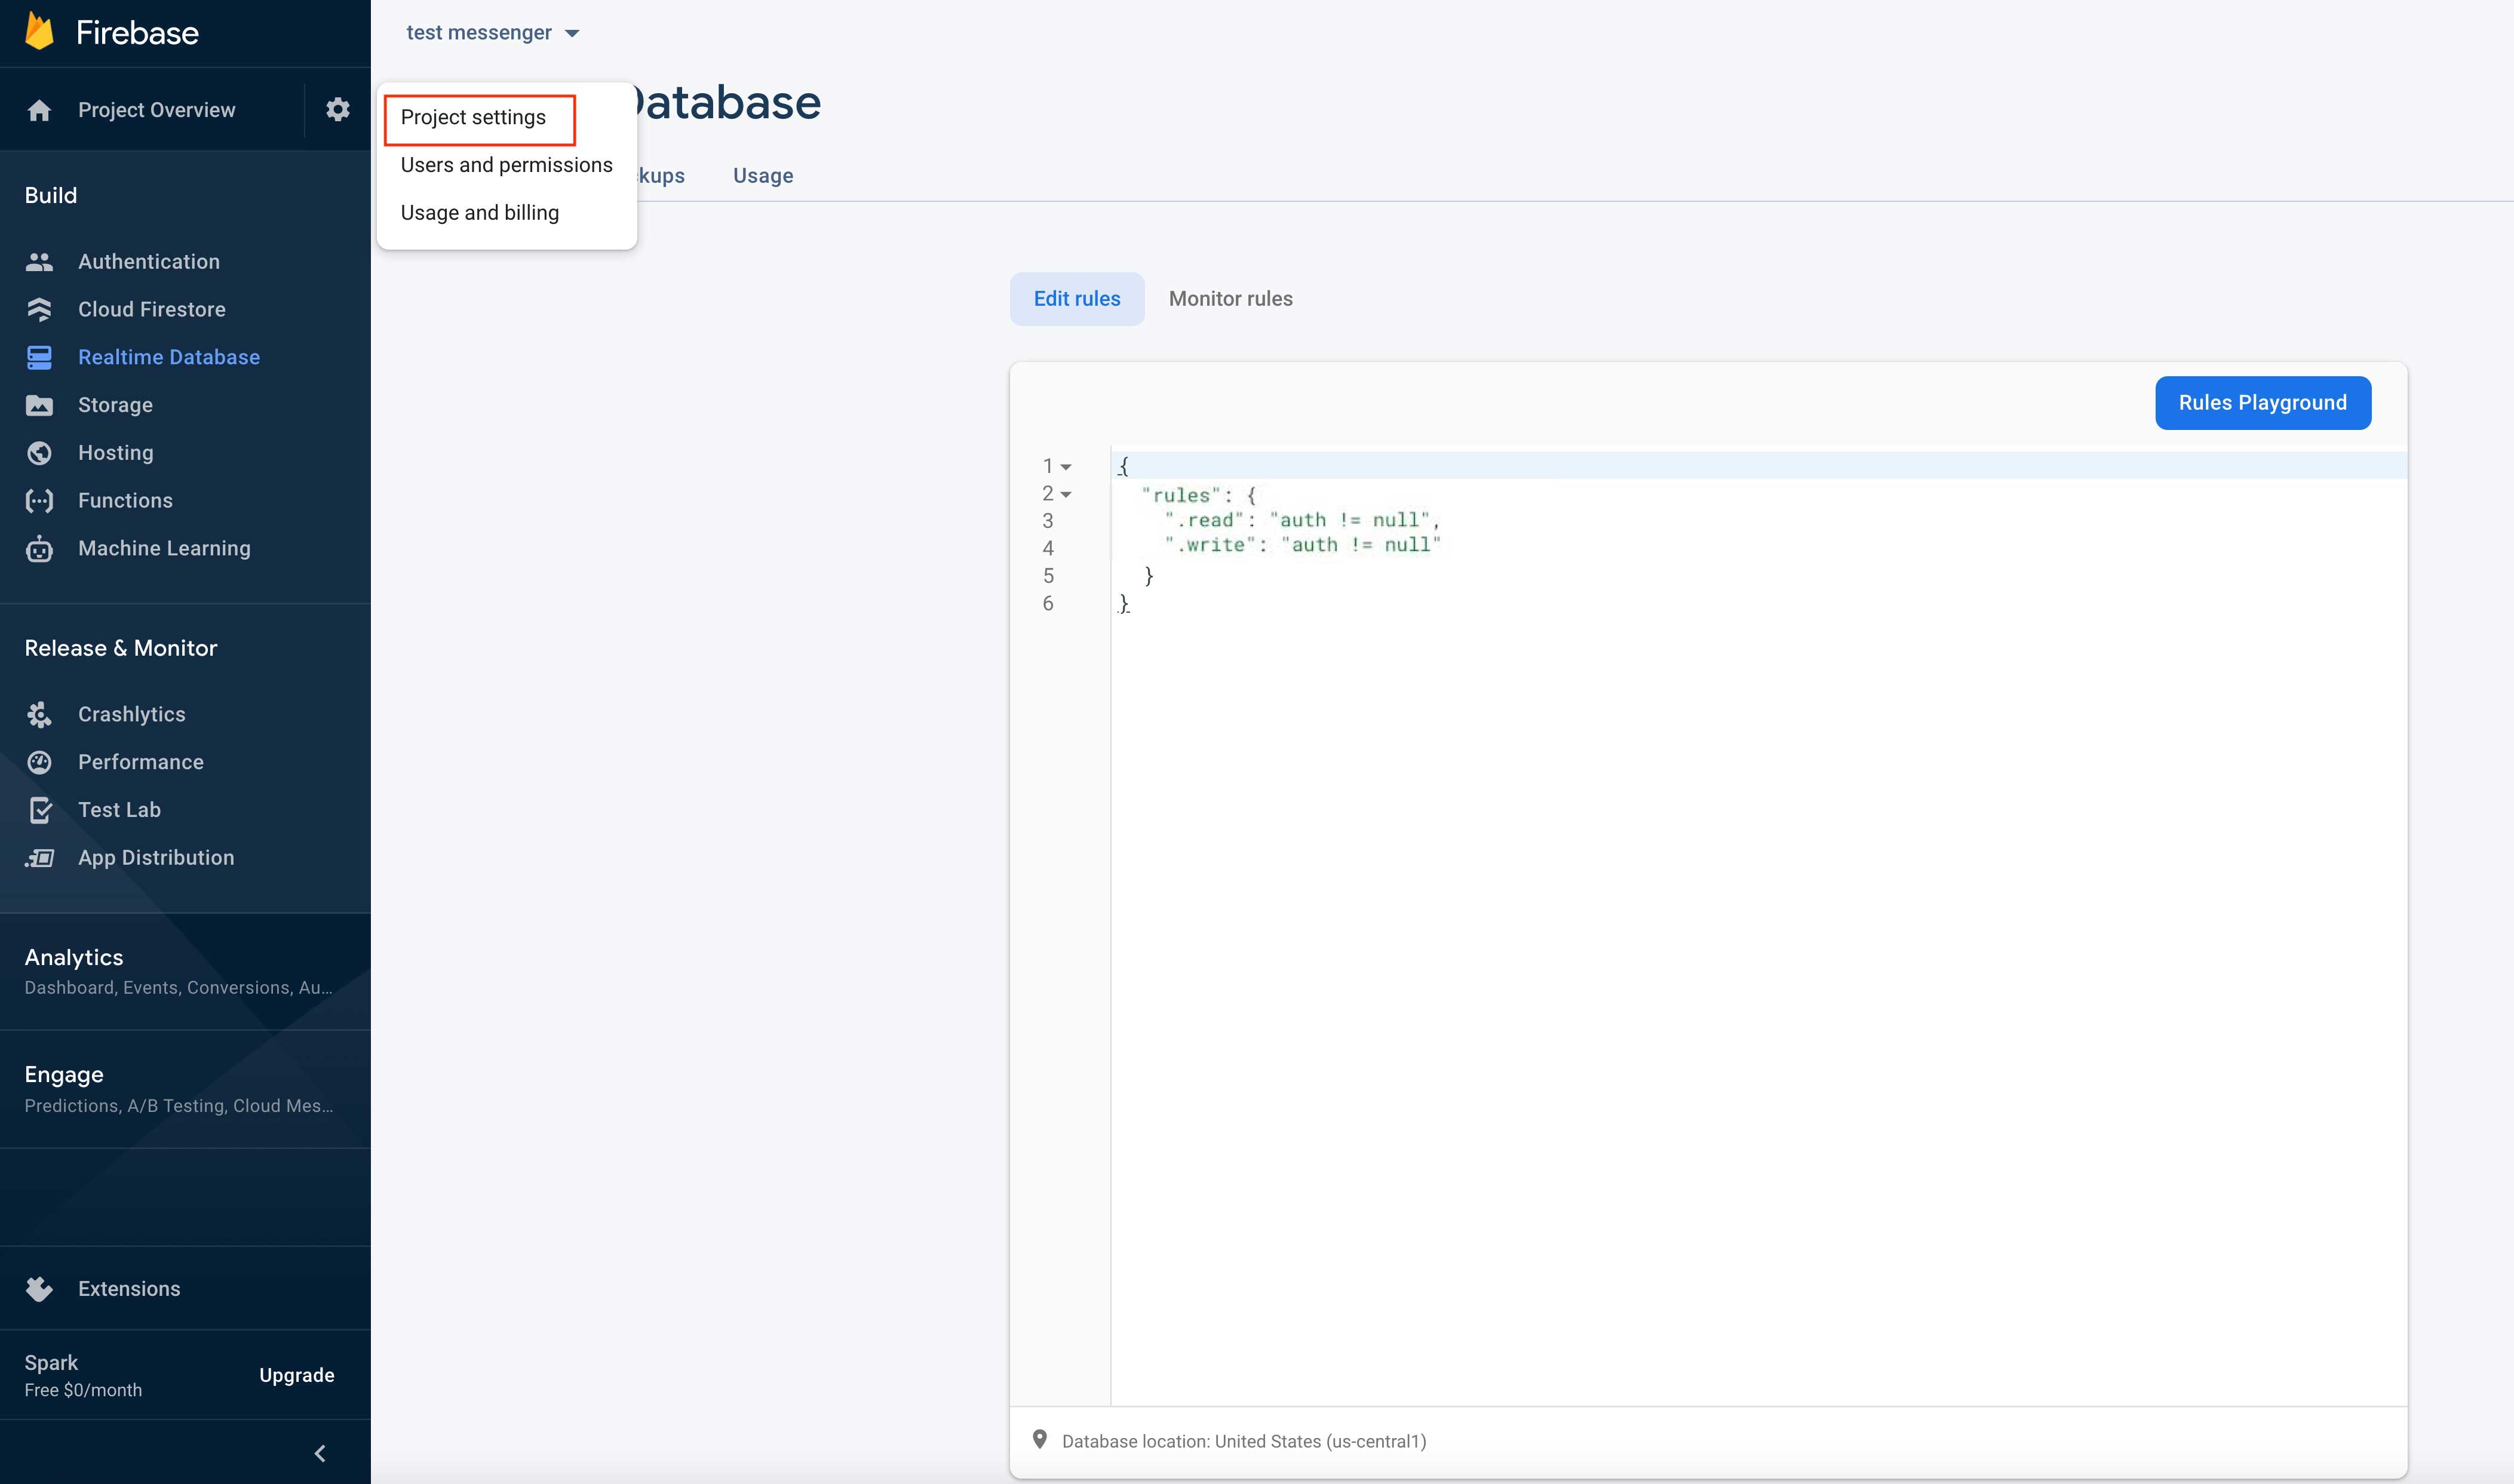
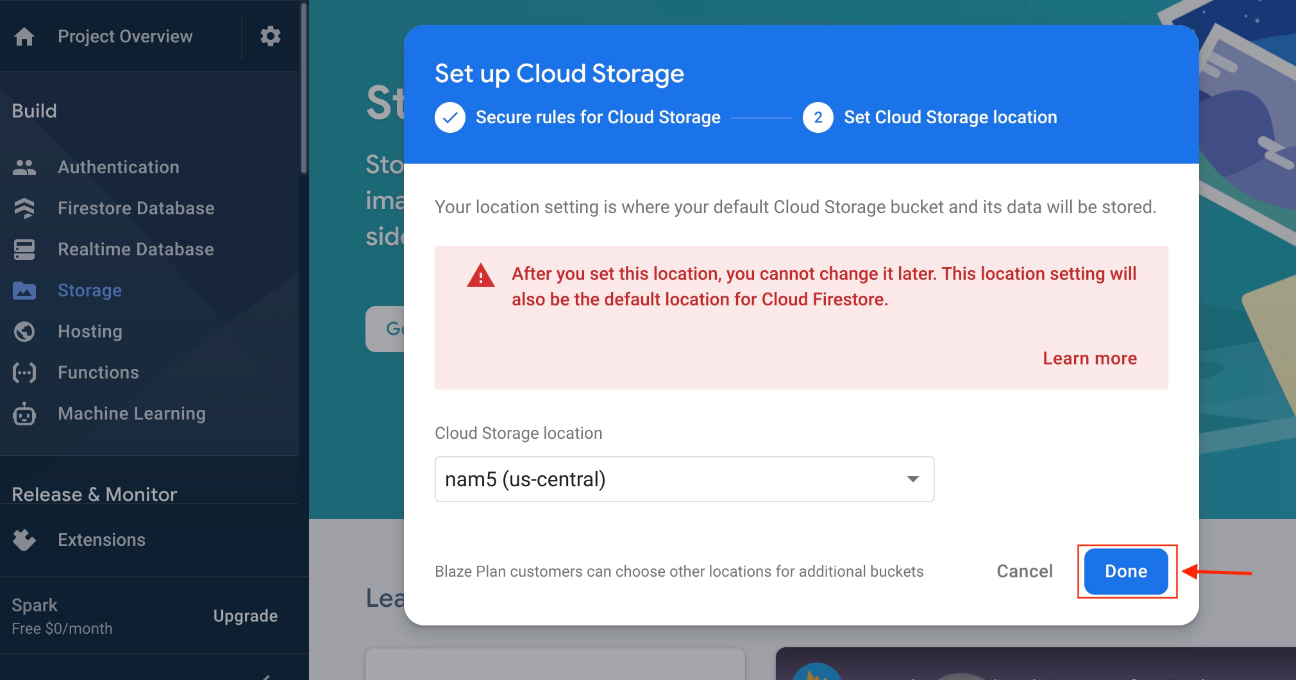
 Step 29 : Click on cog icon
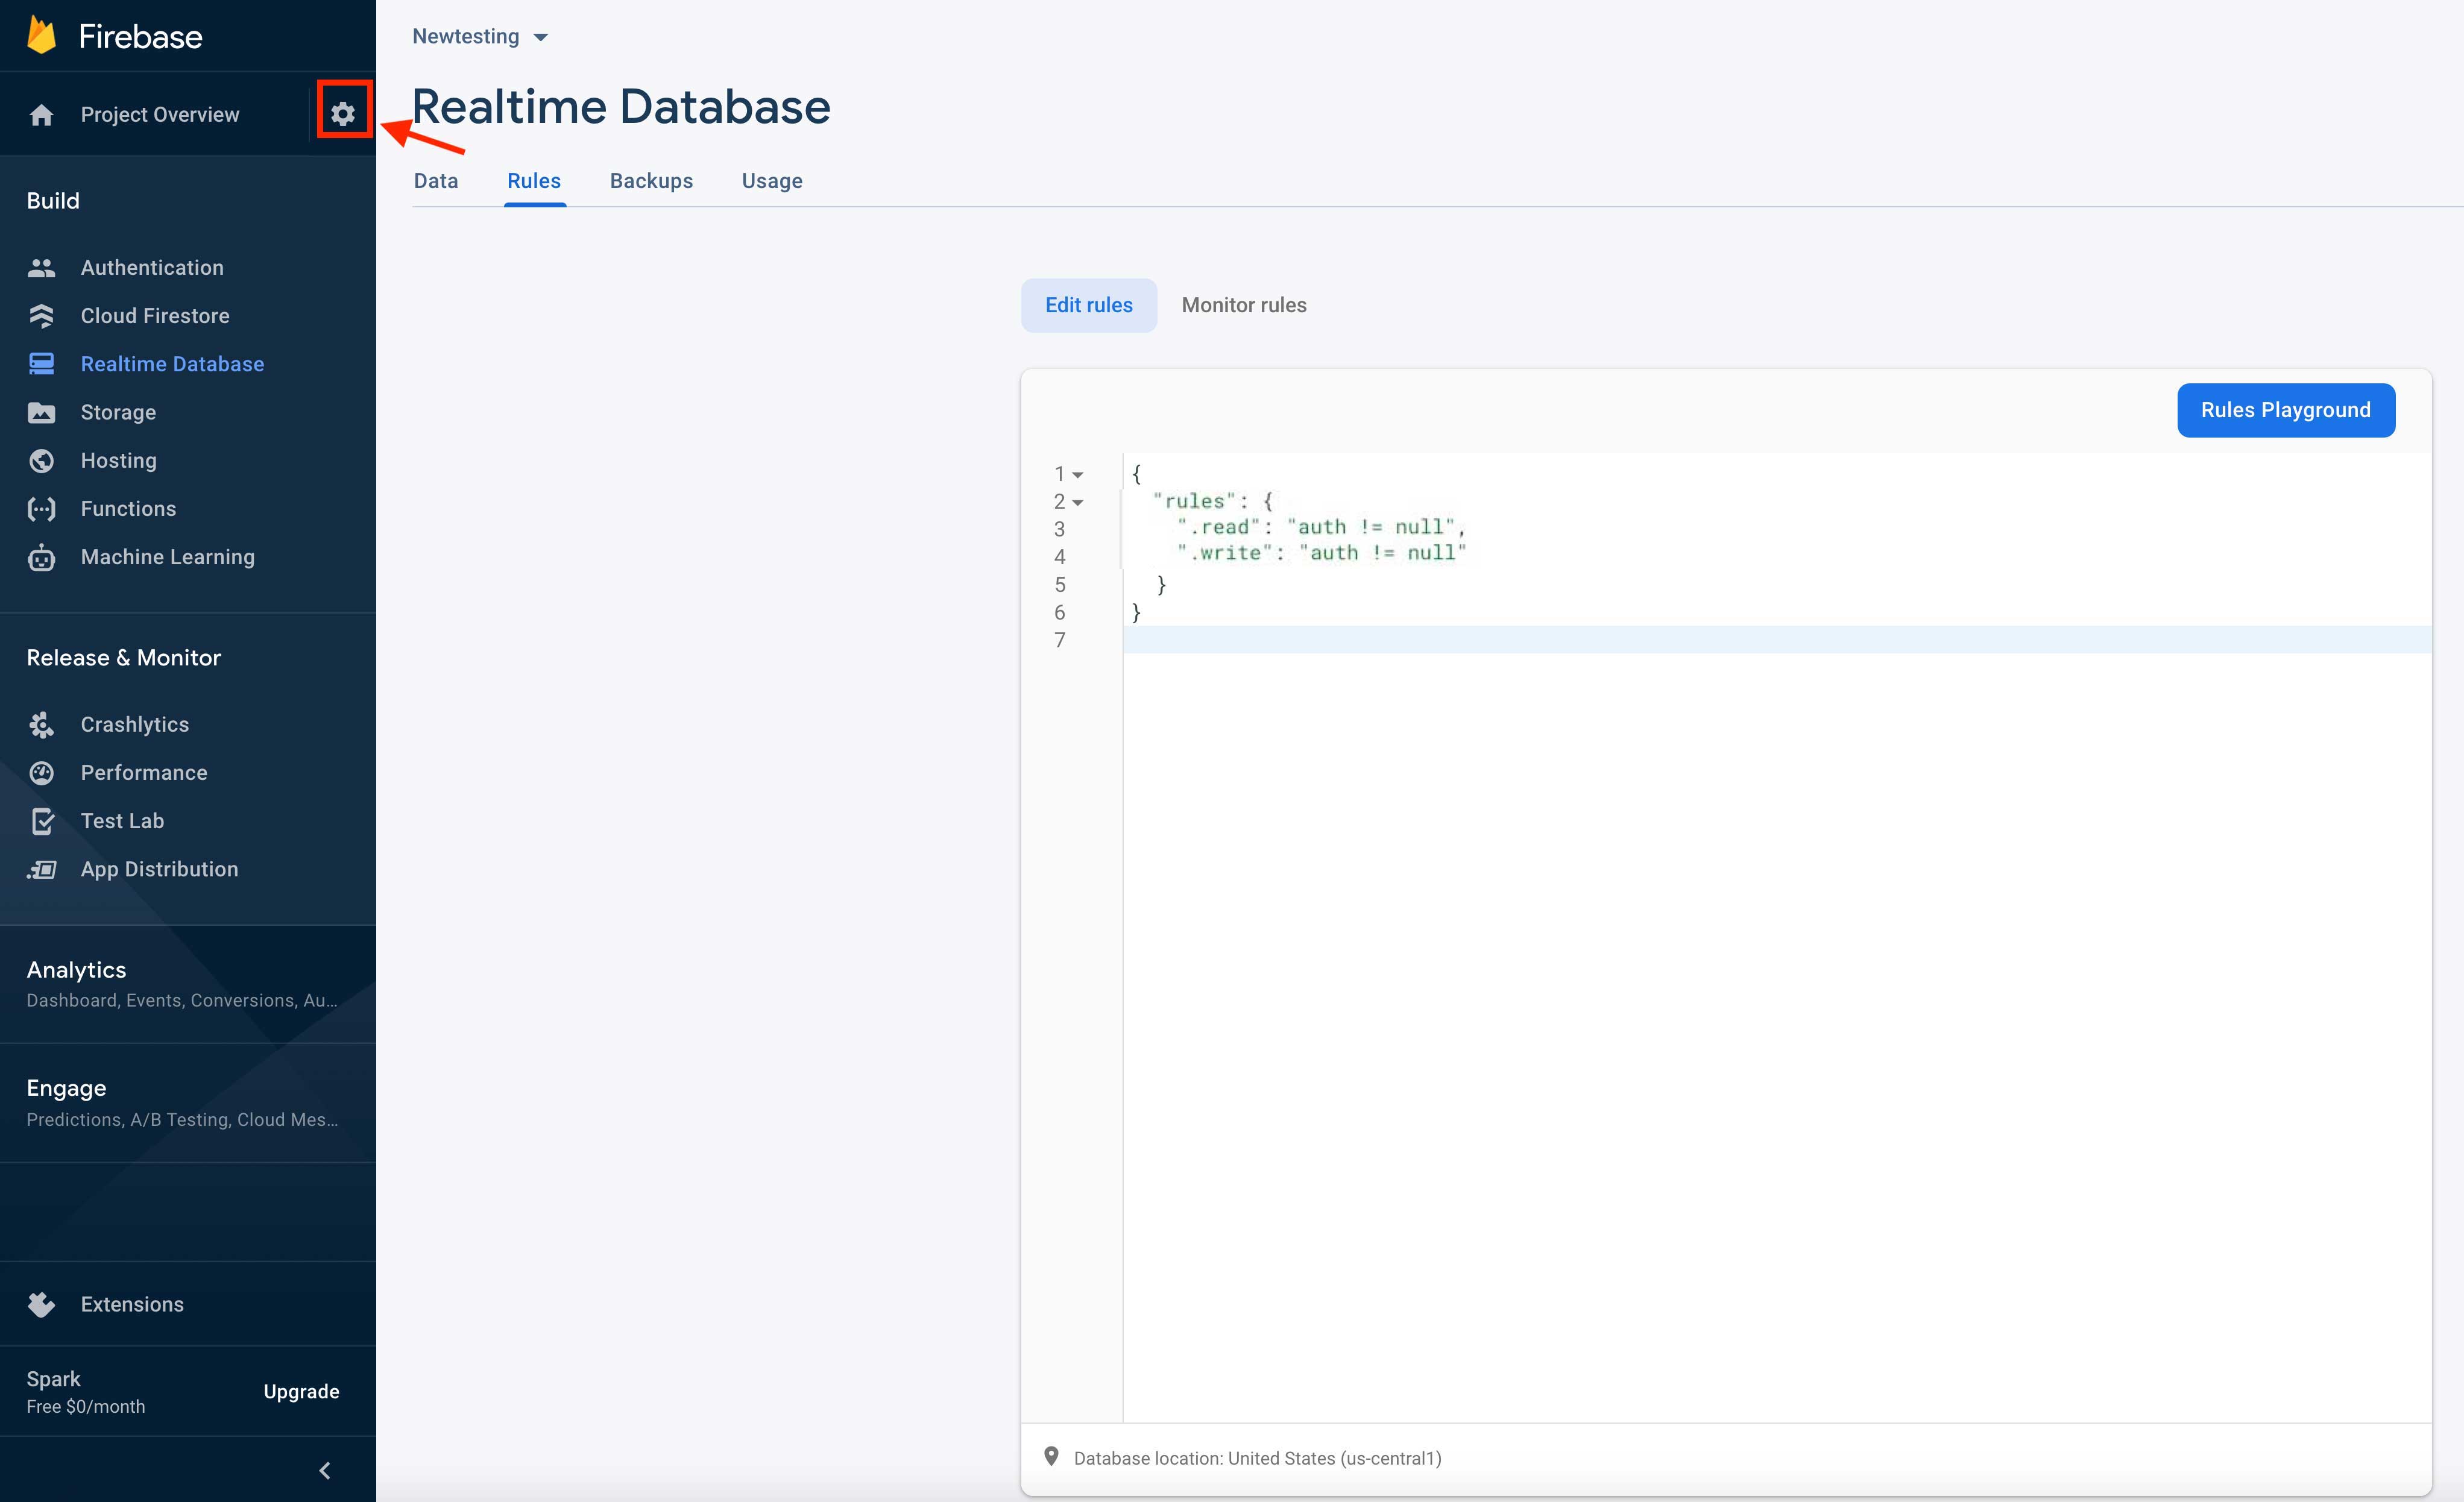
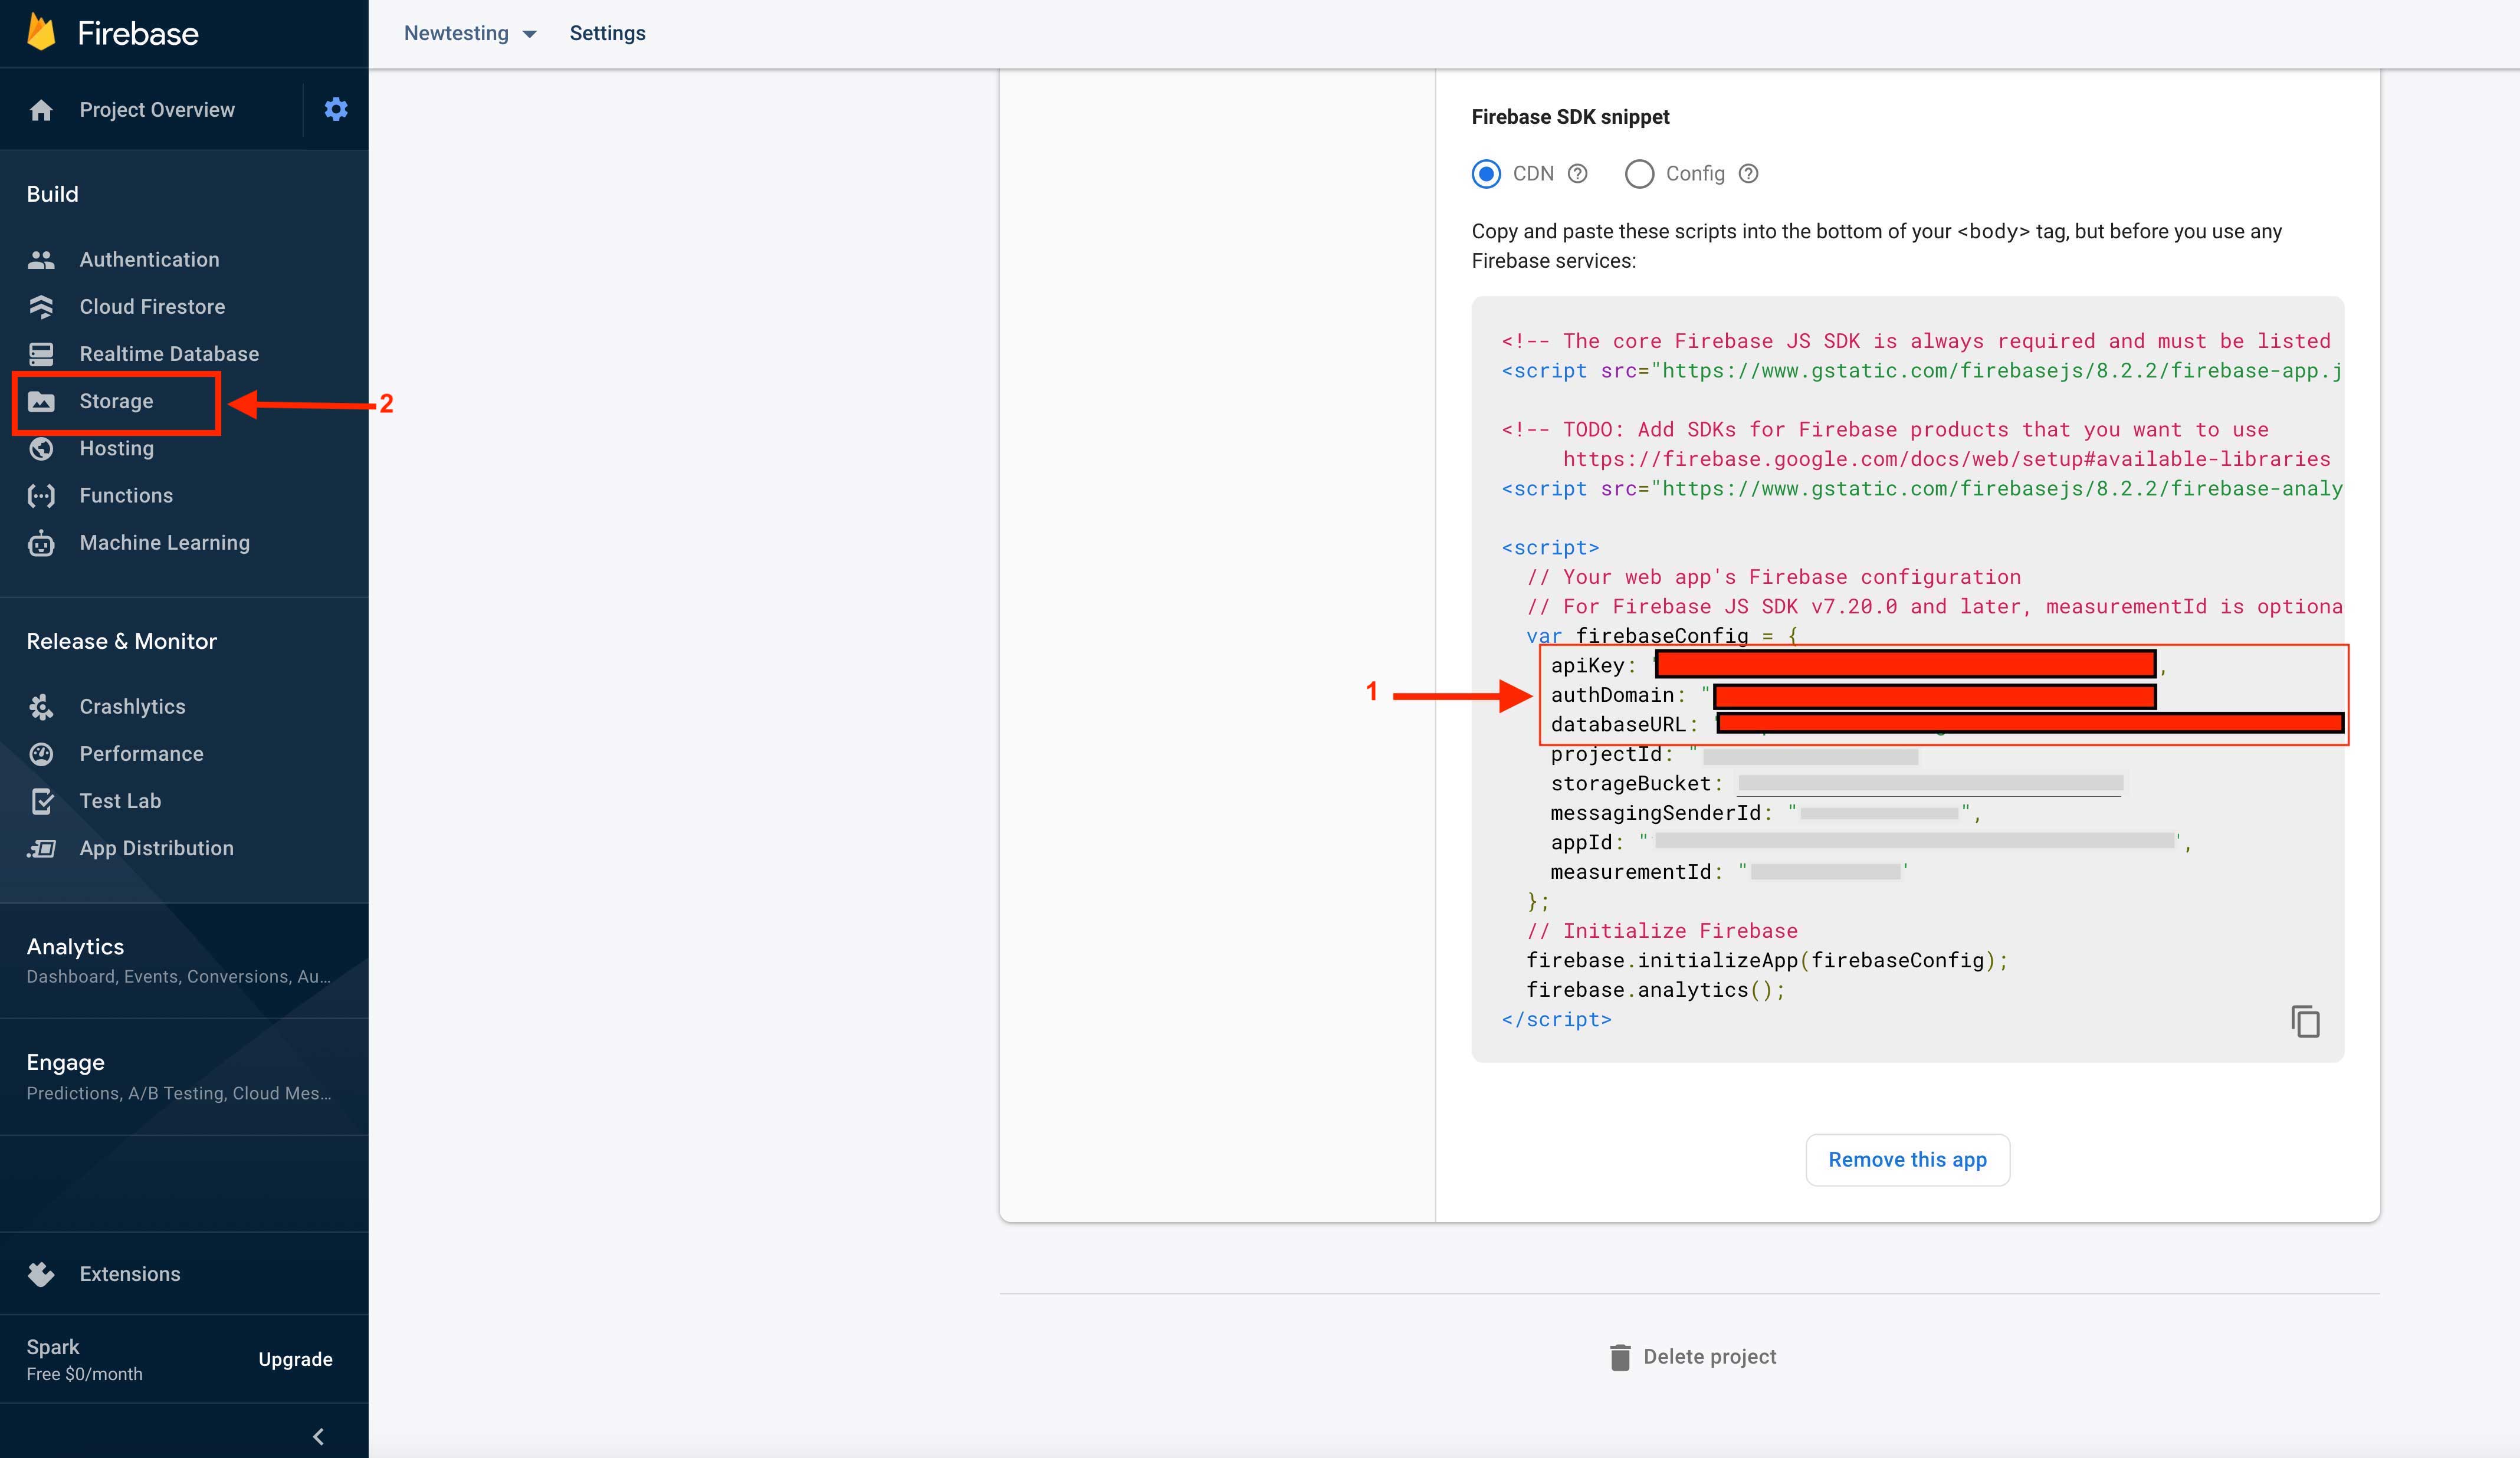
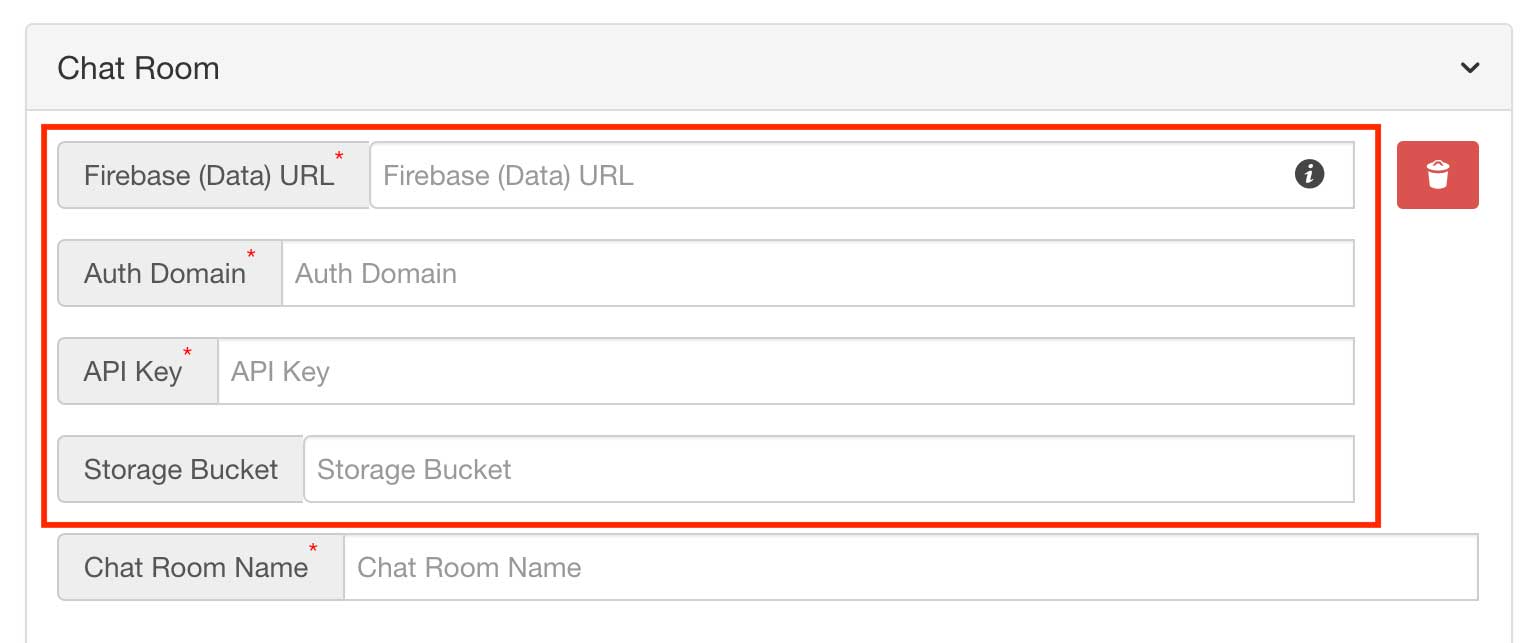
Step 35 : Here is your Storage Bucket URL. Exclude gs:// and copy the remaining part of the URL, and click on Rule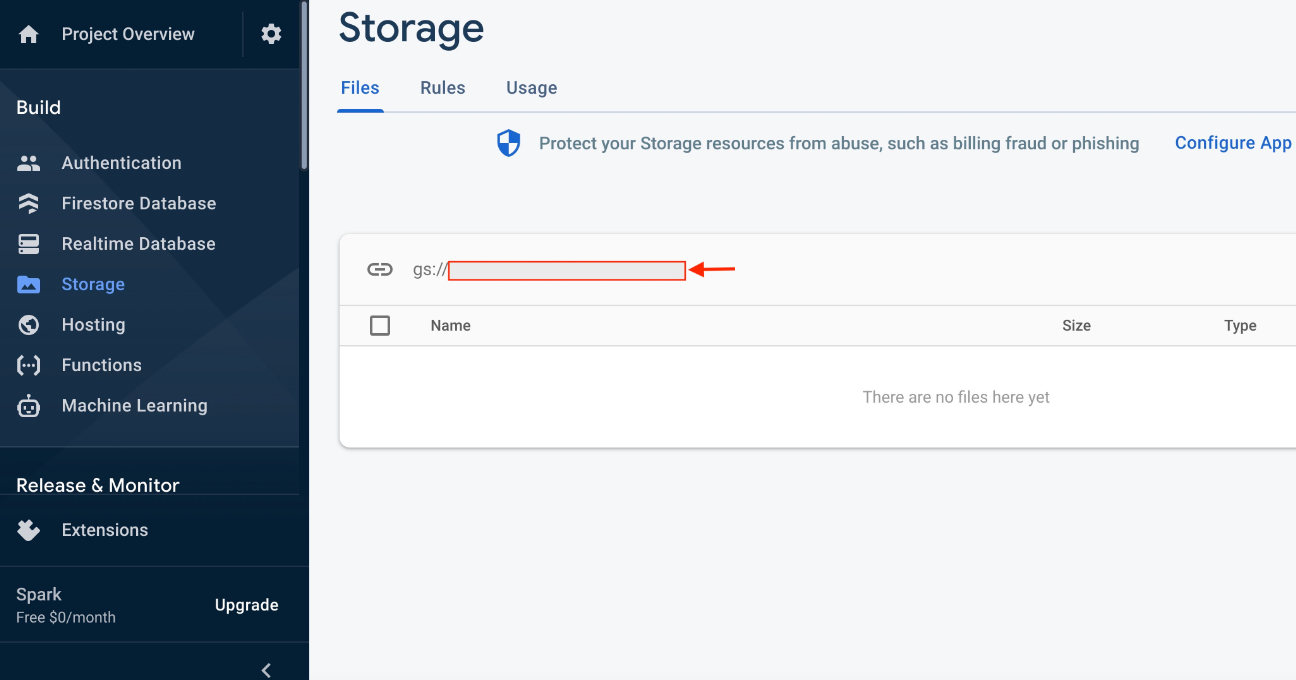
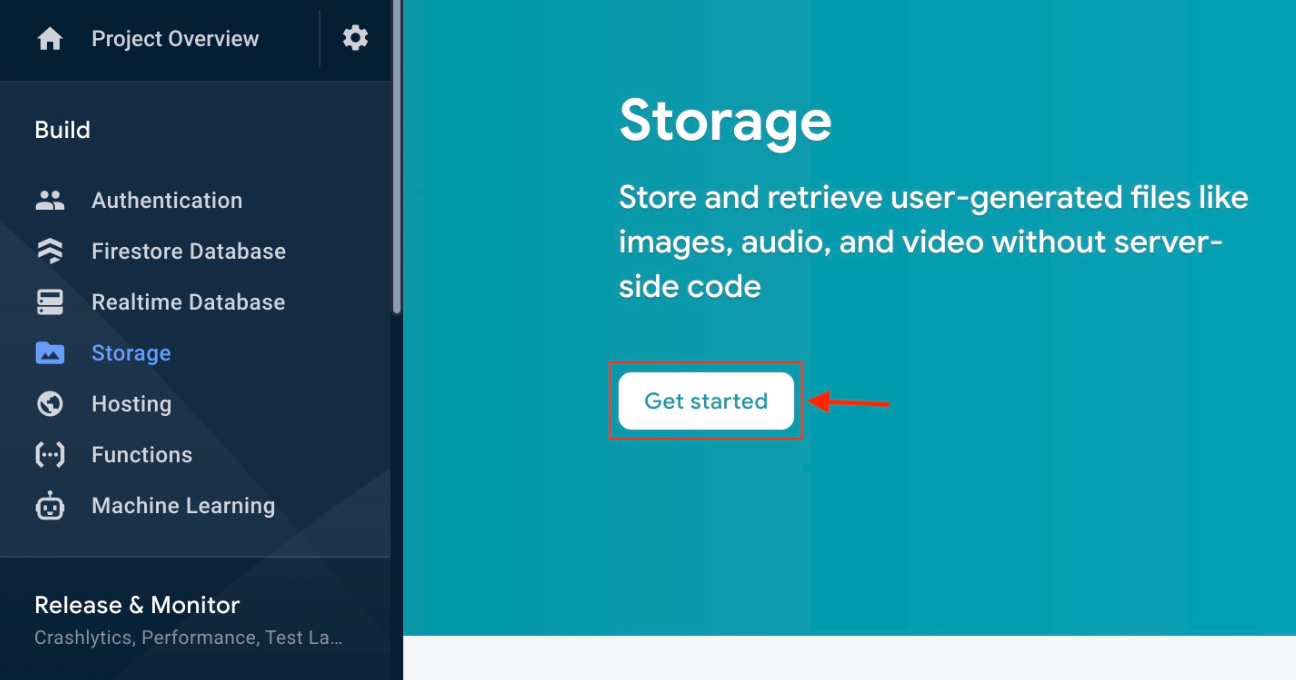
Step 36 : Delete the entire code 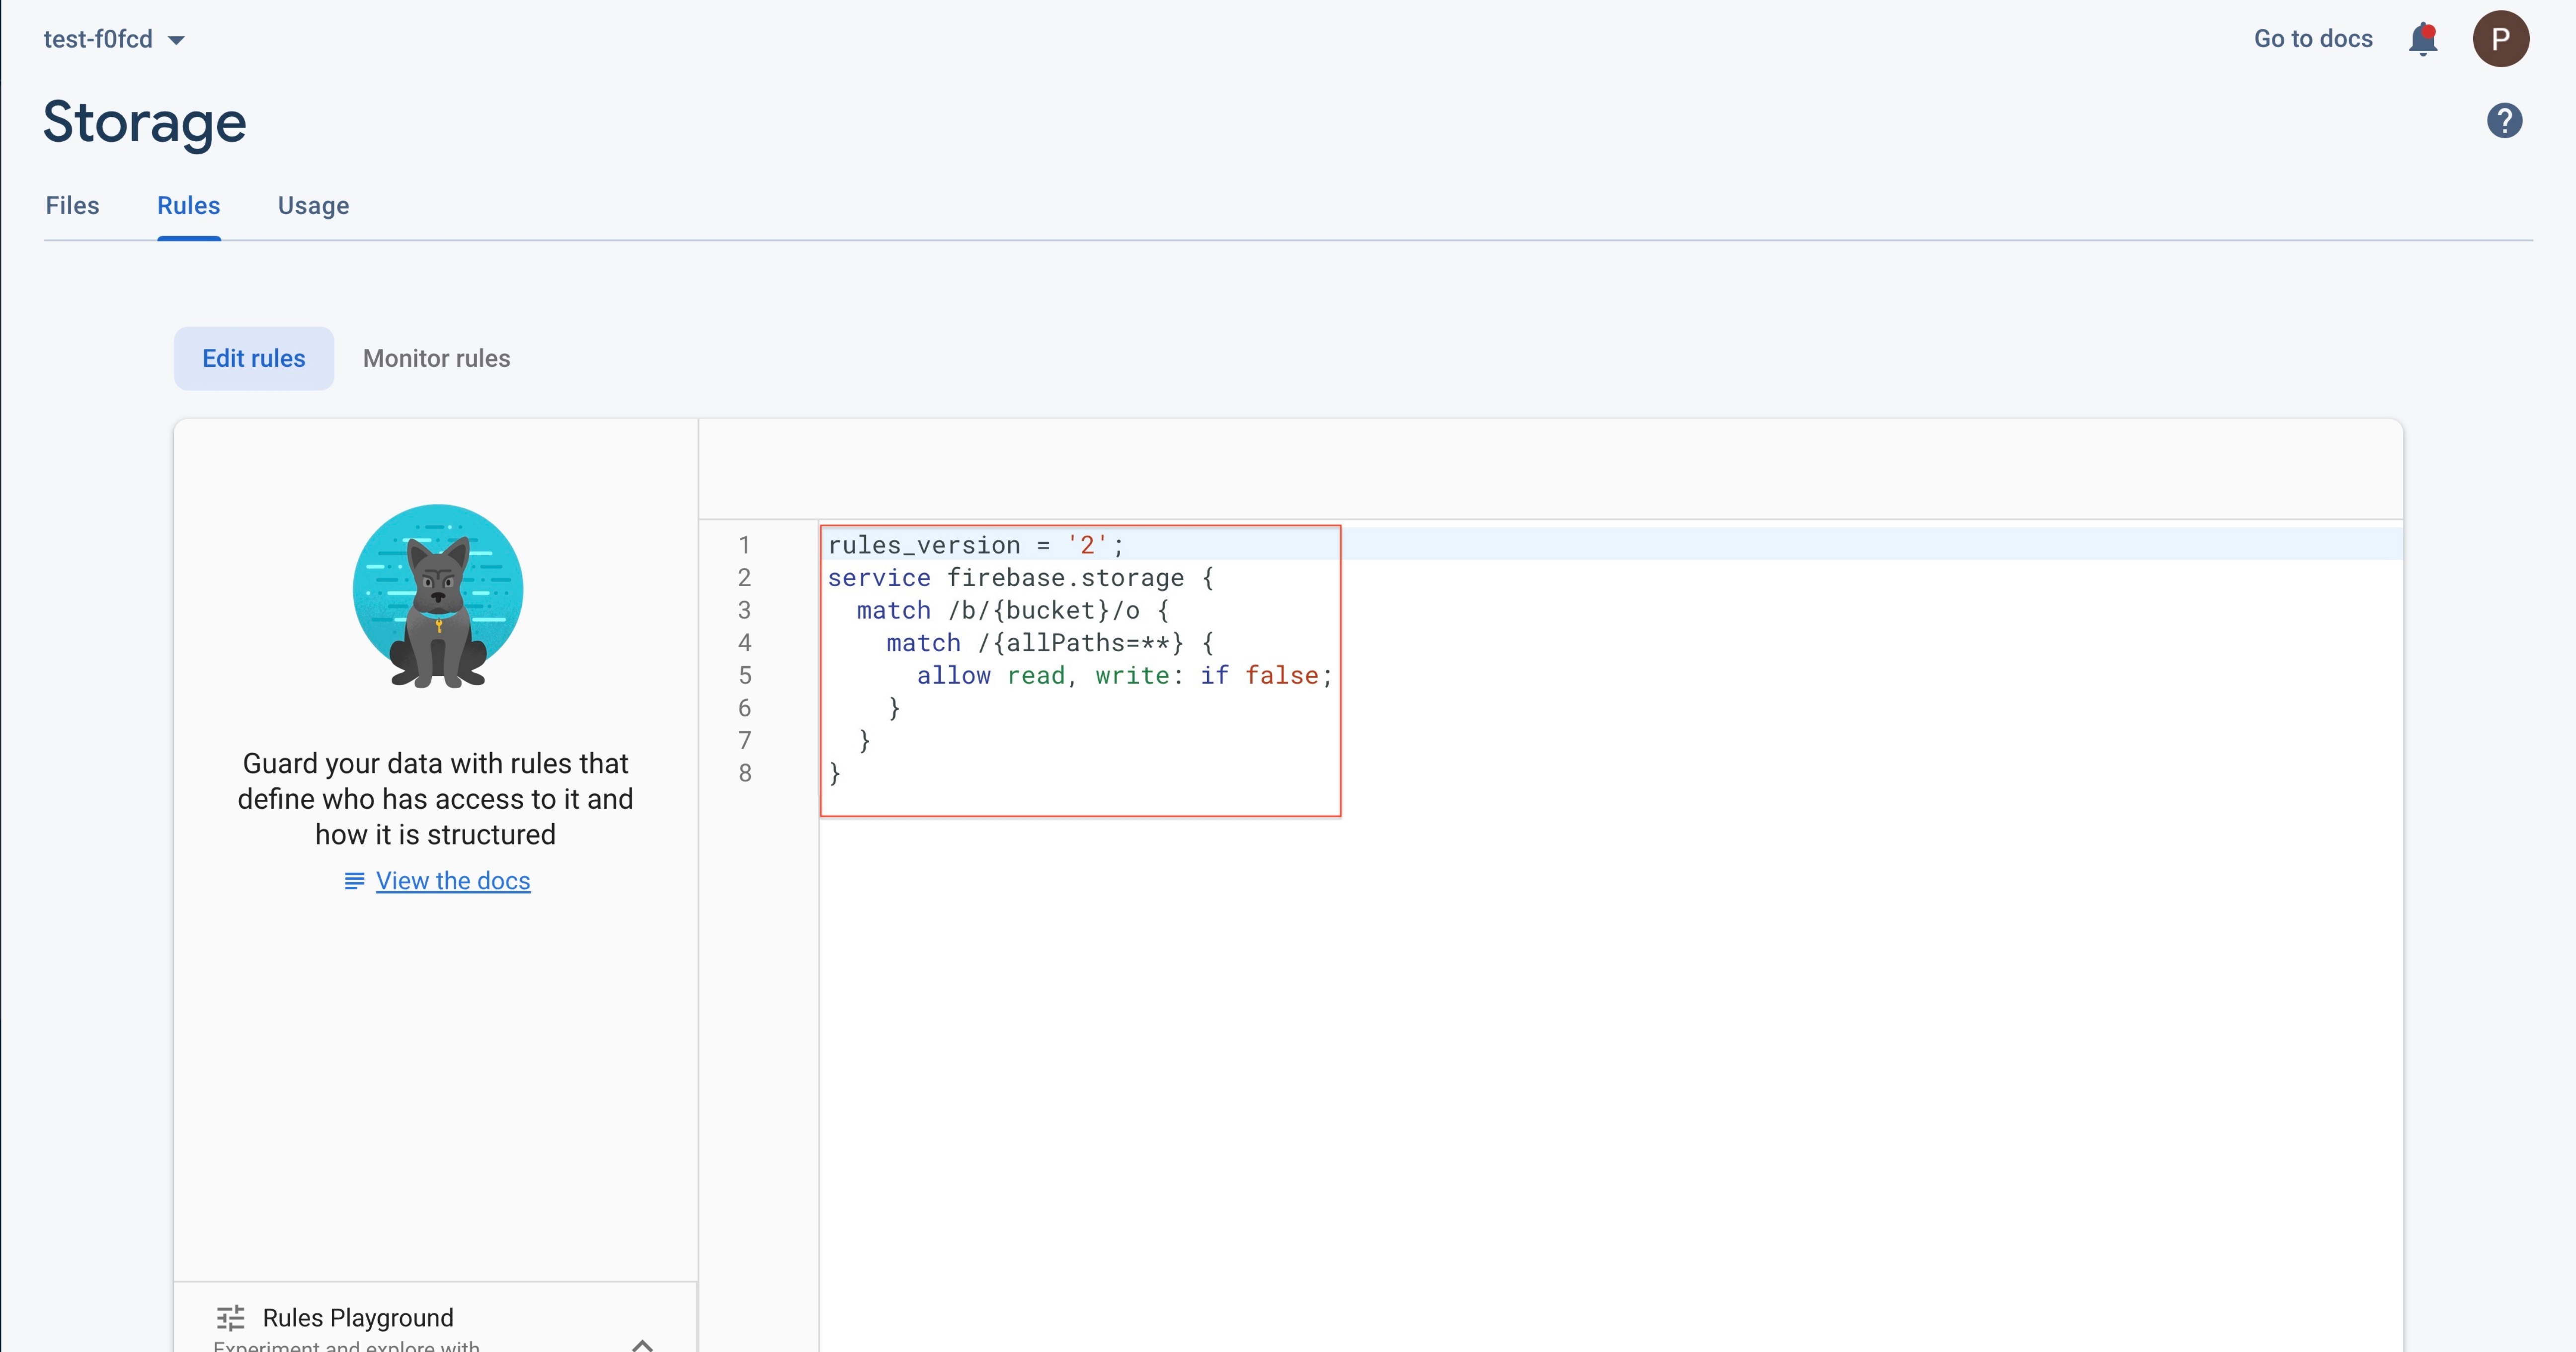
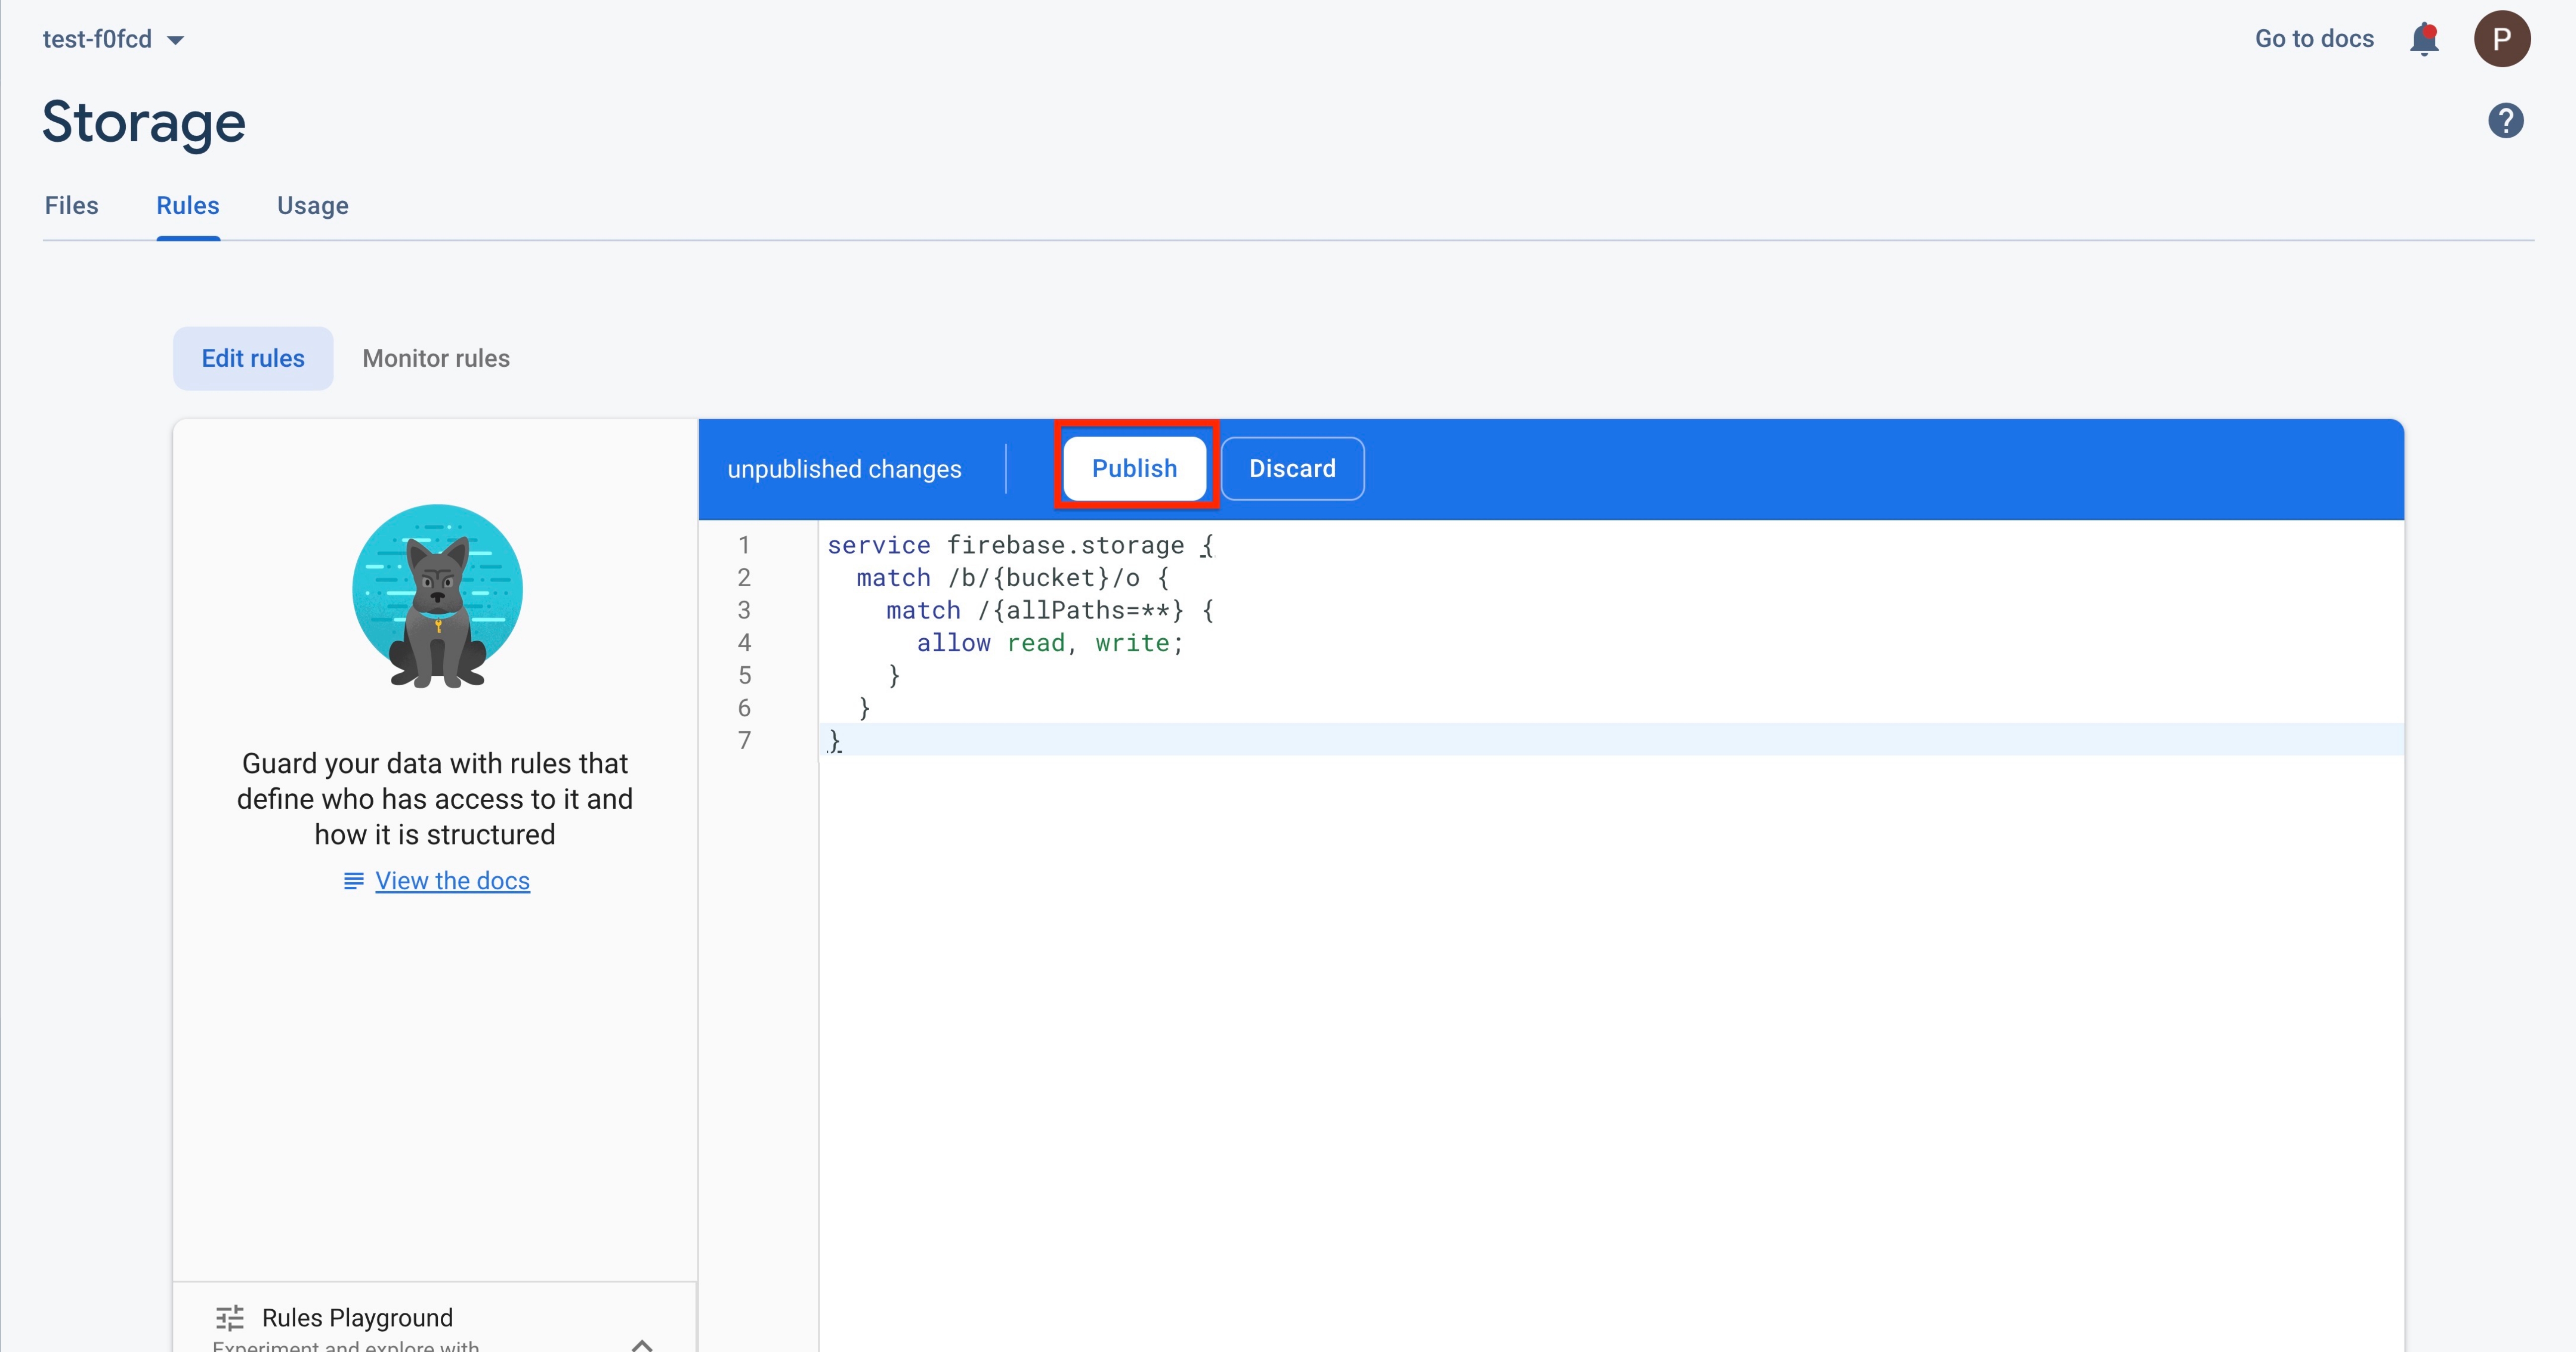
Step 37 : Now enter the following code, and click on Publish
service firebase.storage {
match /b/{bucket}/o {
match /{allPaths=**} {
allow read, write;
}
}
}